Category: Teardown
This category will hold teardown articles.
Voltlog #81 – Qualcomm QuickCharge USB Charger Teardown
This USB charger is sold very cheap on GearBest.com and a viewer suggested I should get one and do a teardown to check the safety aspects. So I got one, and it looks decent inside, however clearly built down to a cost.
Voltlog #70 – Dual USB Power Socket Teardown
Got this cheap power socket with usb charging ports from ebay. I don’t plan to use it, I was only curious about the quality of the power supply inside.
Voltlog #56 – Broadlink RM Mini 3 Black Bean Teardown
I haven’t done any teardown for a while so today we’re going to take a look inside the Broadlink BlackBean, model RM Mini 3.
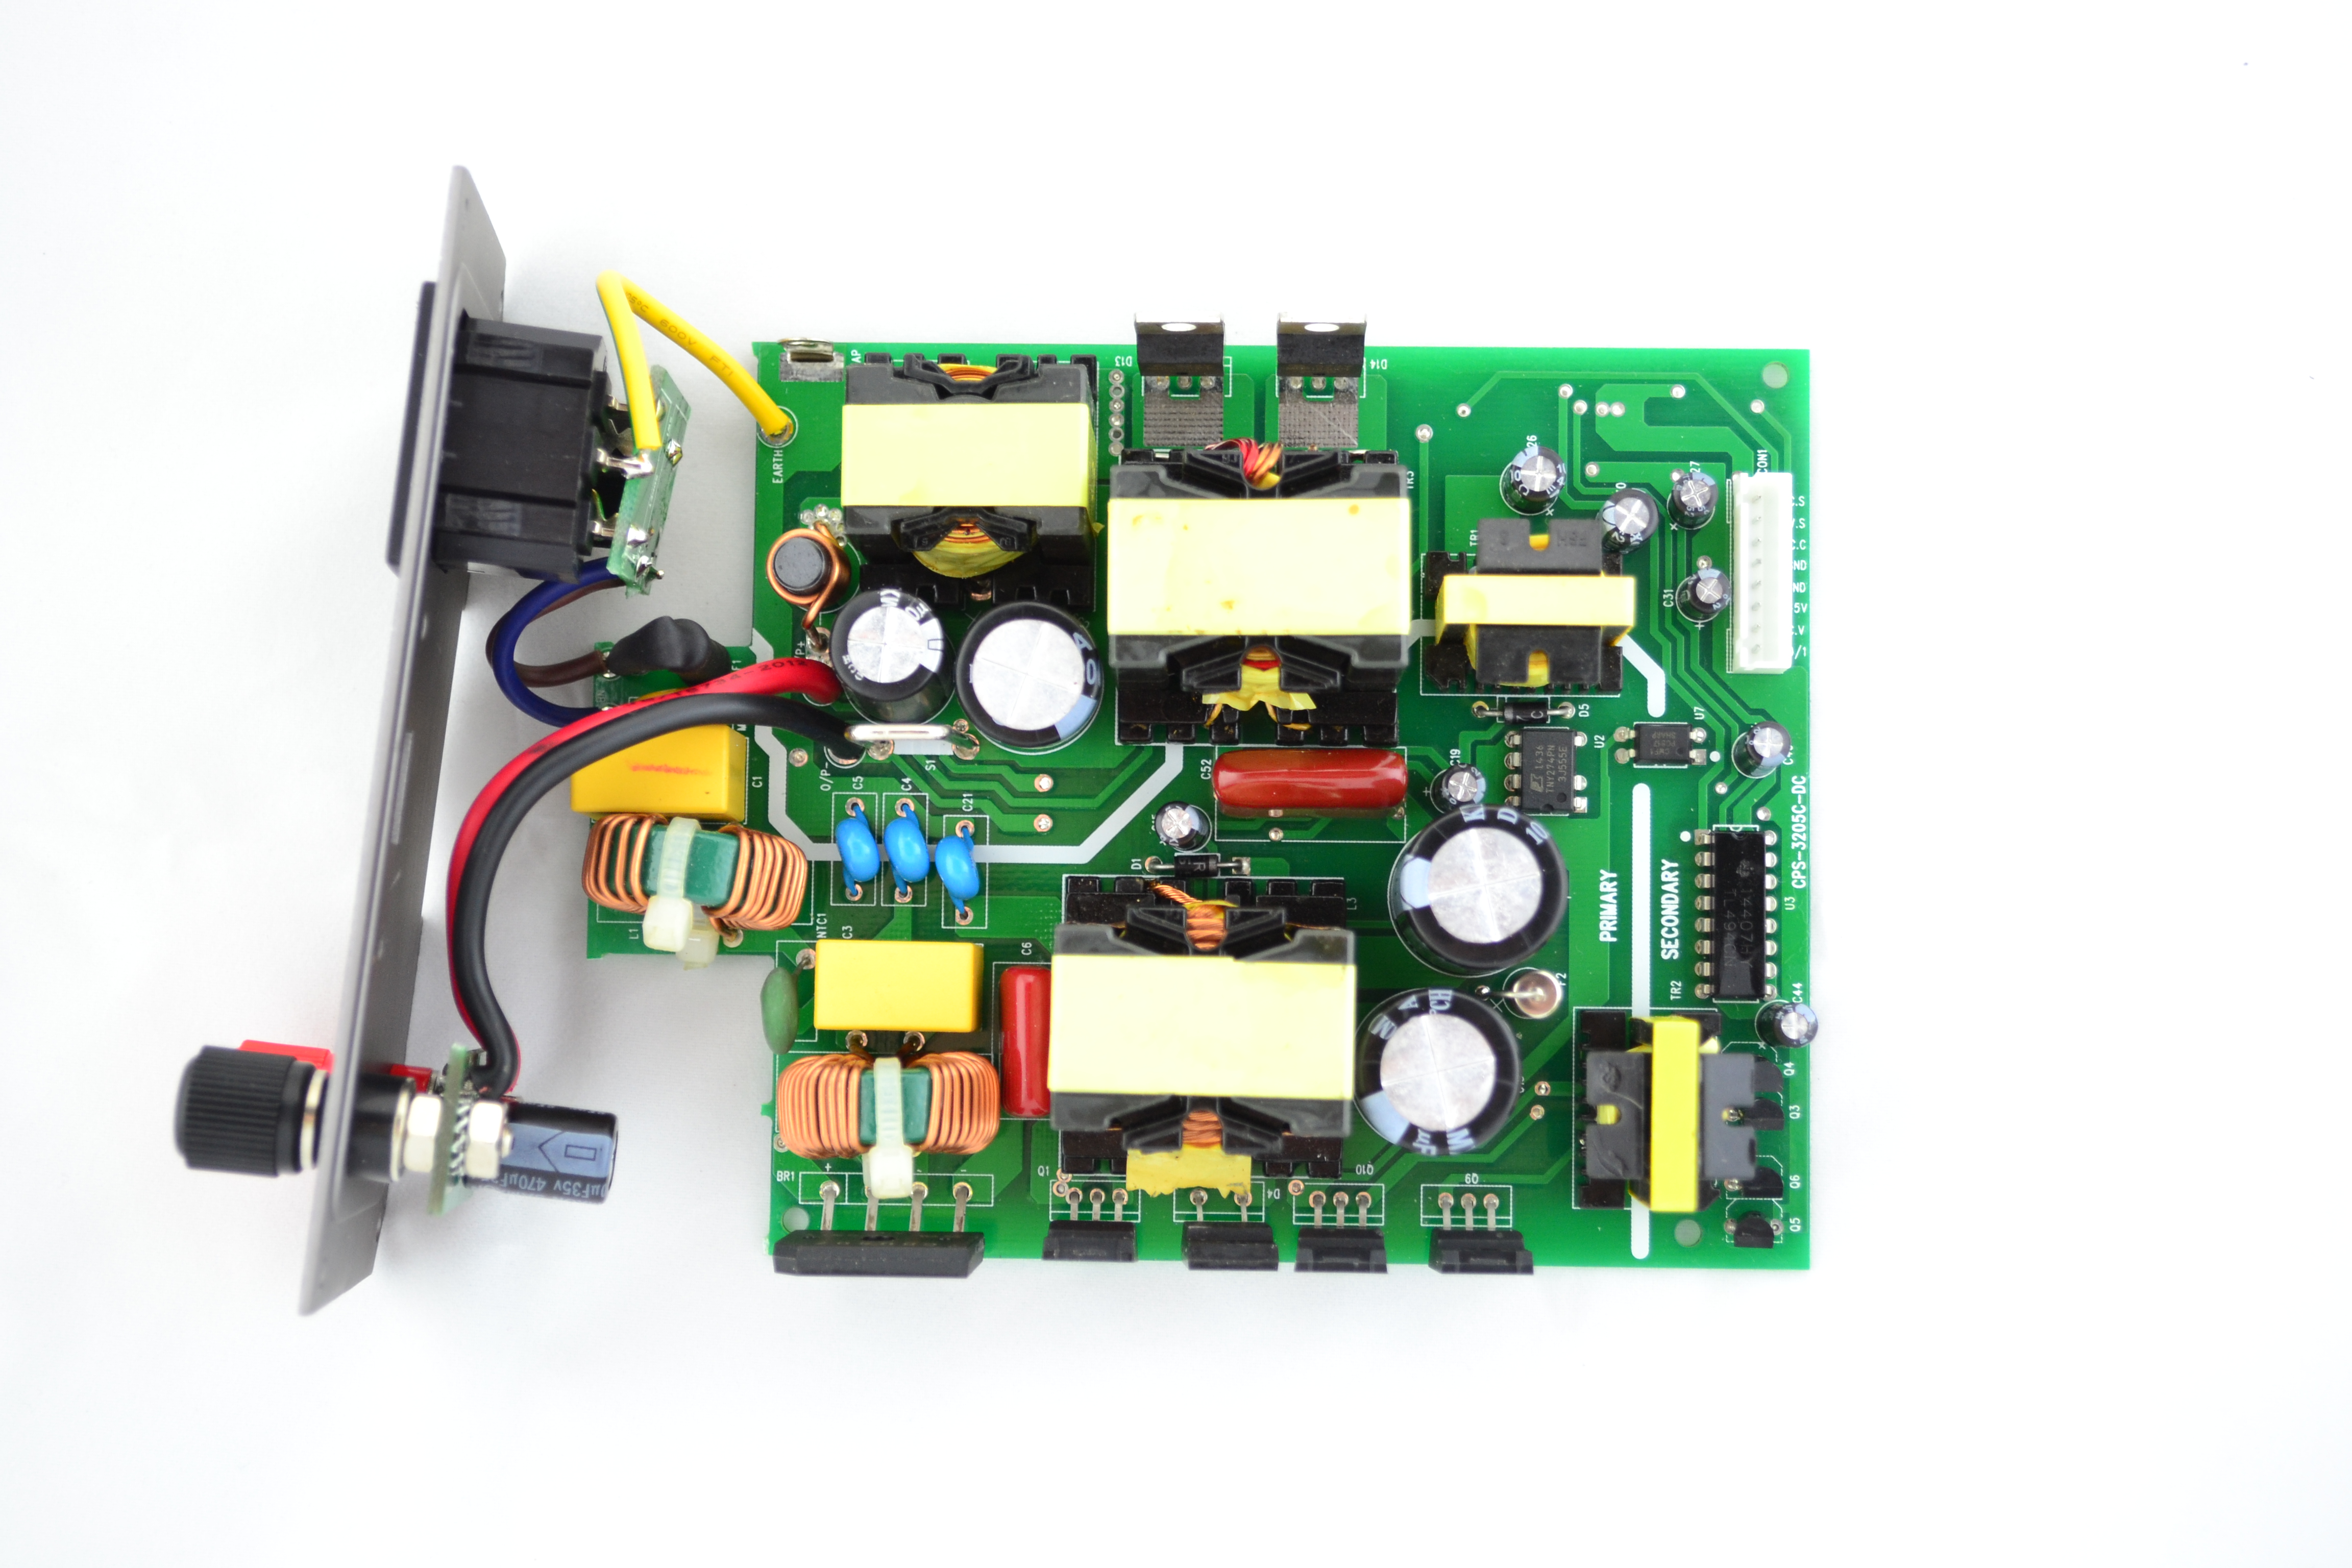
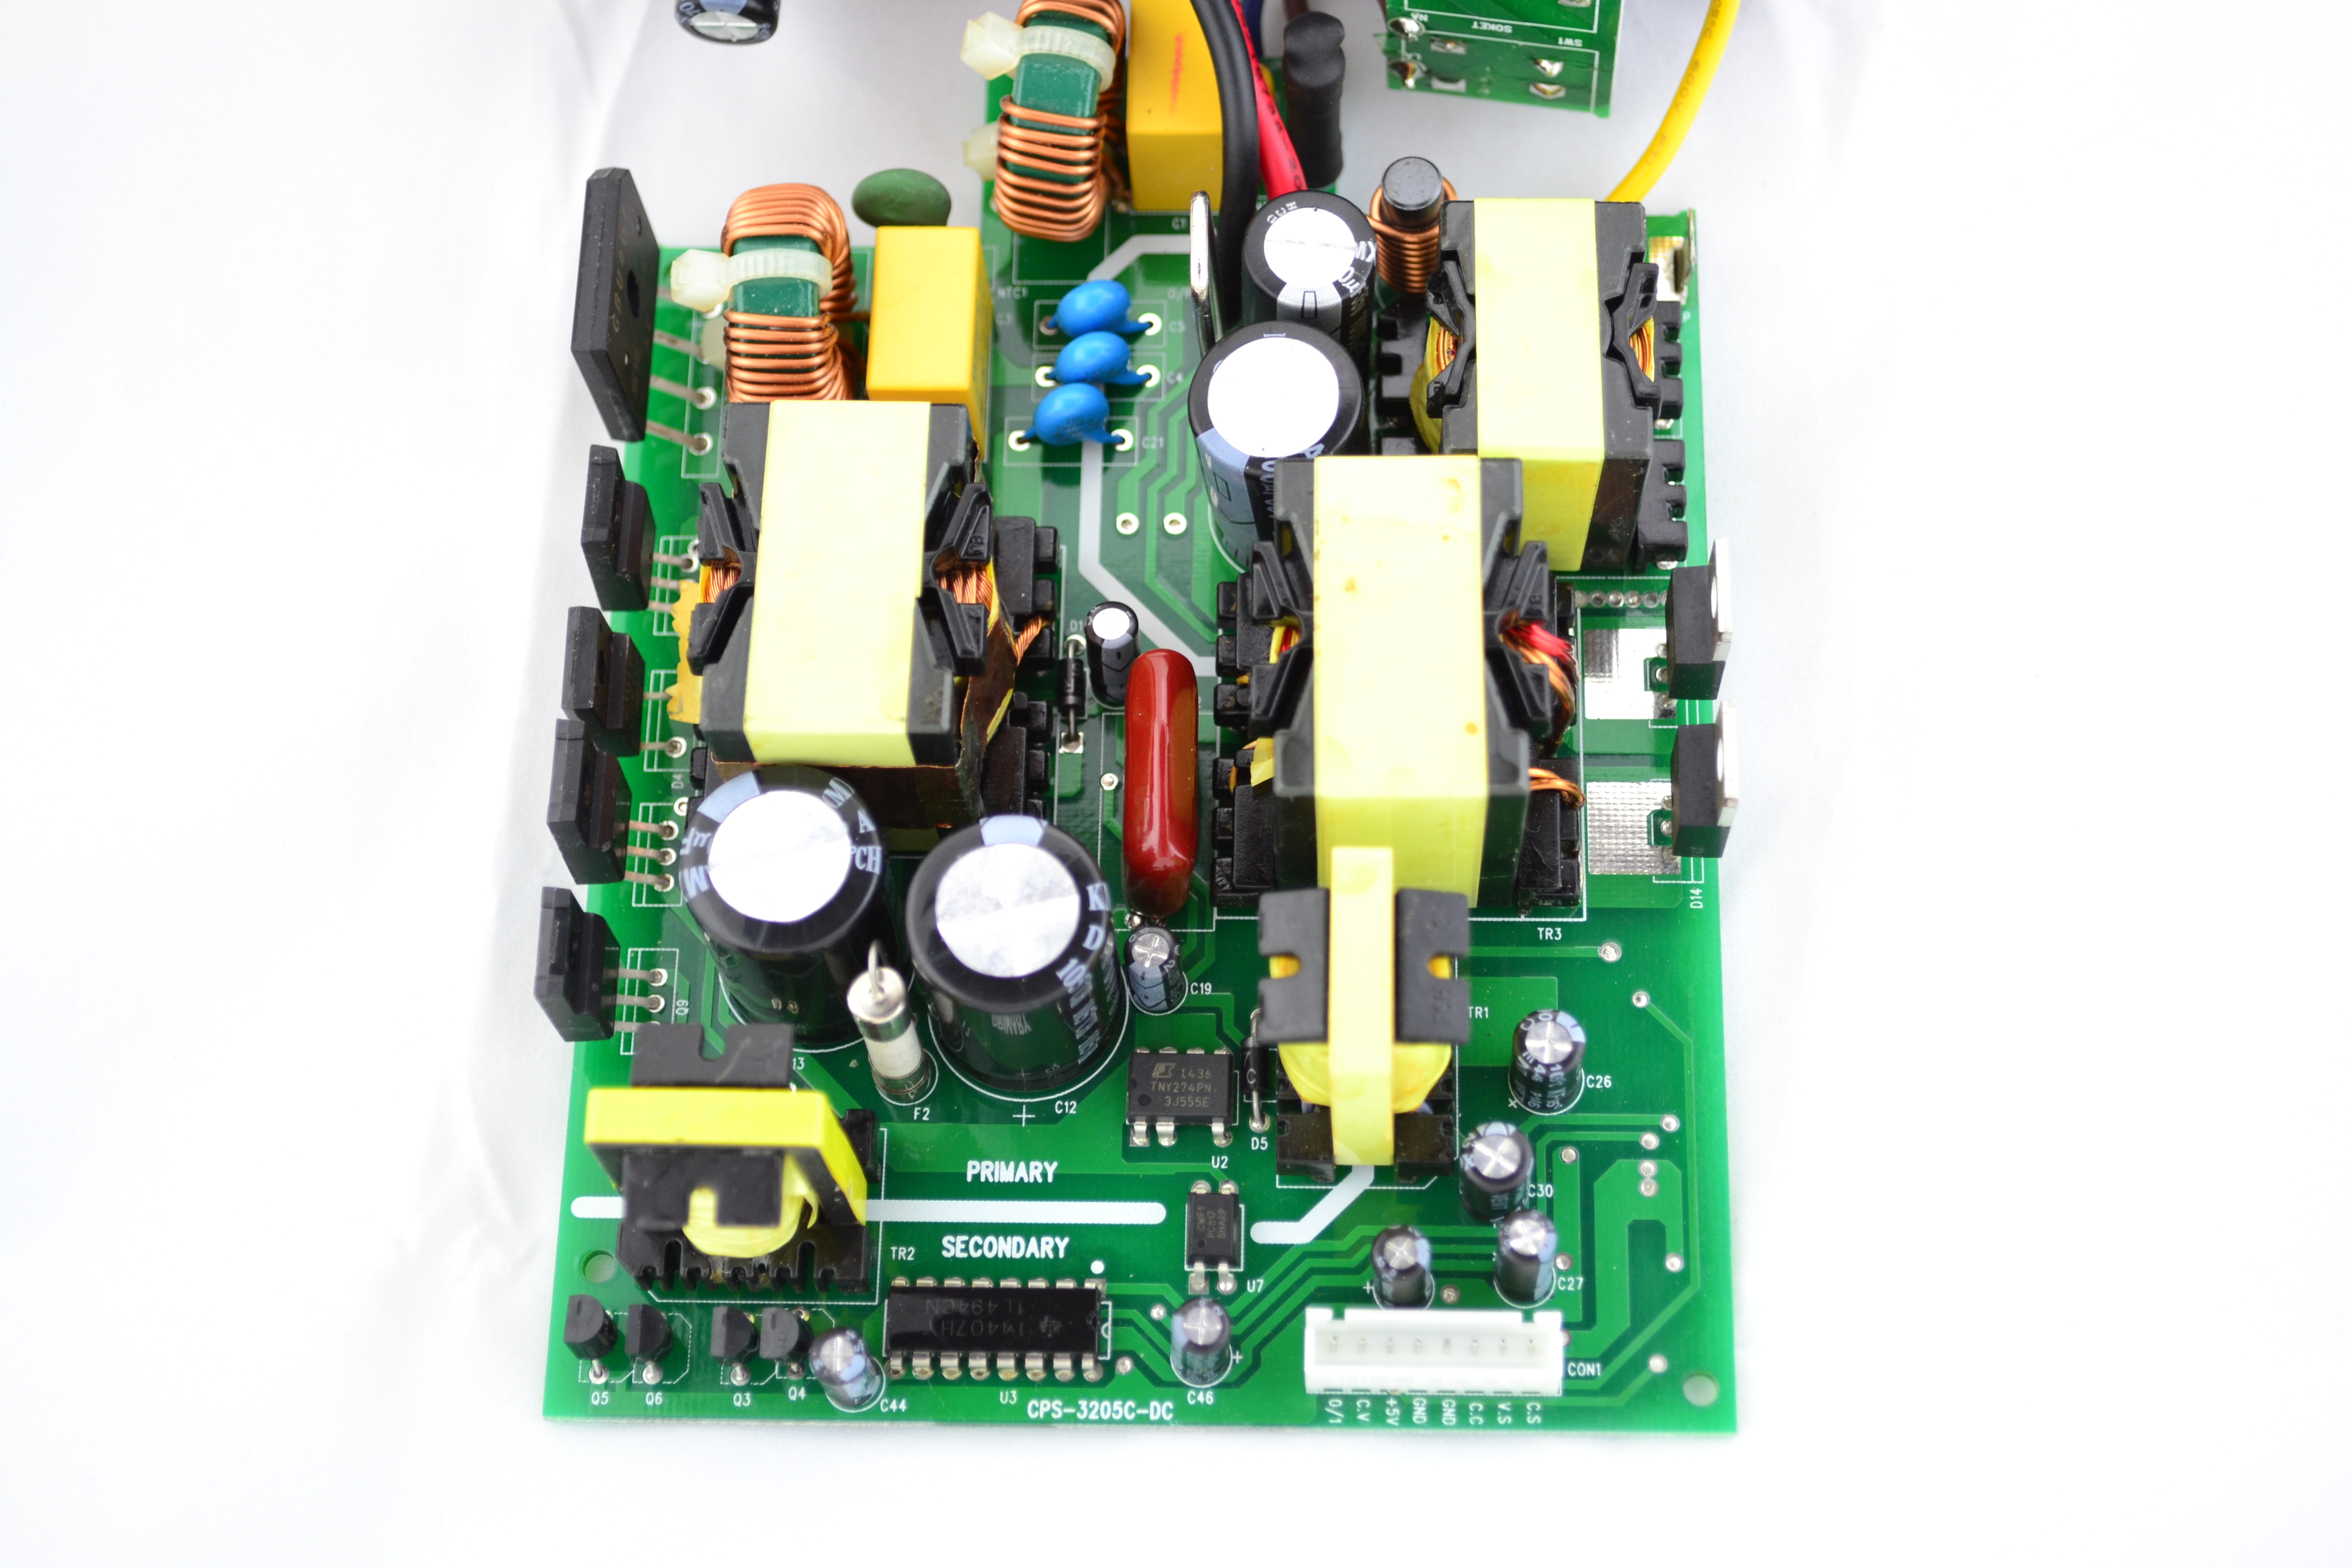
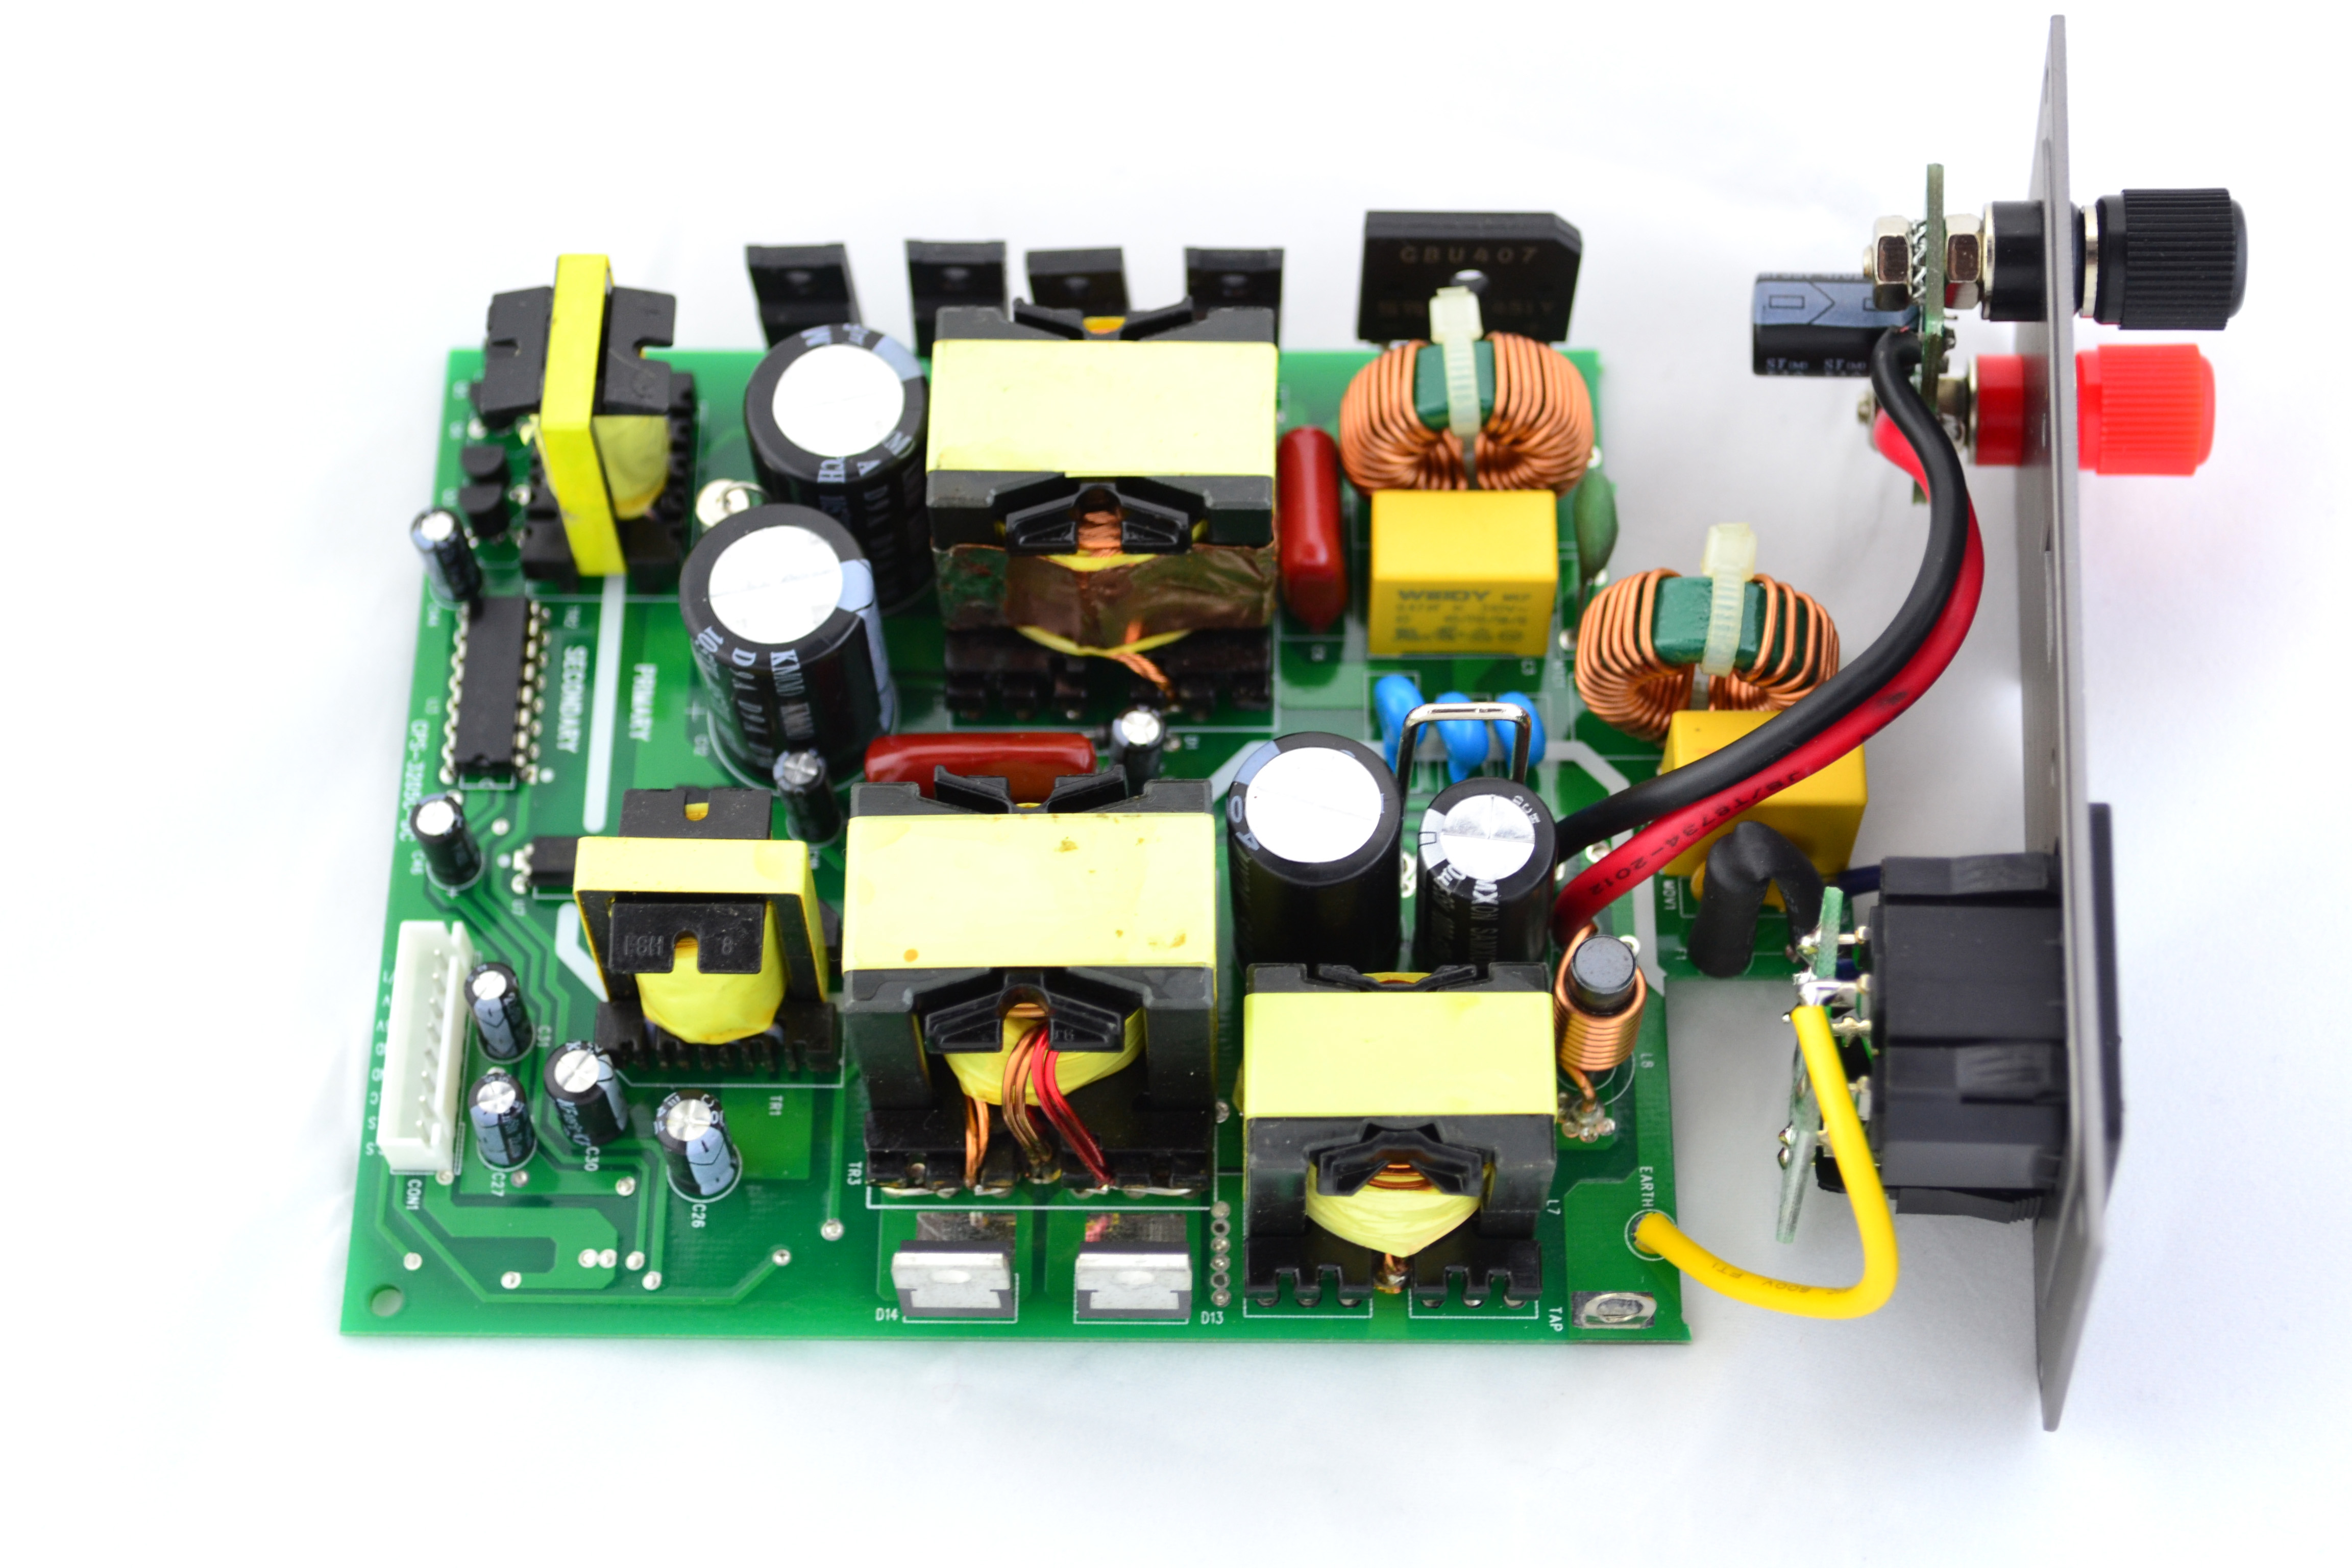
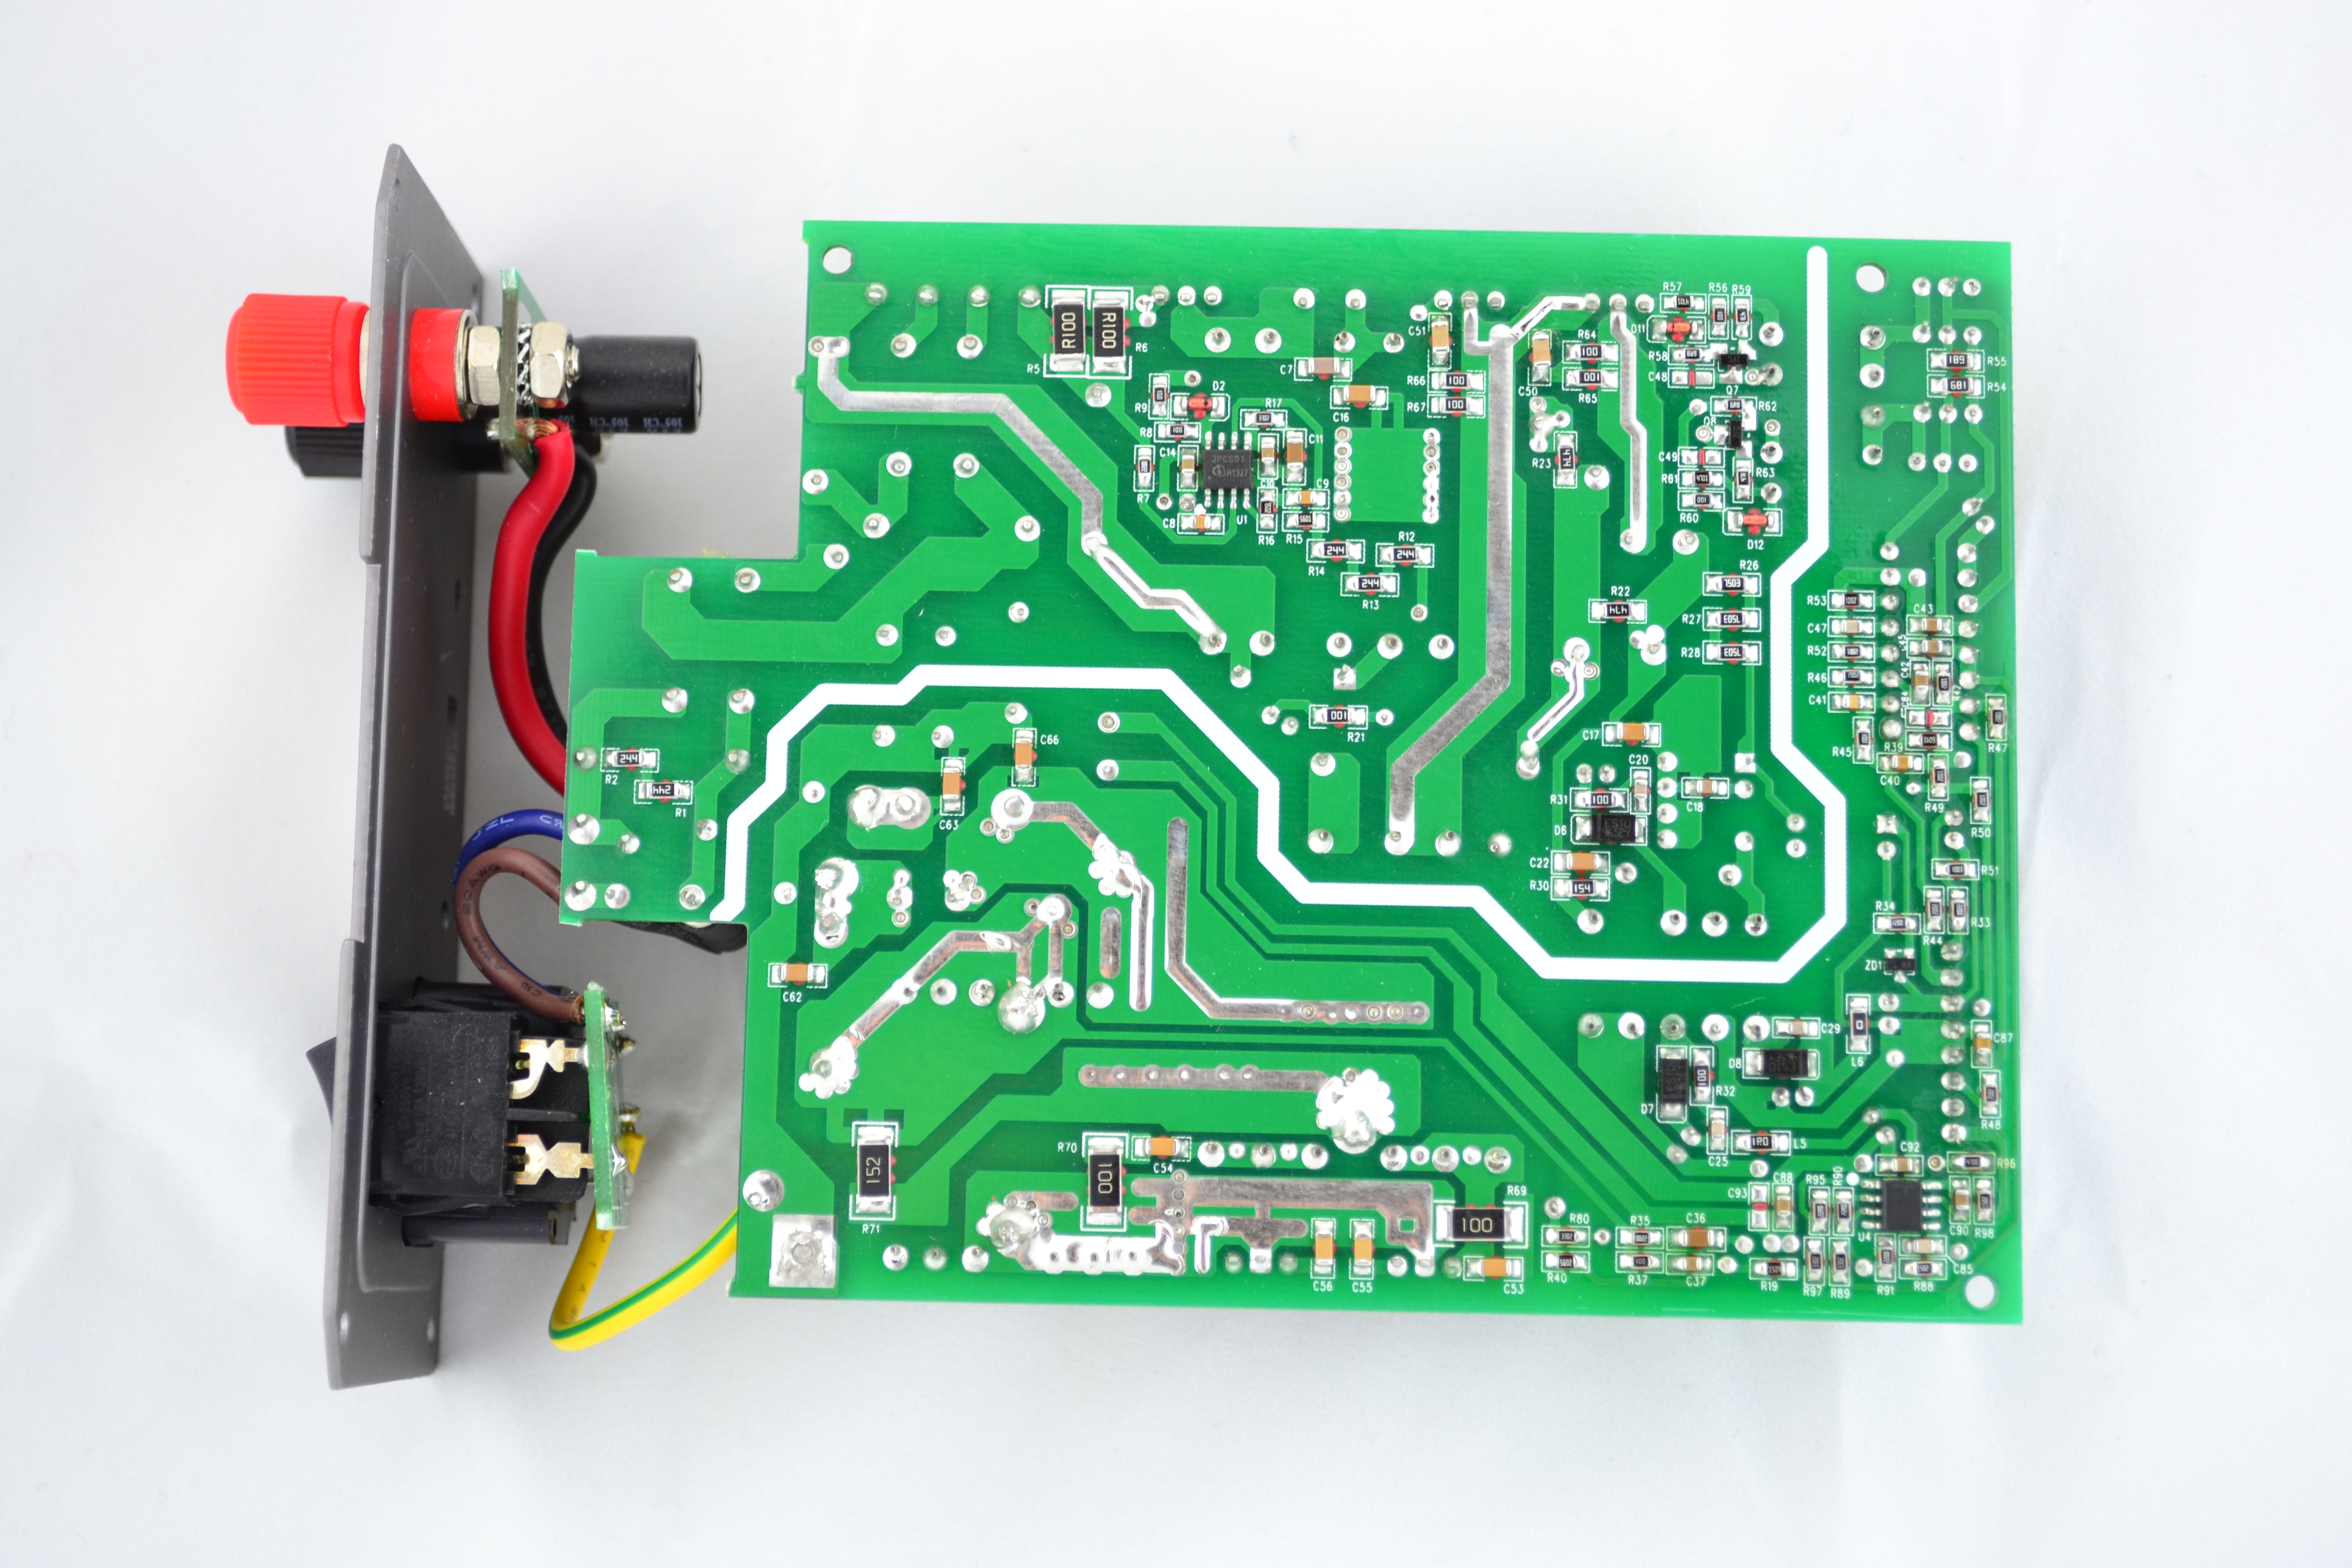
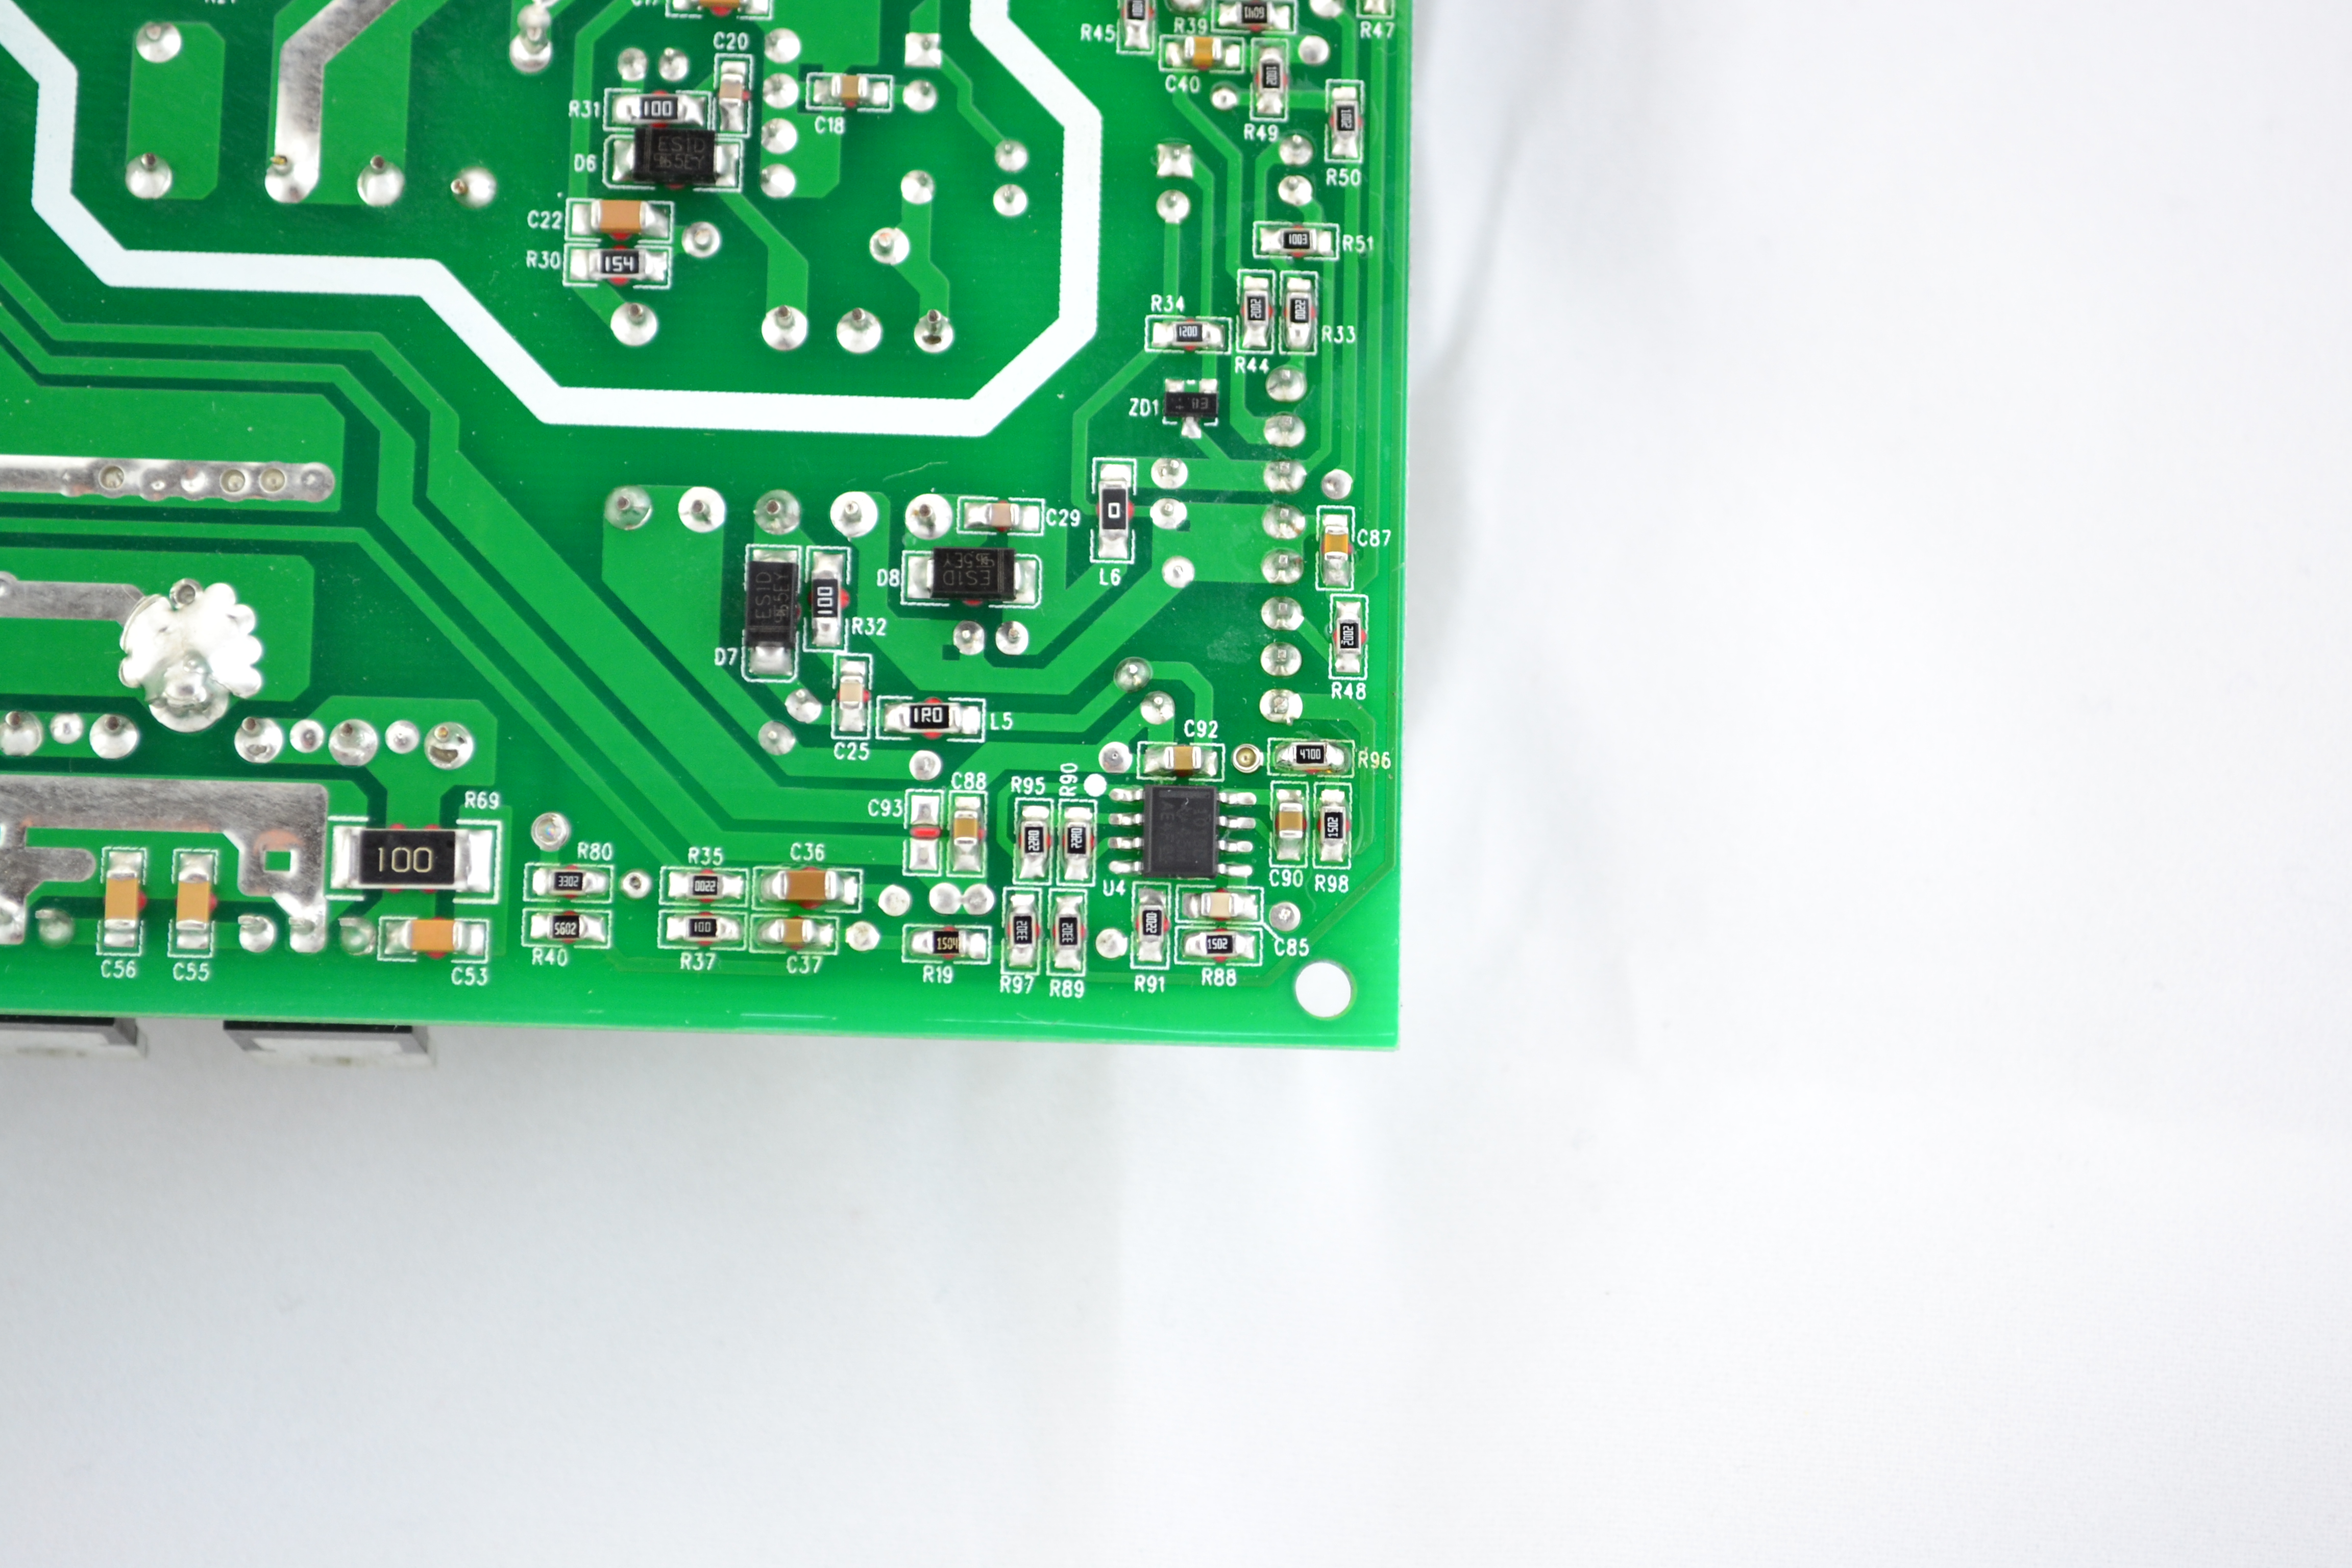
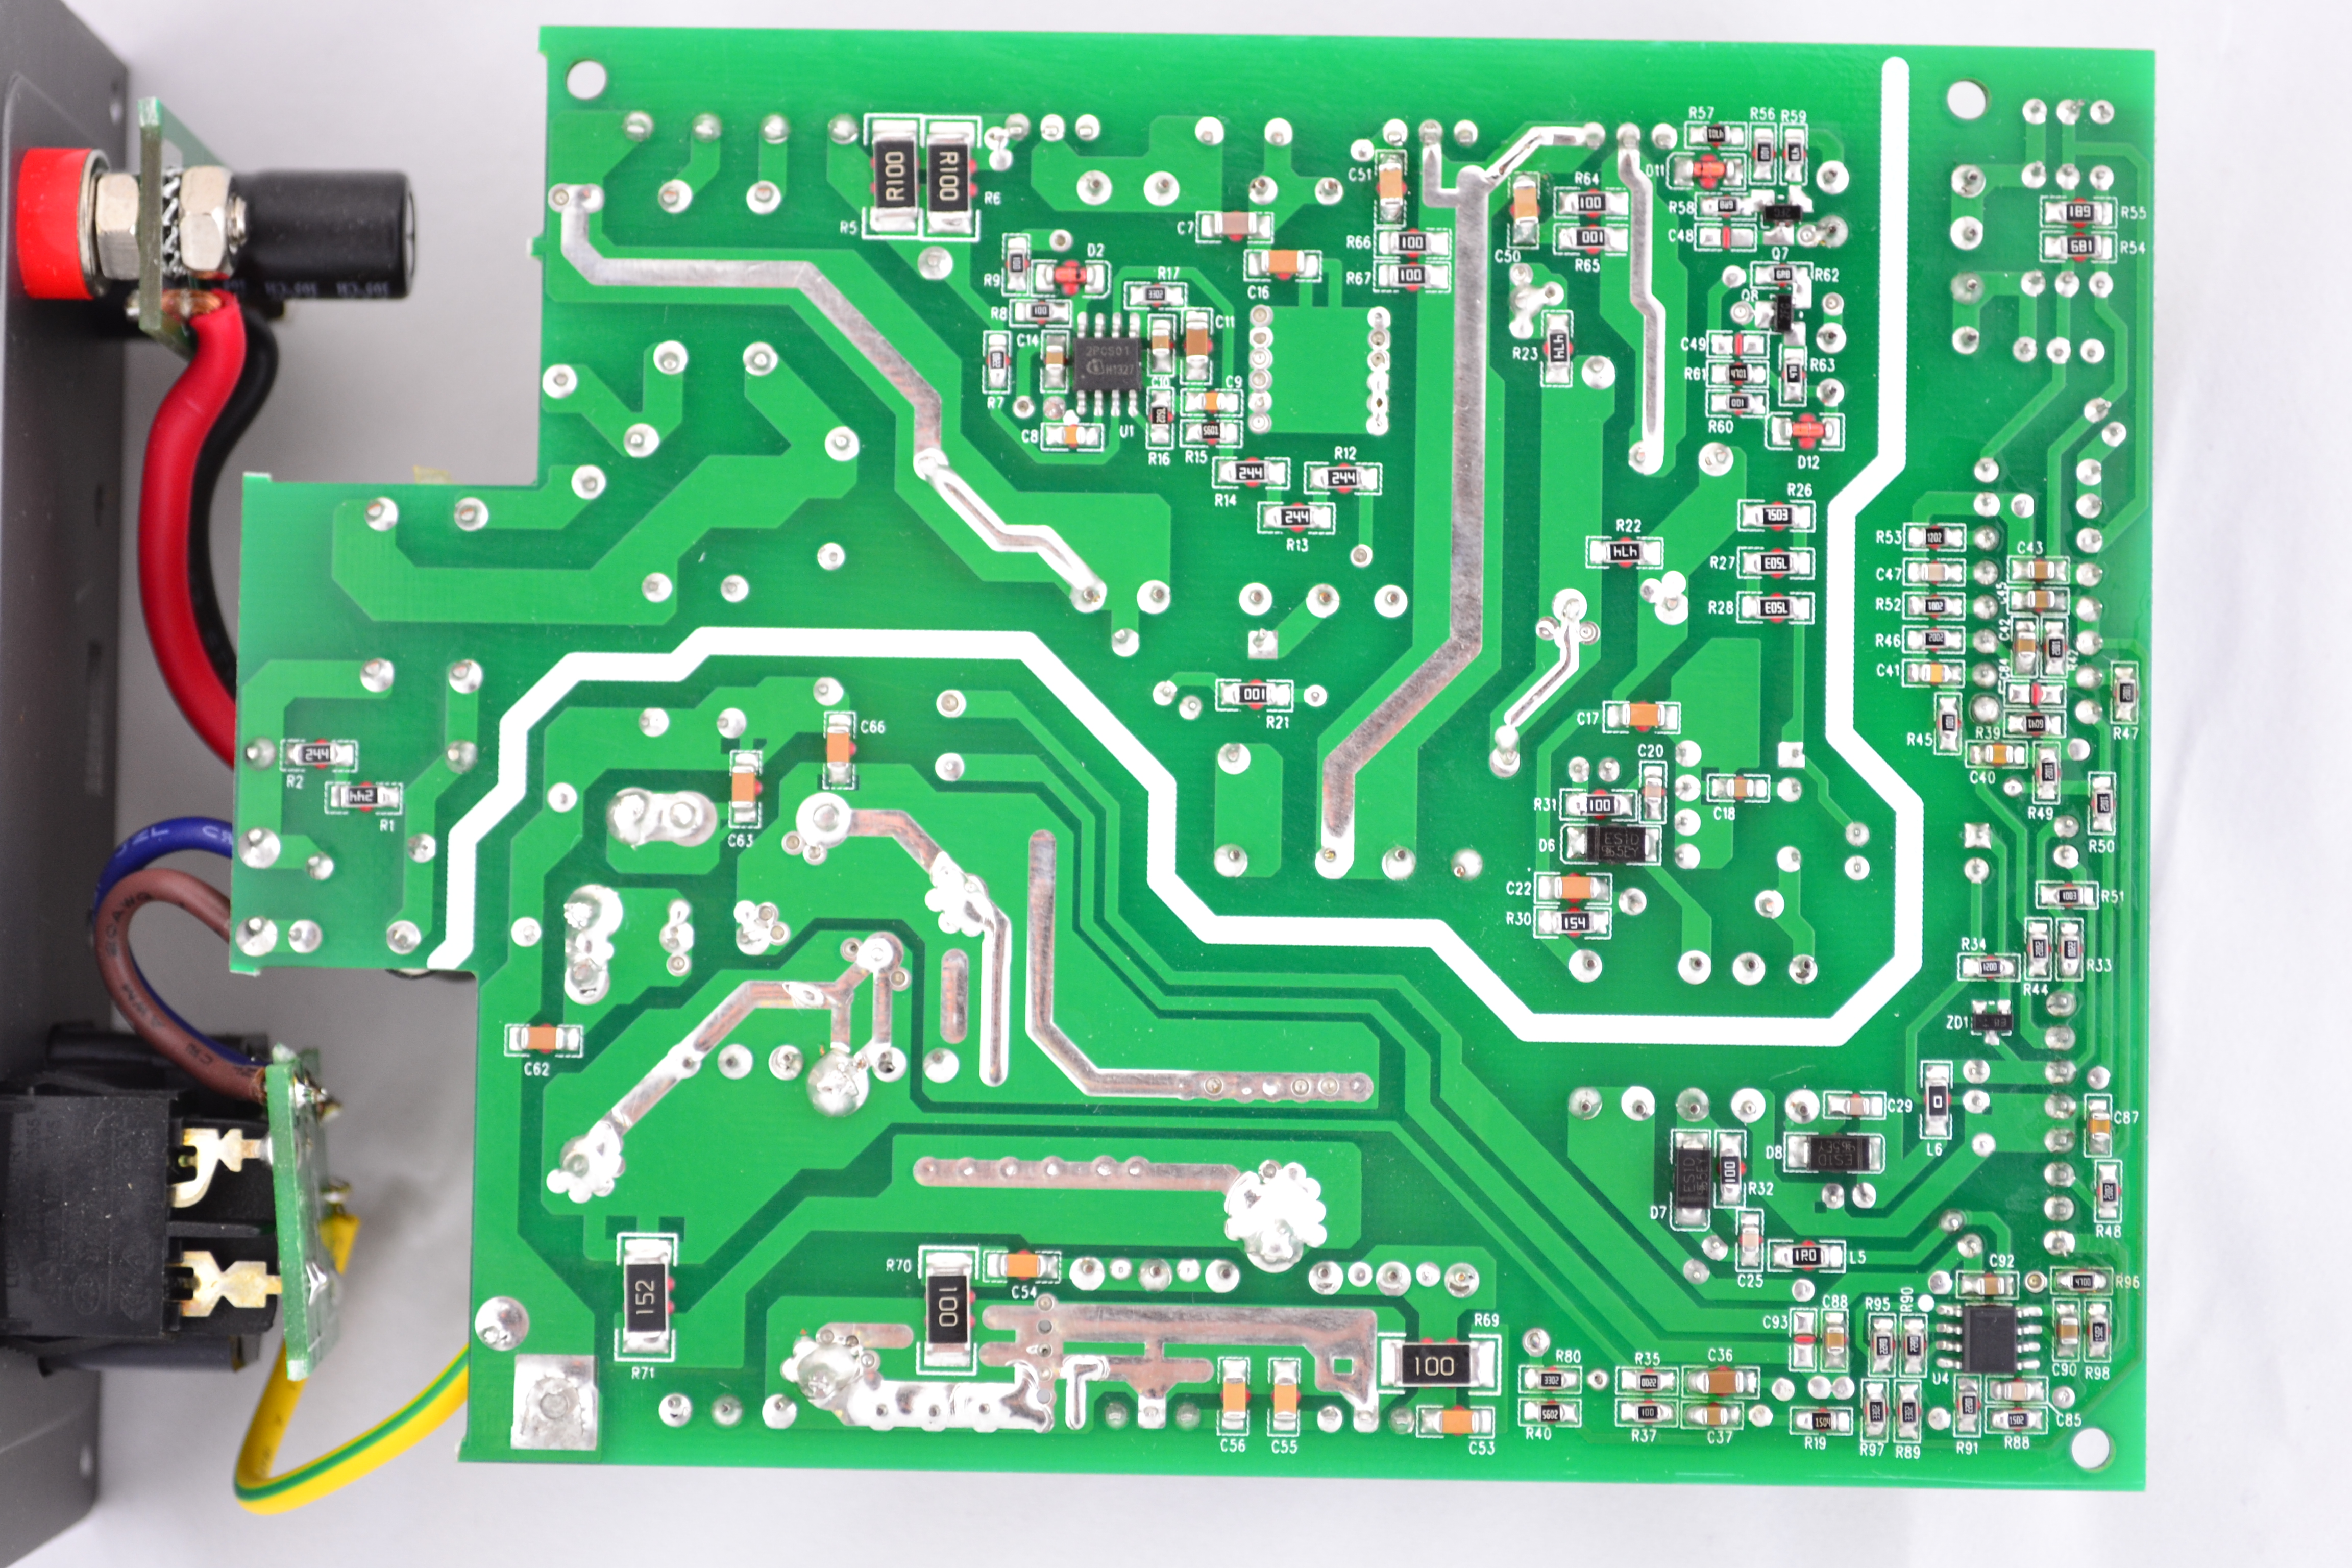
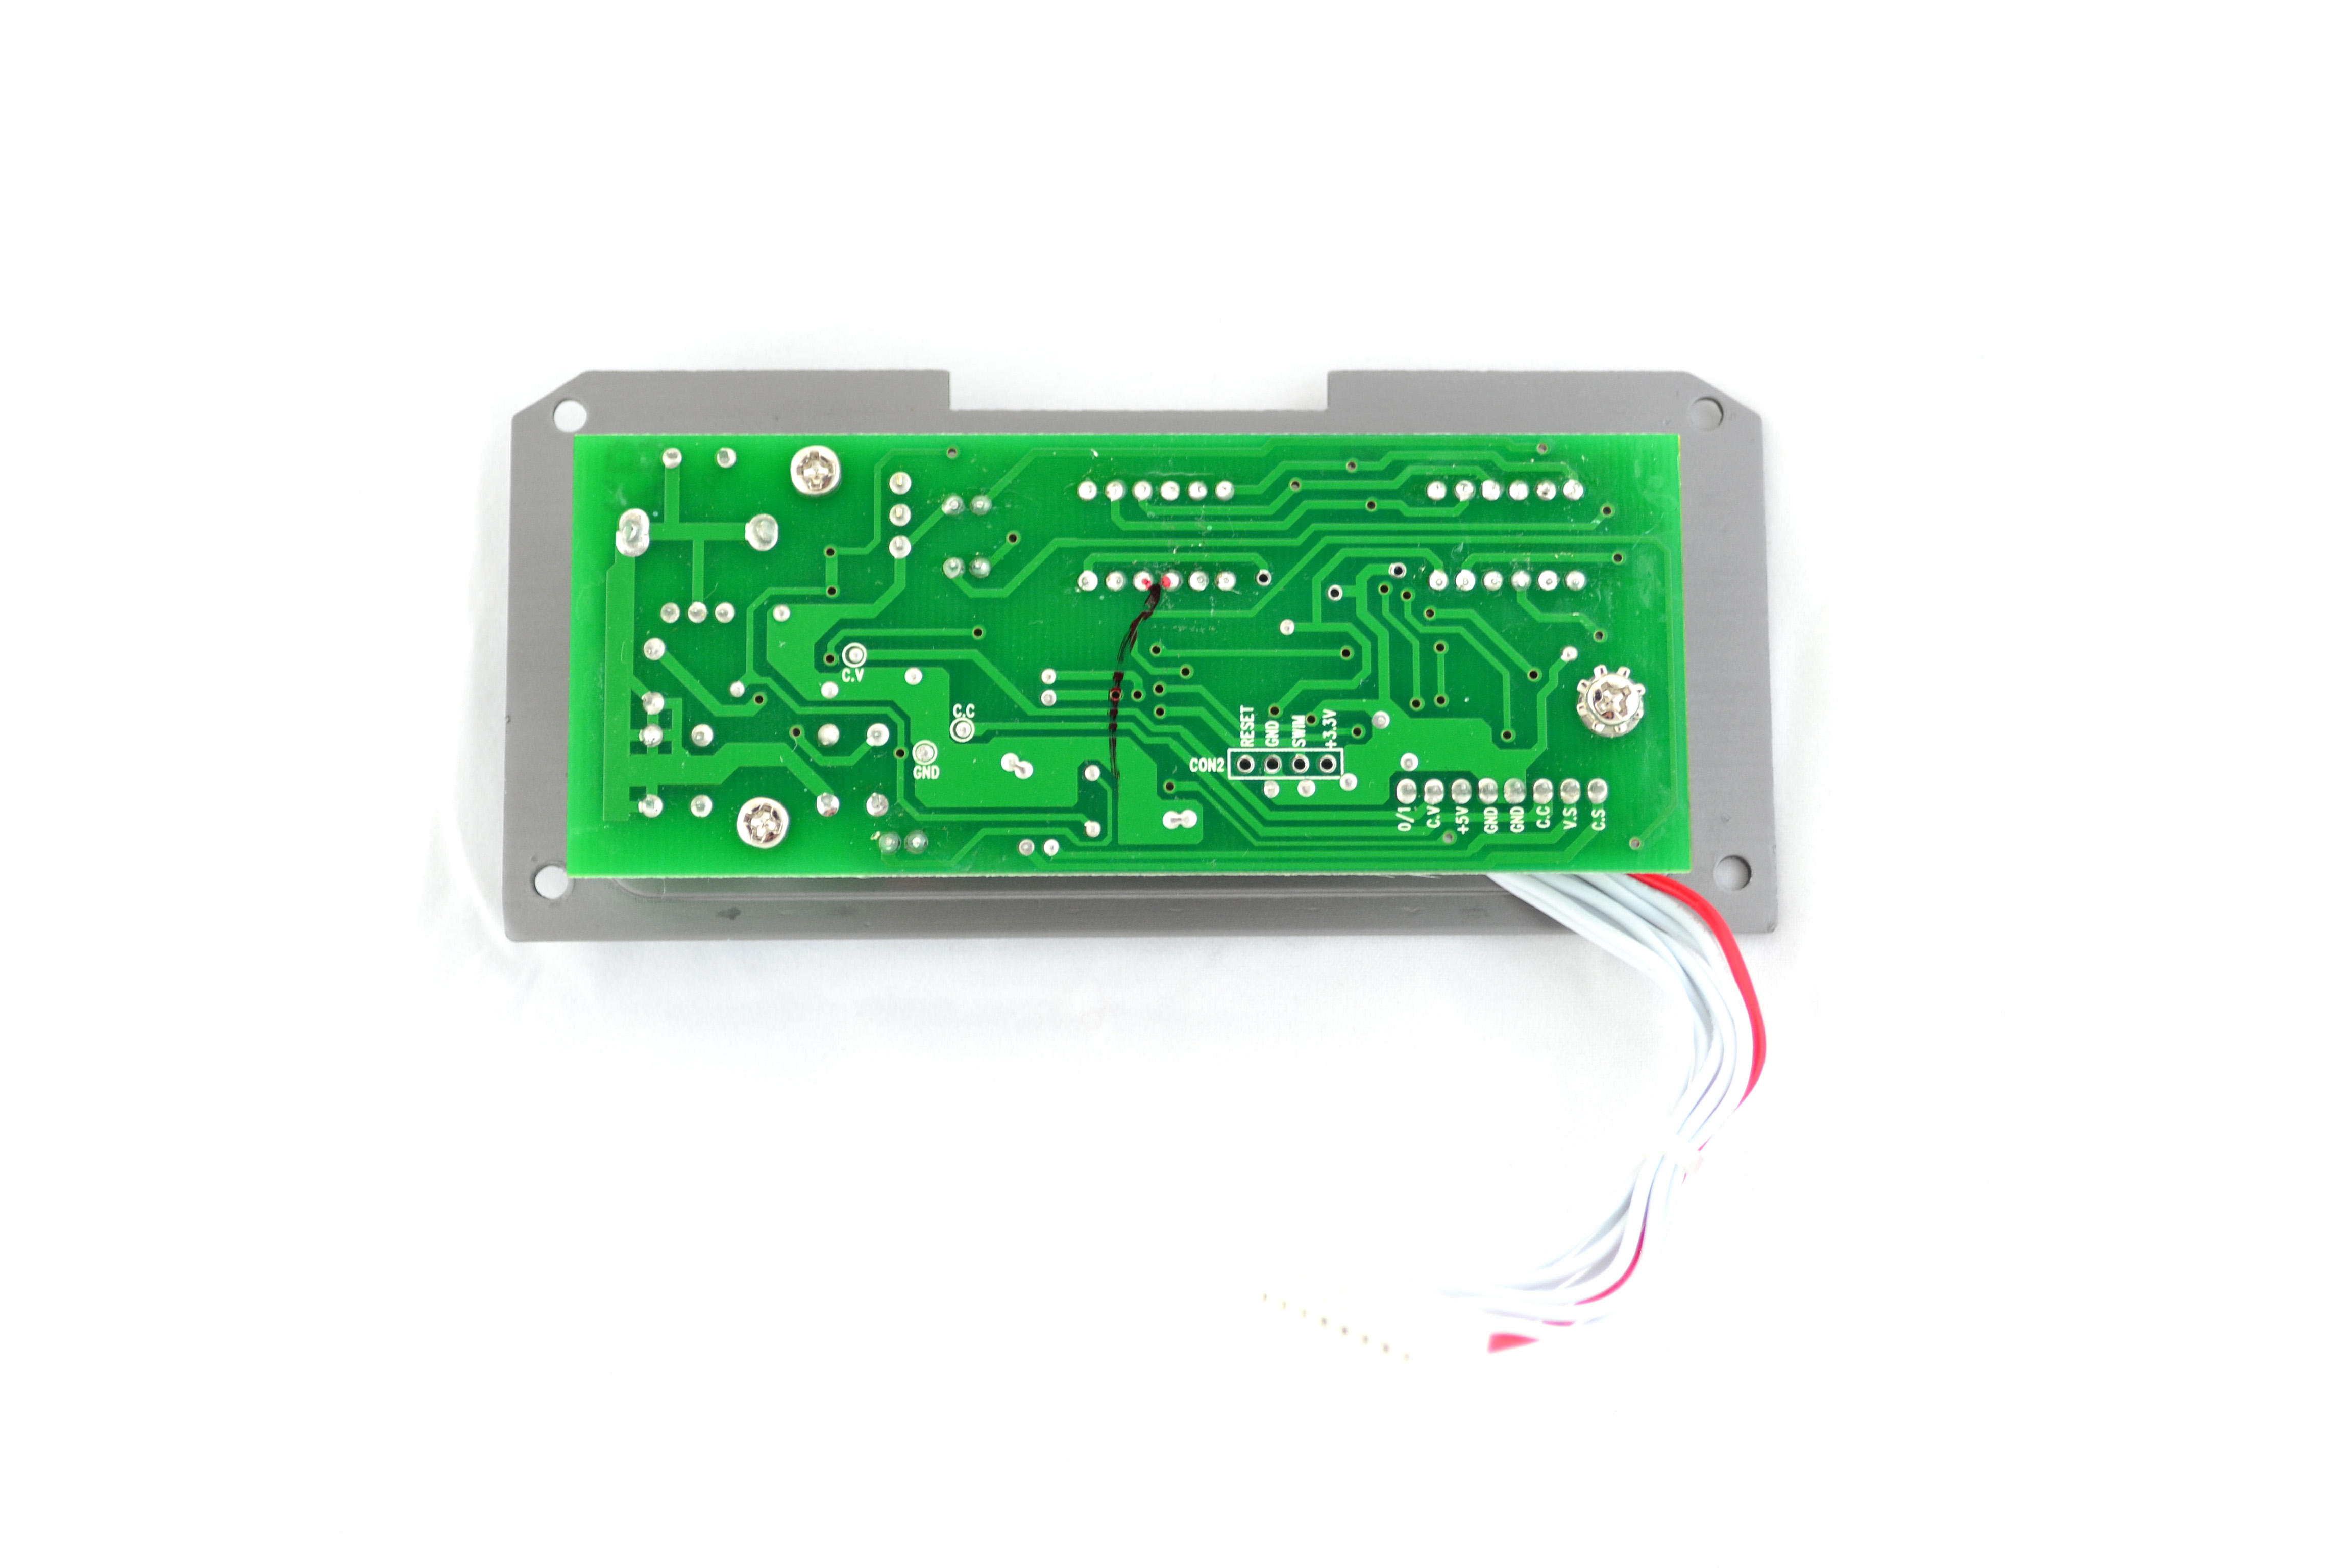
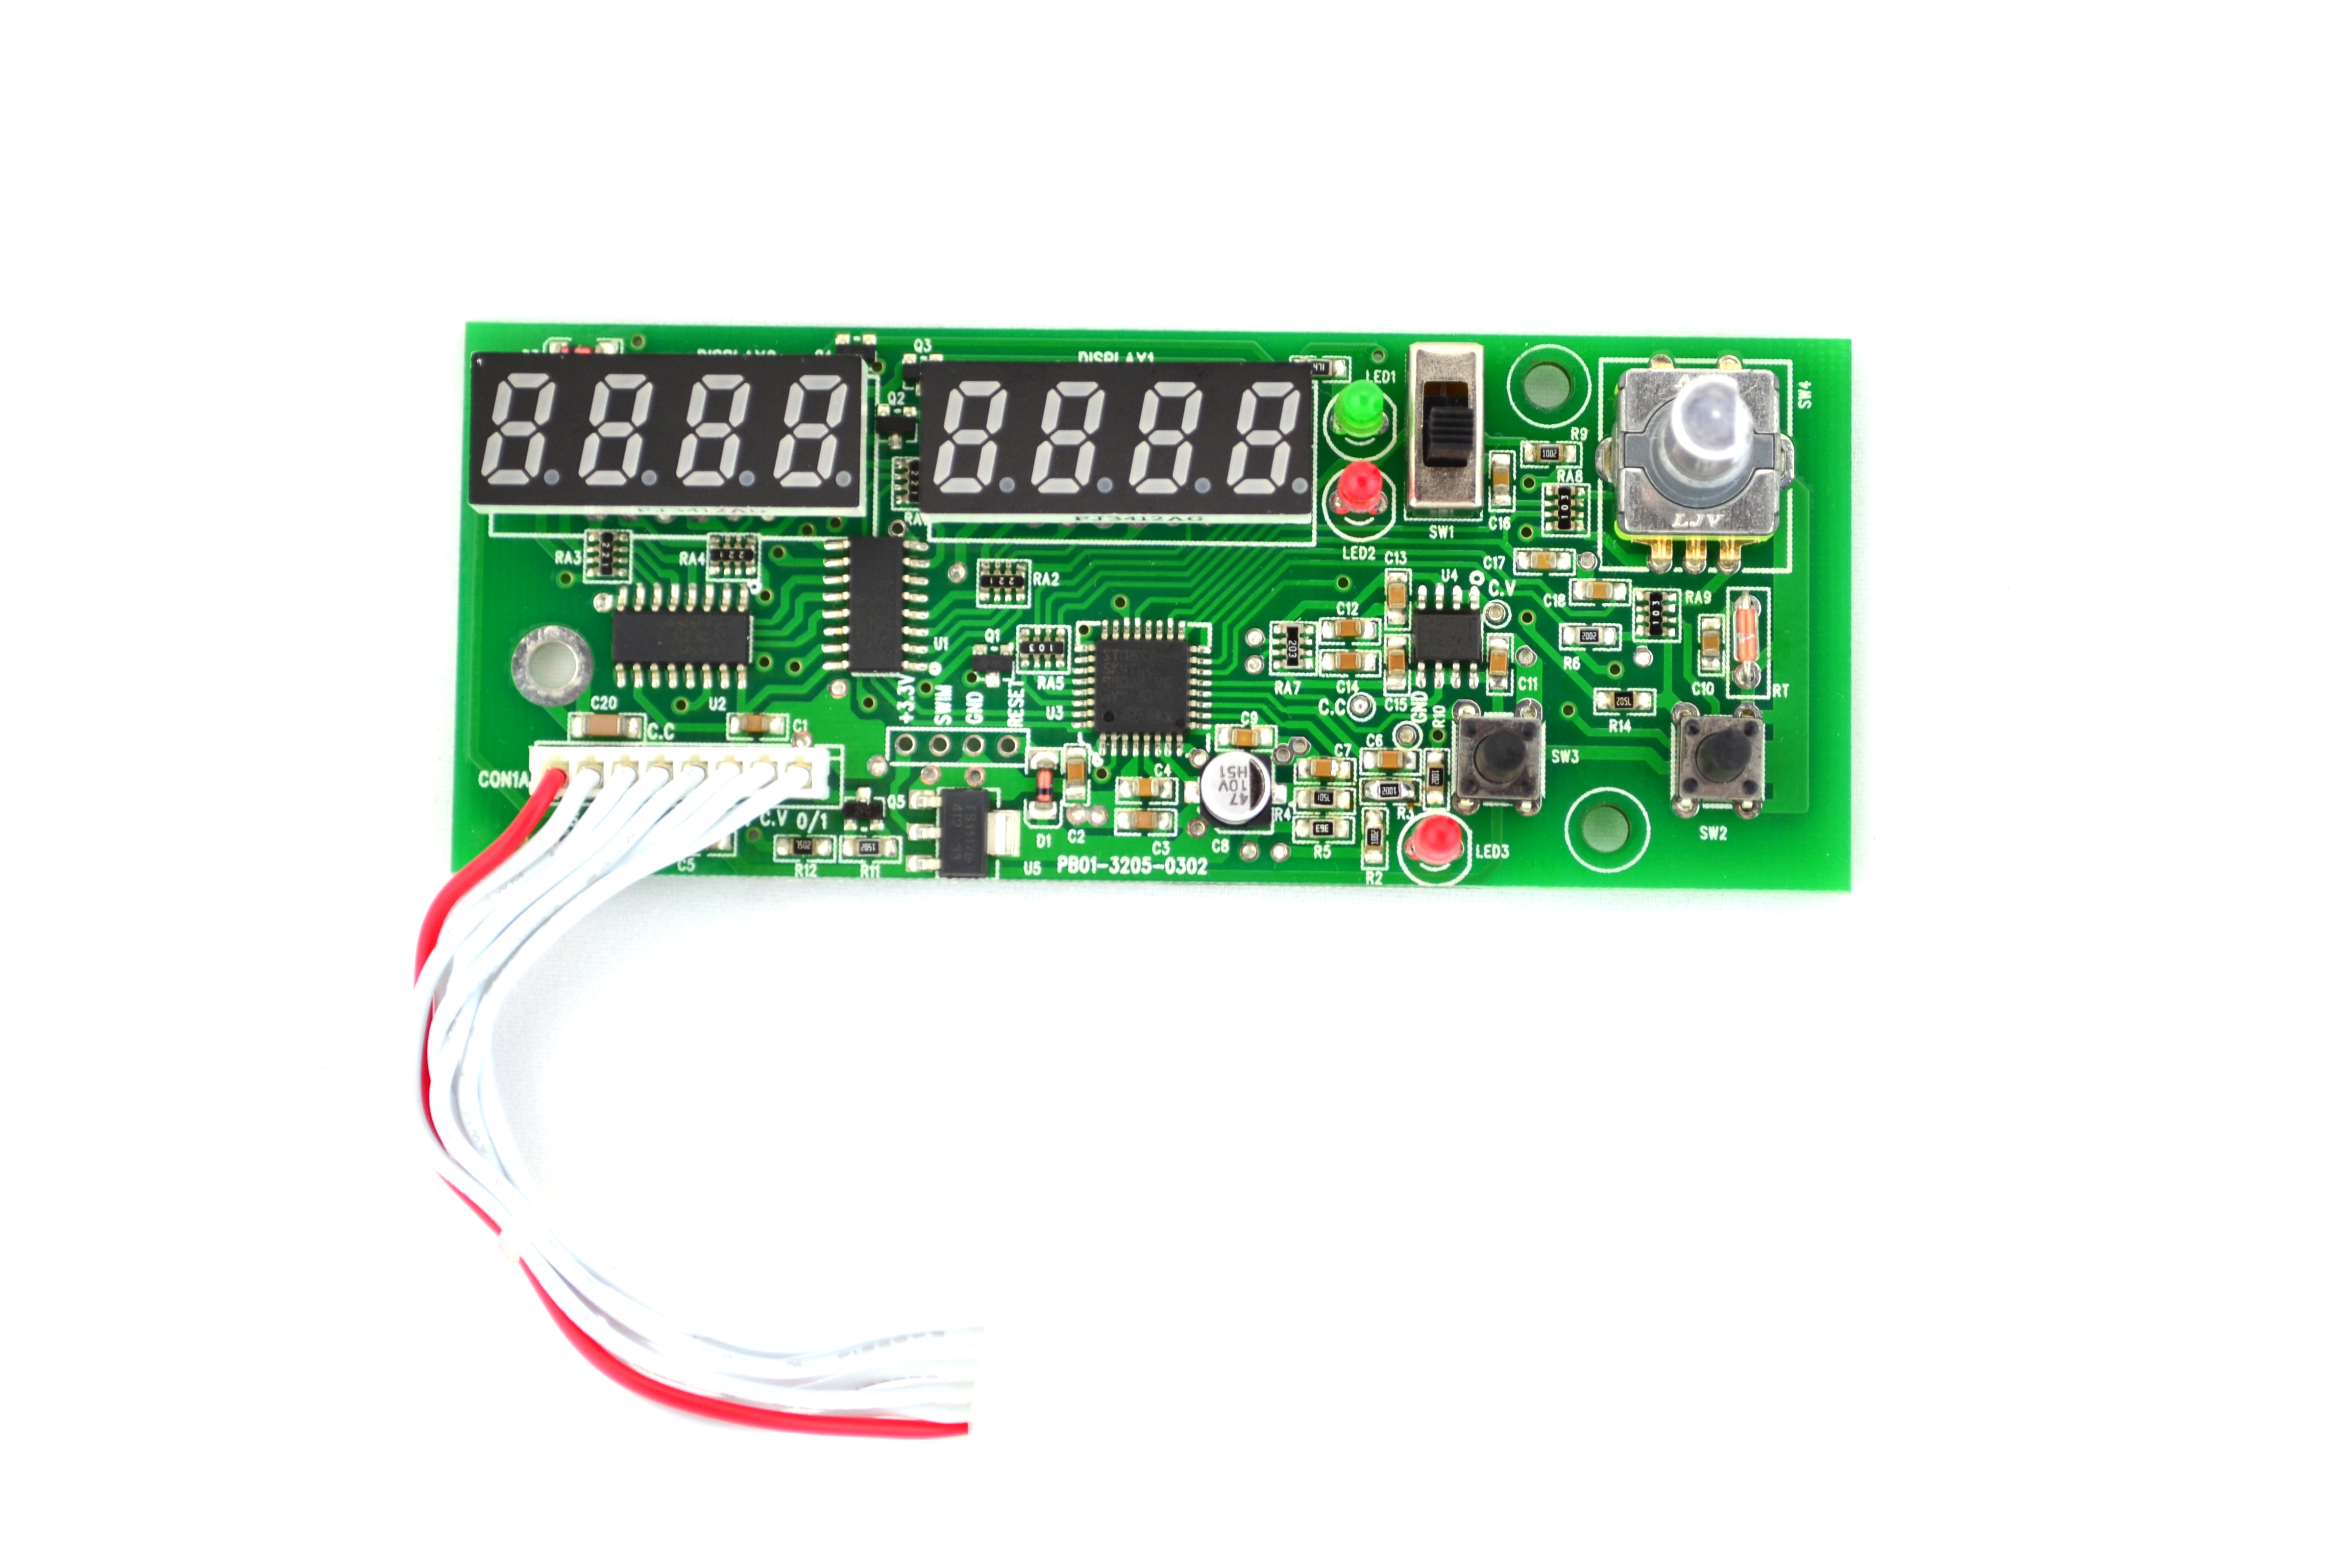
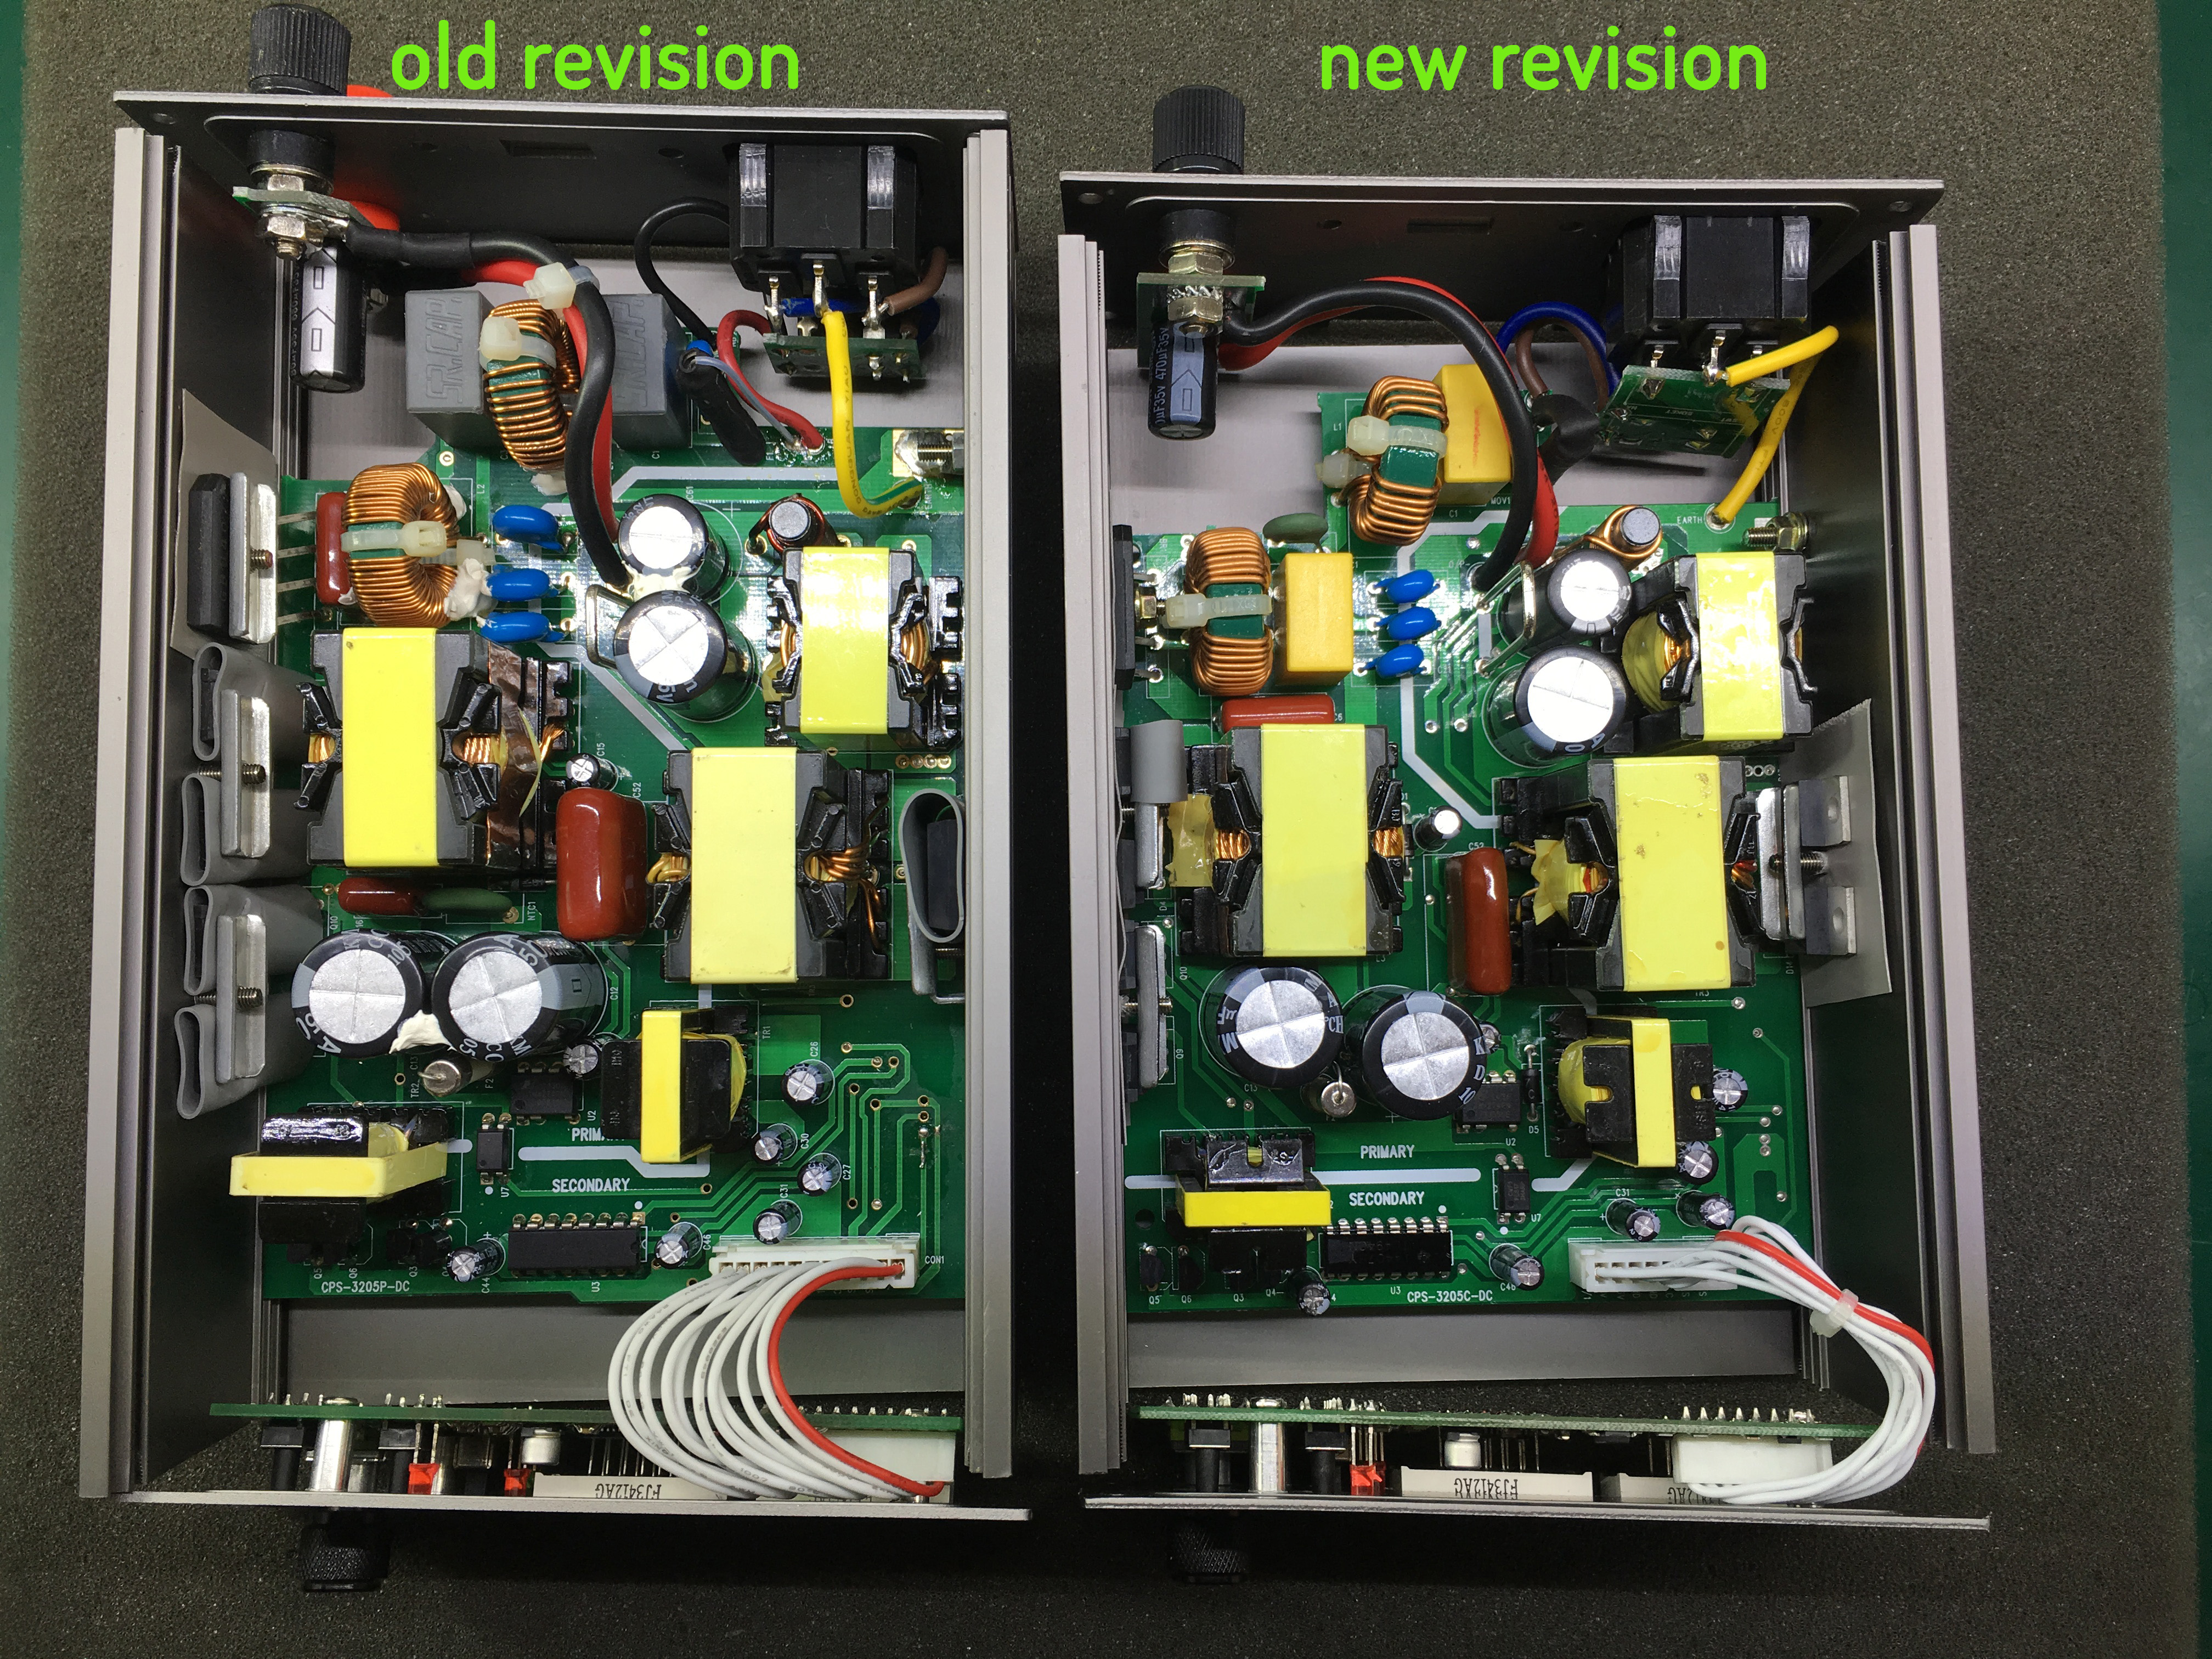
Voltlog #48 – New 2016 Gopher CPS-3205C Review & Teardown
This is the new 2016 revision of the Gopher CPS-3205C. Gopher has addressed some of the issues I found in the old revision and sent me their latest for review. You will see a teardown as well as various tests performed on this power supply.
Voltlog #34 – Fluke 77 Teardown & Repair, Varistor Replacement
In this video I’m opening the Fluke 77 I scored at a recent auction to show and repair a small issue it has. One of the MOV (metal oxide varistor) in the input protection circuit had suffered damage probably while protecting the rest of the circuit when a HV signal was applied to it’s input, so I decided to replace the MOV.
The original MOV part number is V910LSX1399 specs: 910V 10% 1mA
The replacement MOV part number is Panasonic ERZV10D911 specs 910V 1mA
VoltLog #25 – How to Salvage Electronic Components For Reuse
In this video I am showing various techniques I use for desoldering and salvaging electronic components like: inductors, tantalum capacitors, connectors, ceramic capacitors, op-amps, comparators, switches, battery connectors, dc jacks, mosfets, fuses and ferrite beads from old motherboards.
I am also taking a look at some laptop optical drivers and lcd pannels to see if there is anything usefull we can save before taking them to the recycling bin.
Here are links to some tools you can use for desoldering jobs:
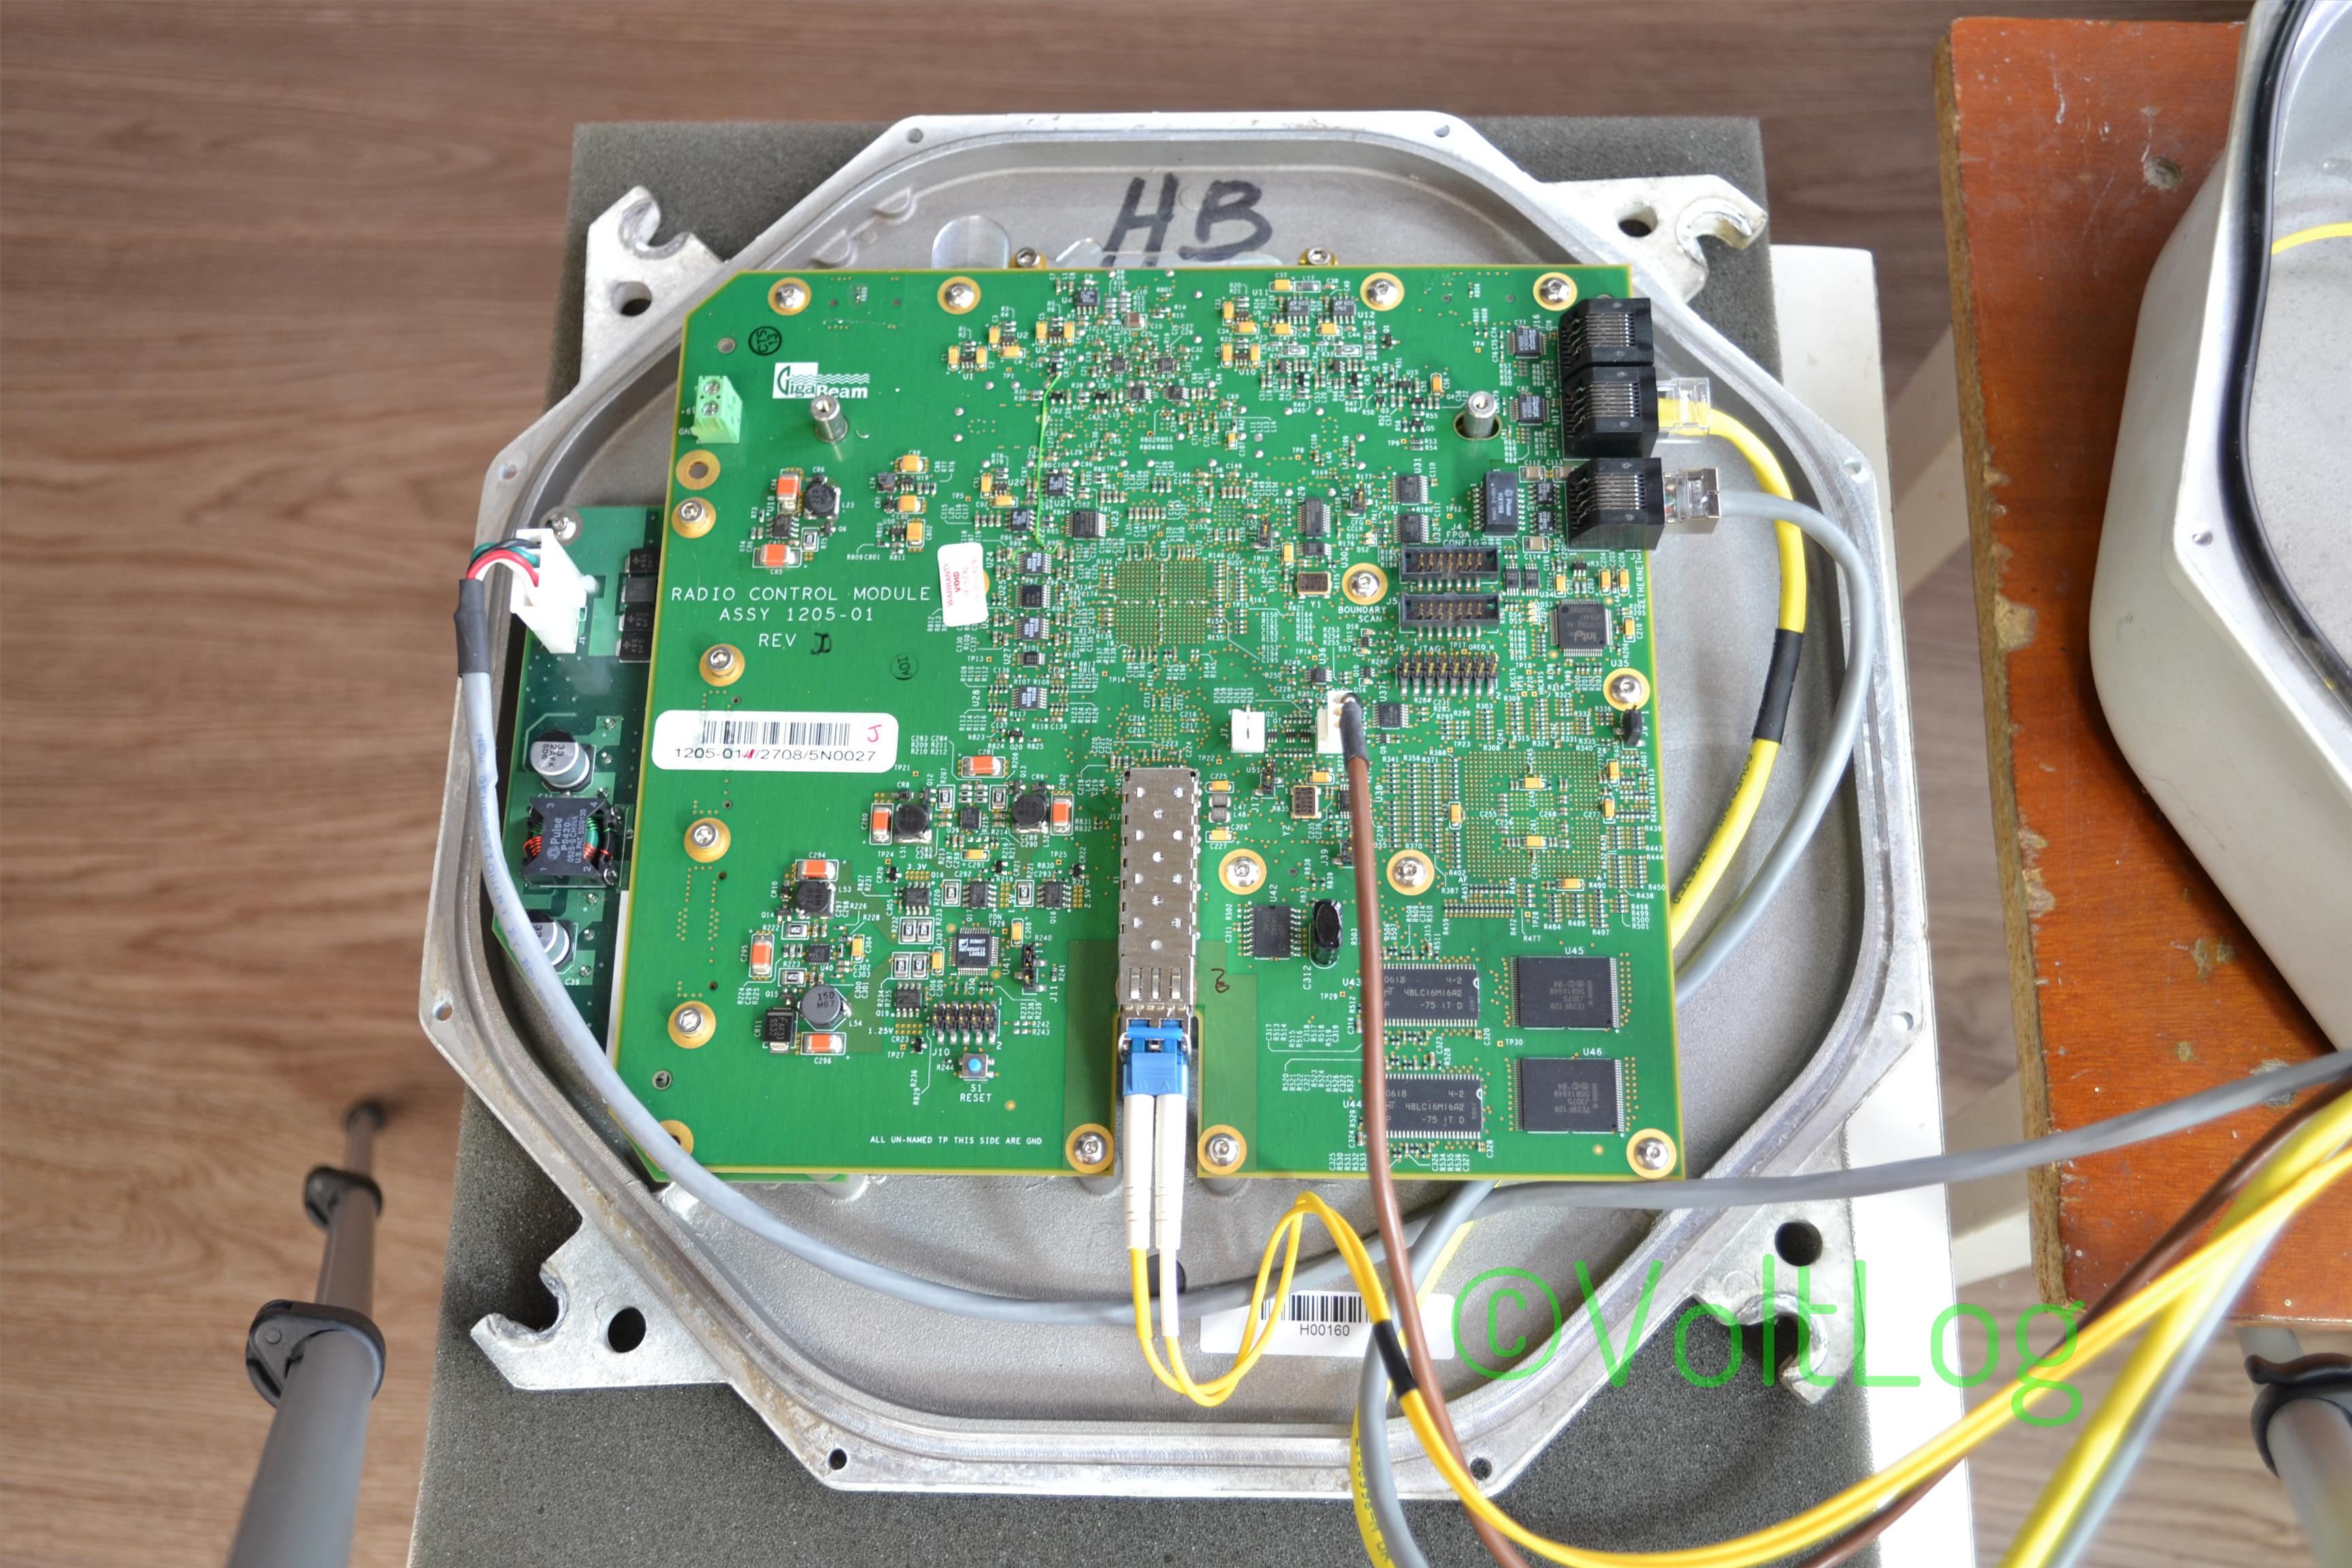
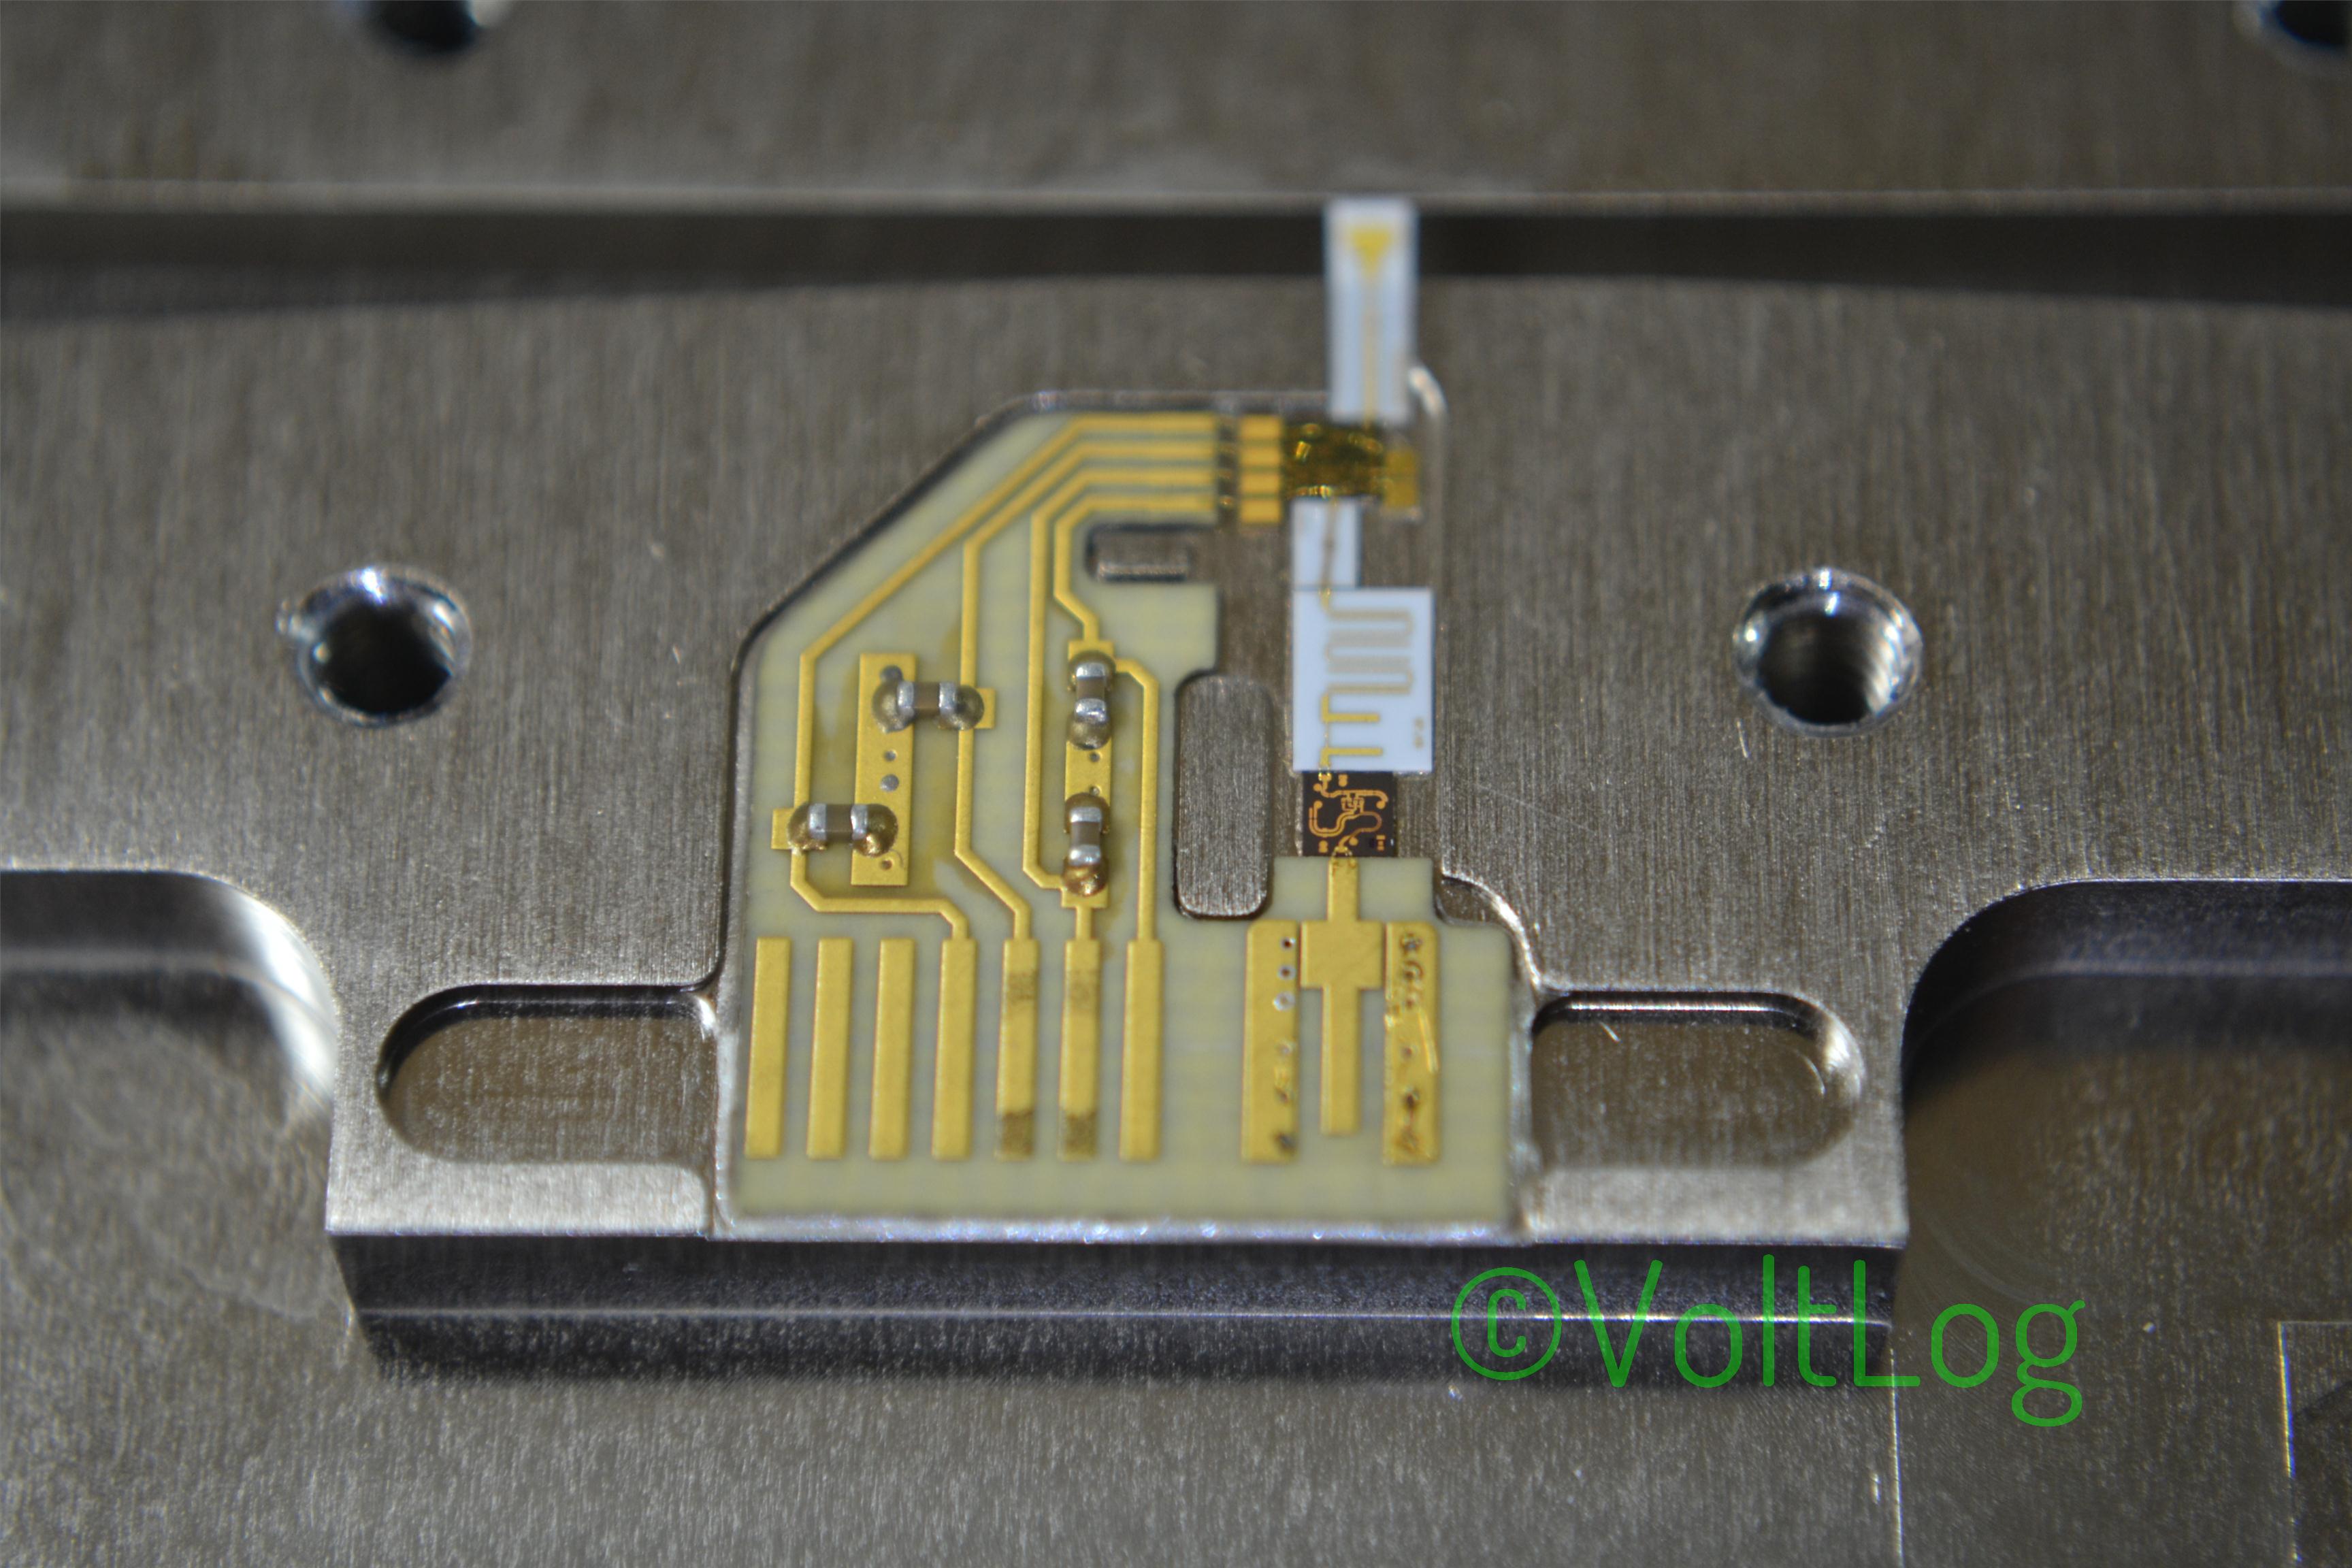
Voltlog #23 – Gigabeam WiFiber G1.25 Teardown
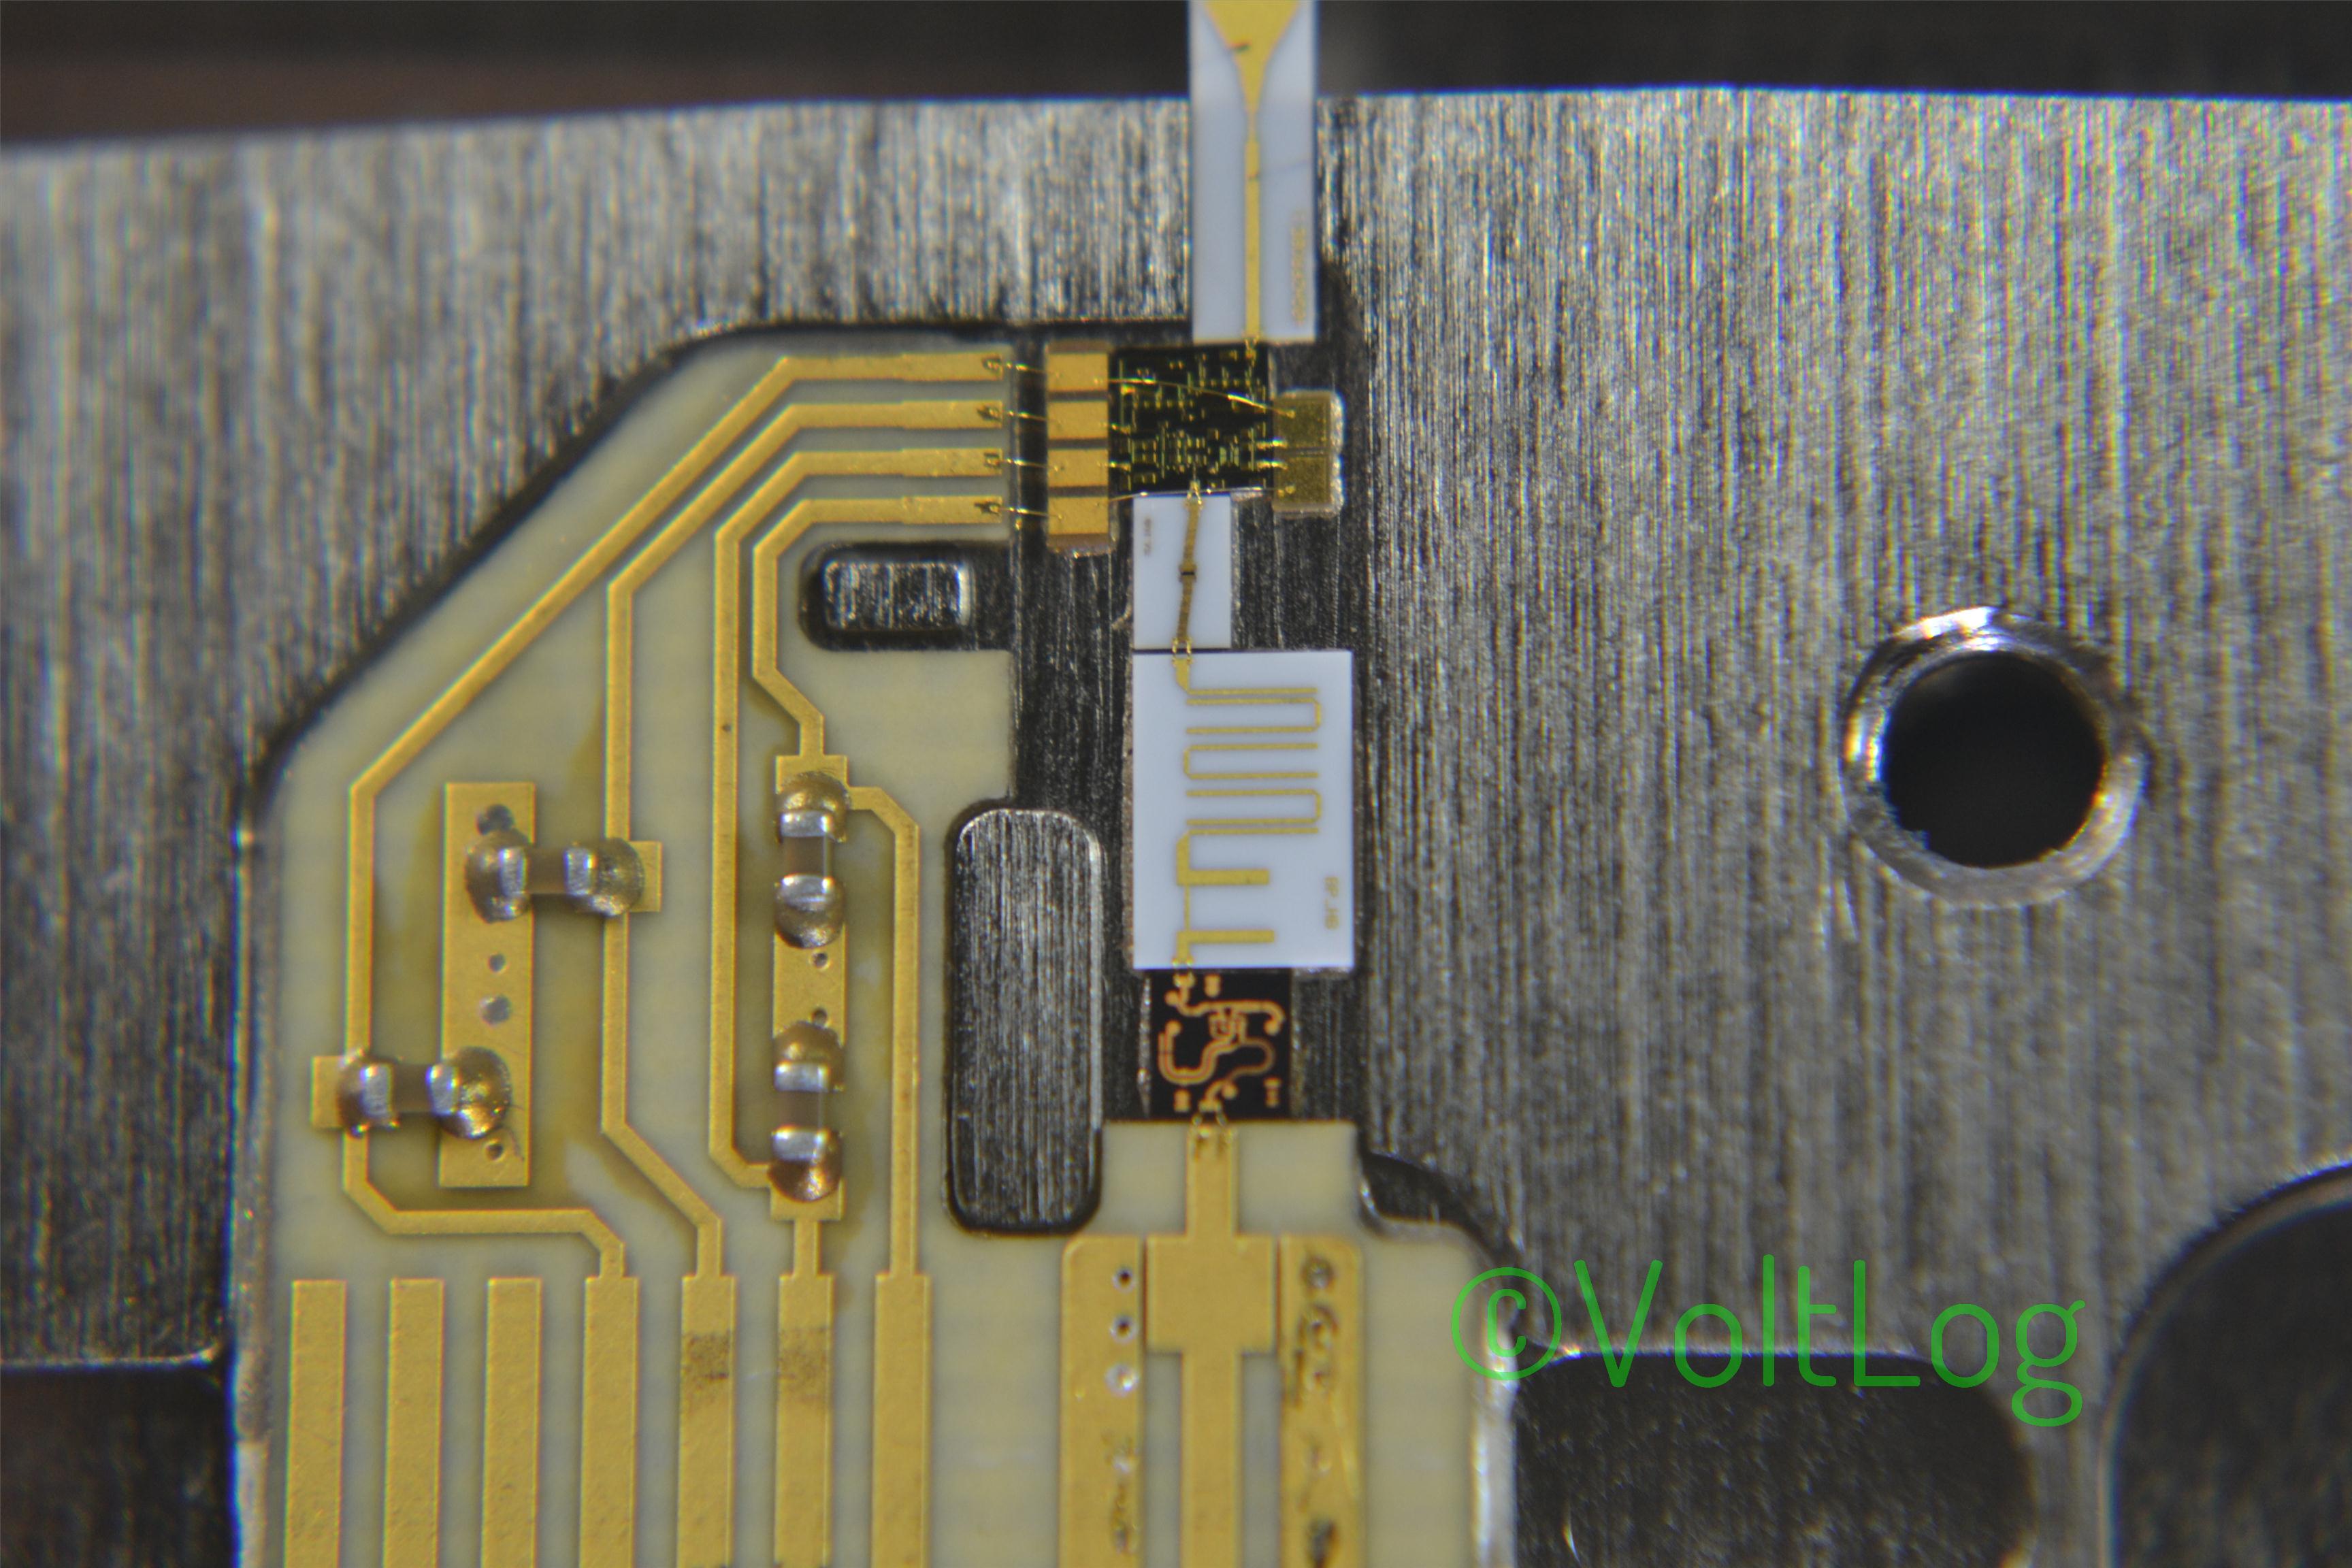
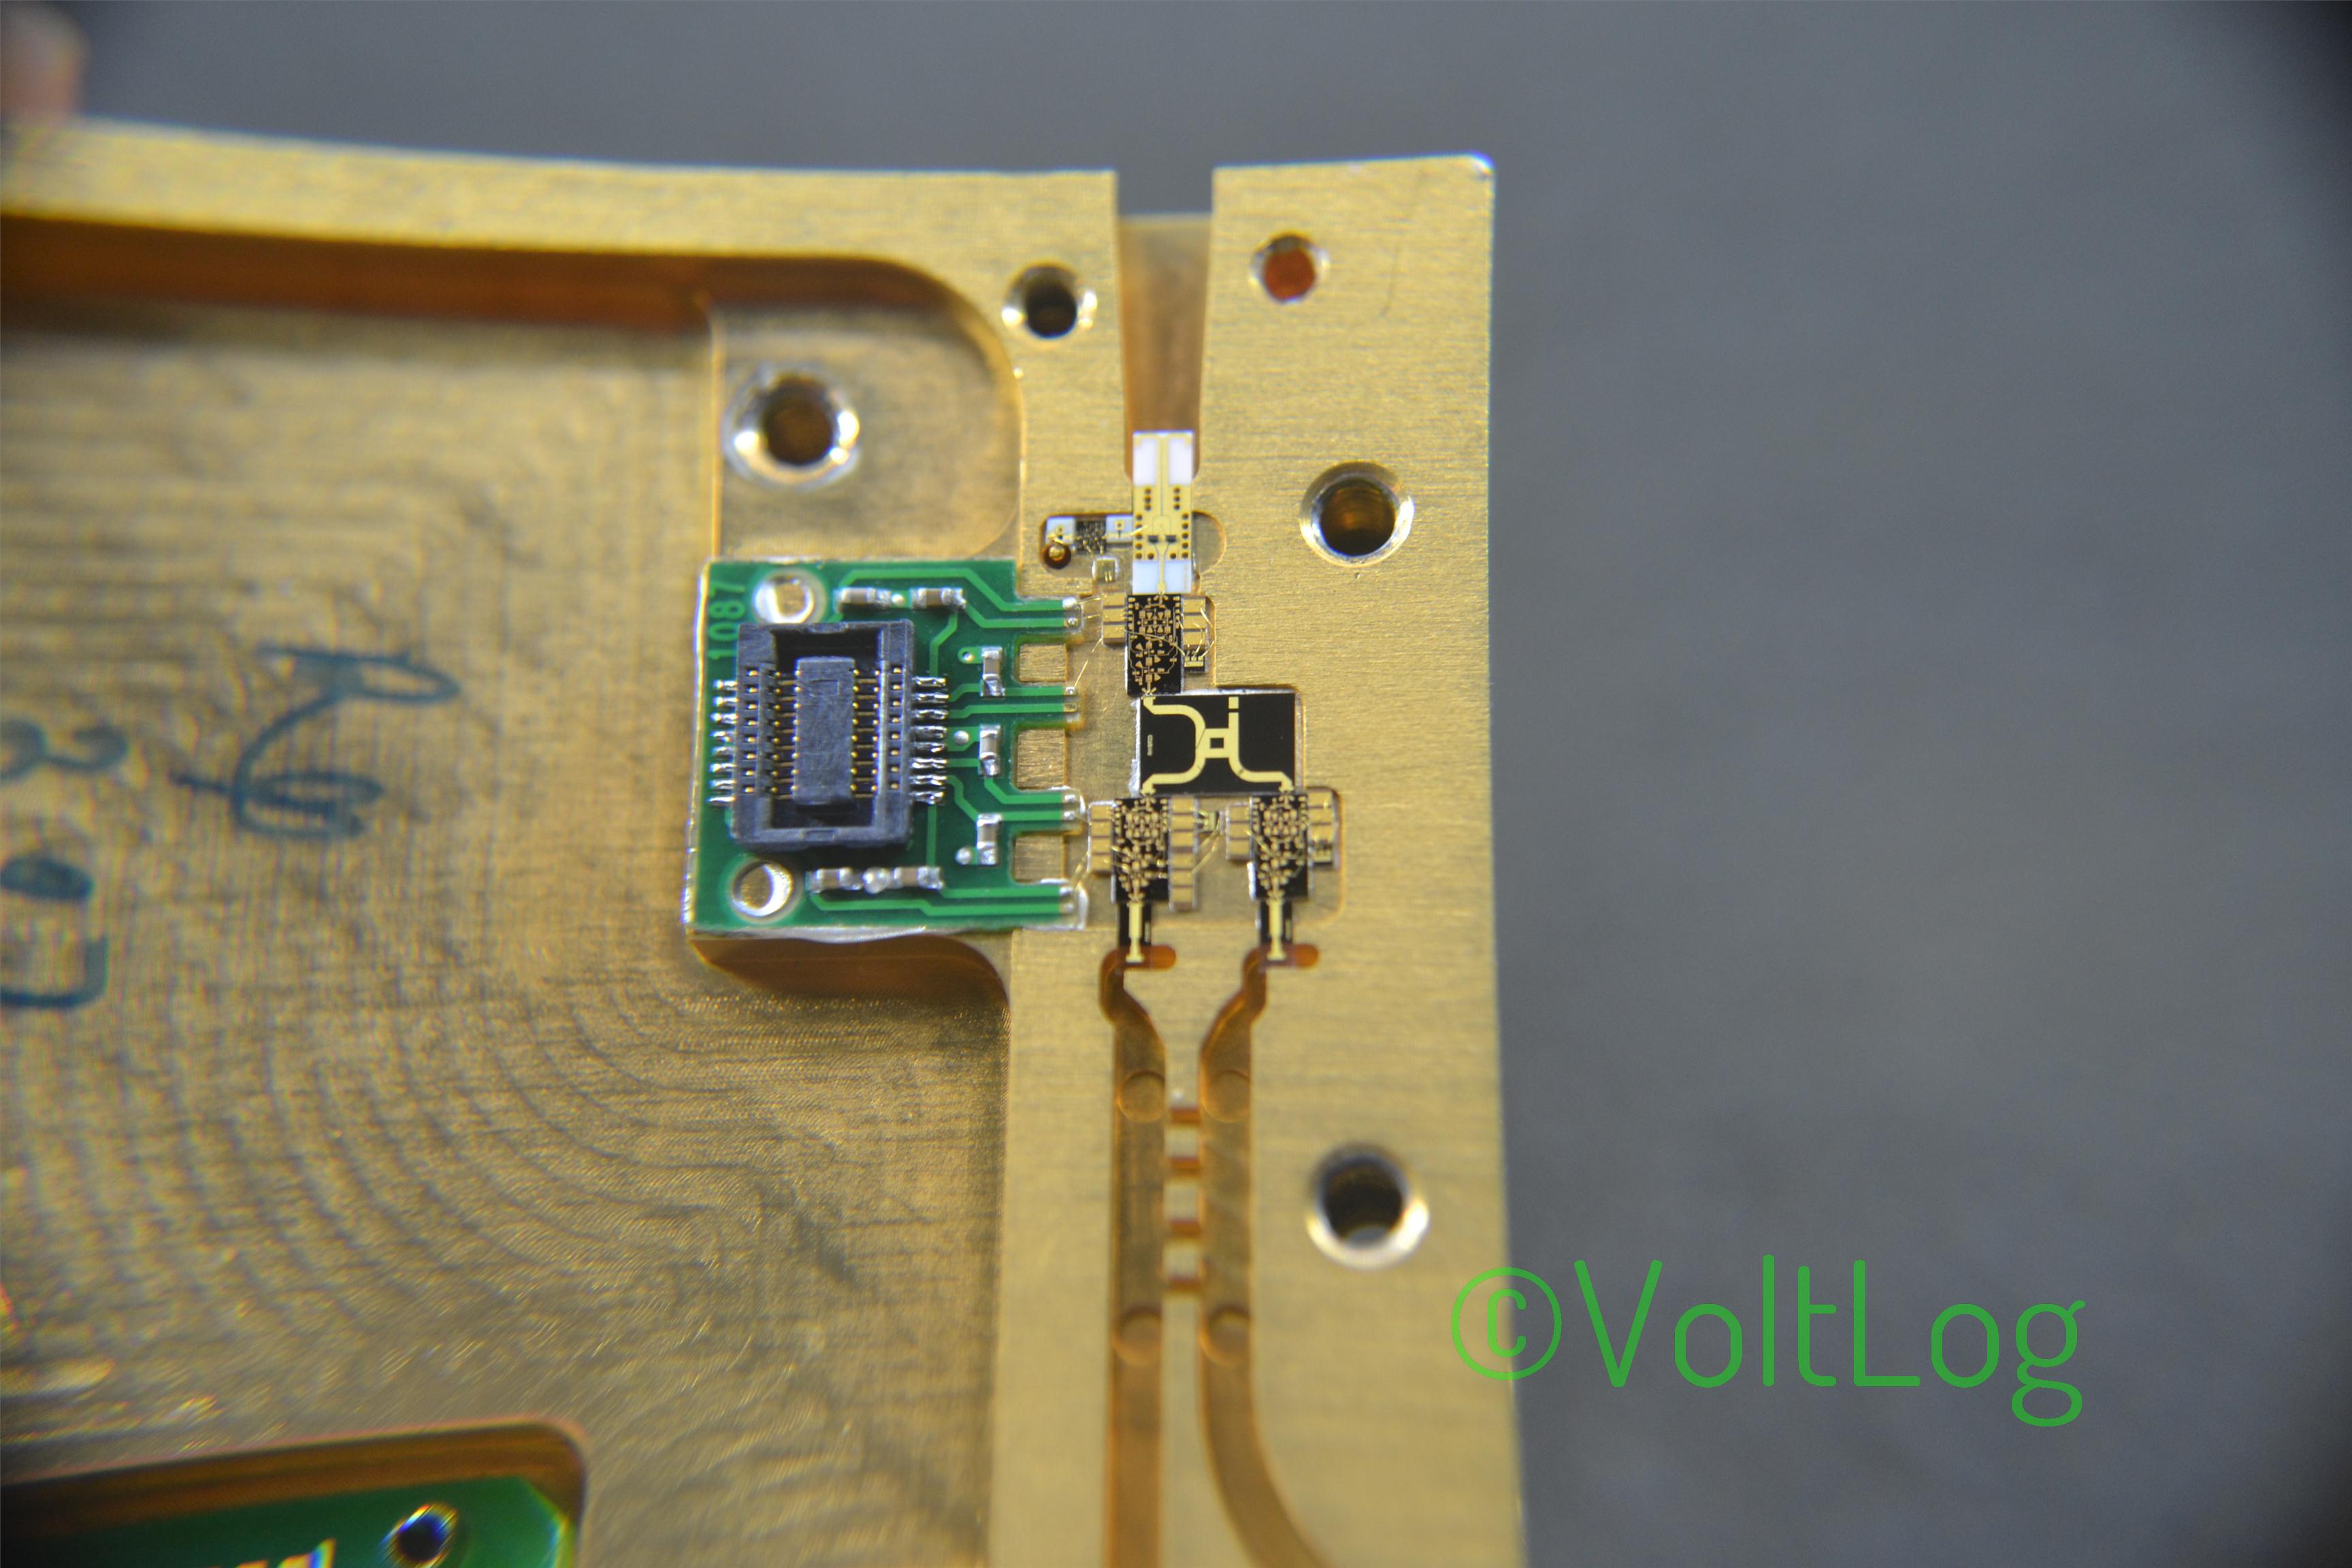
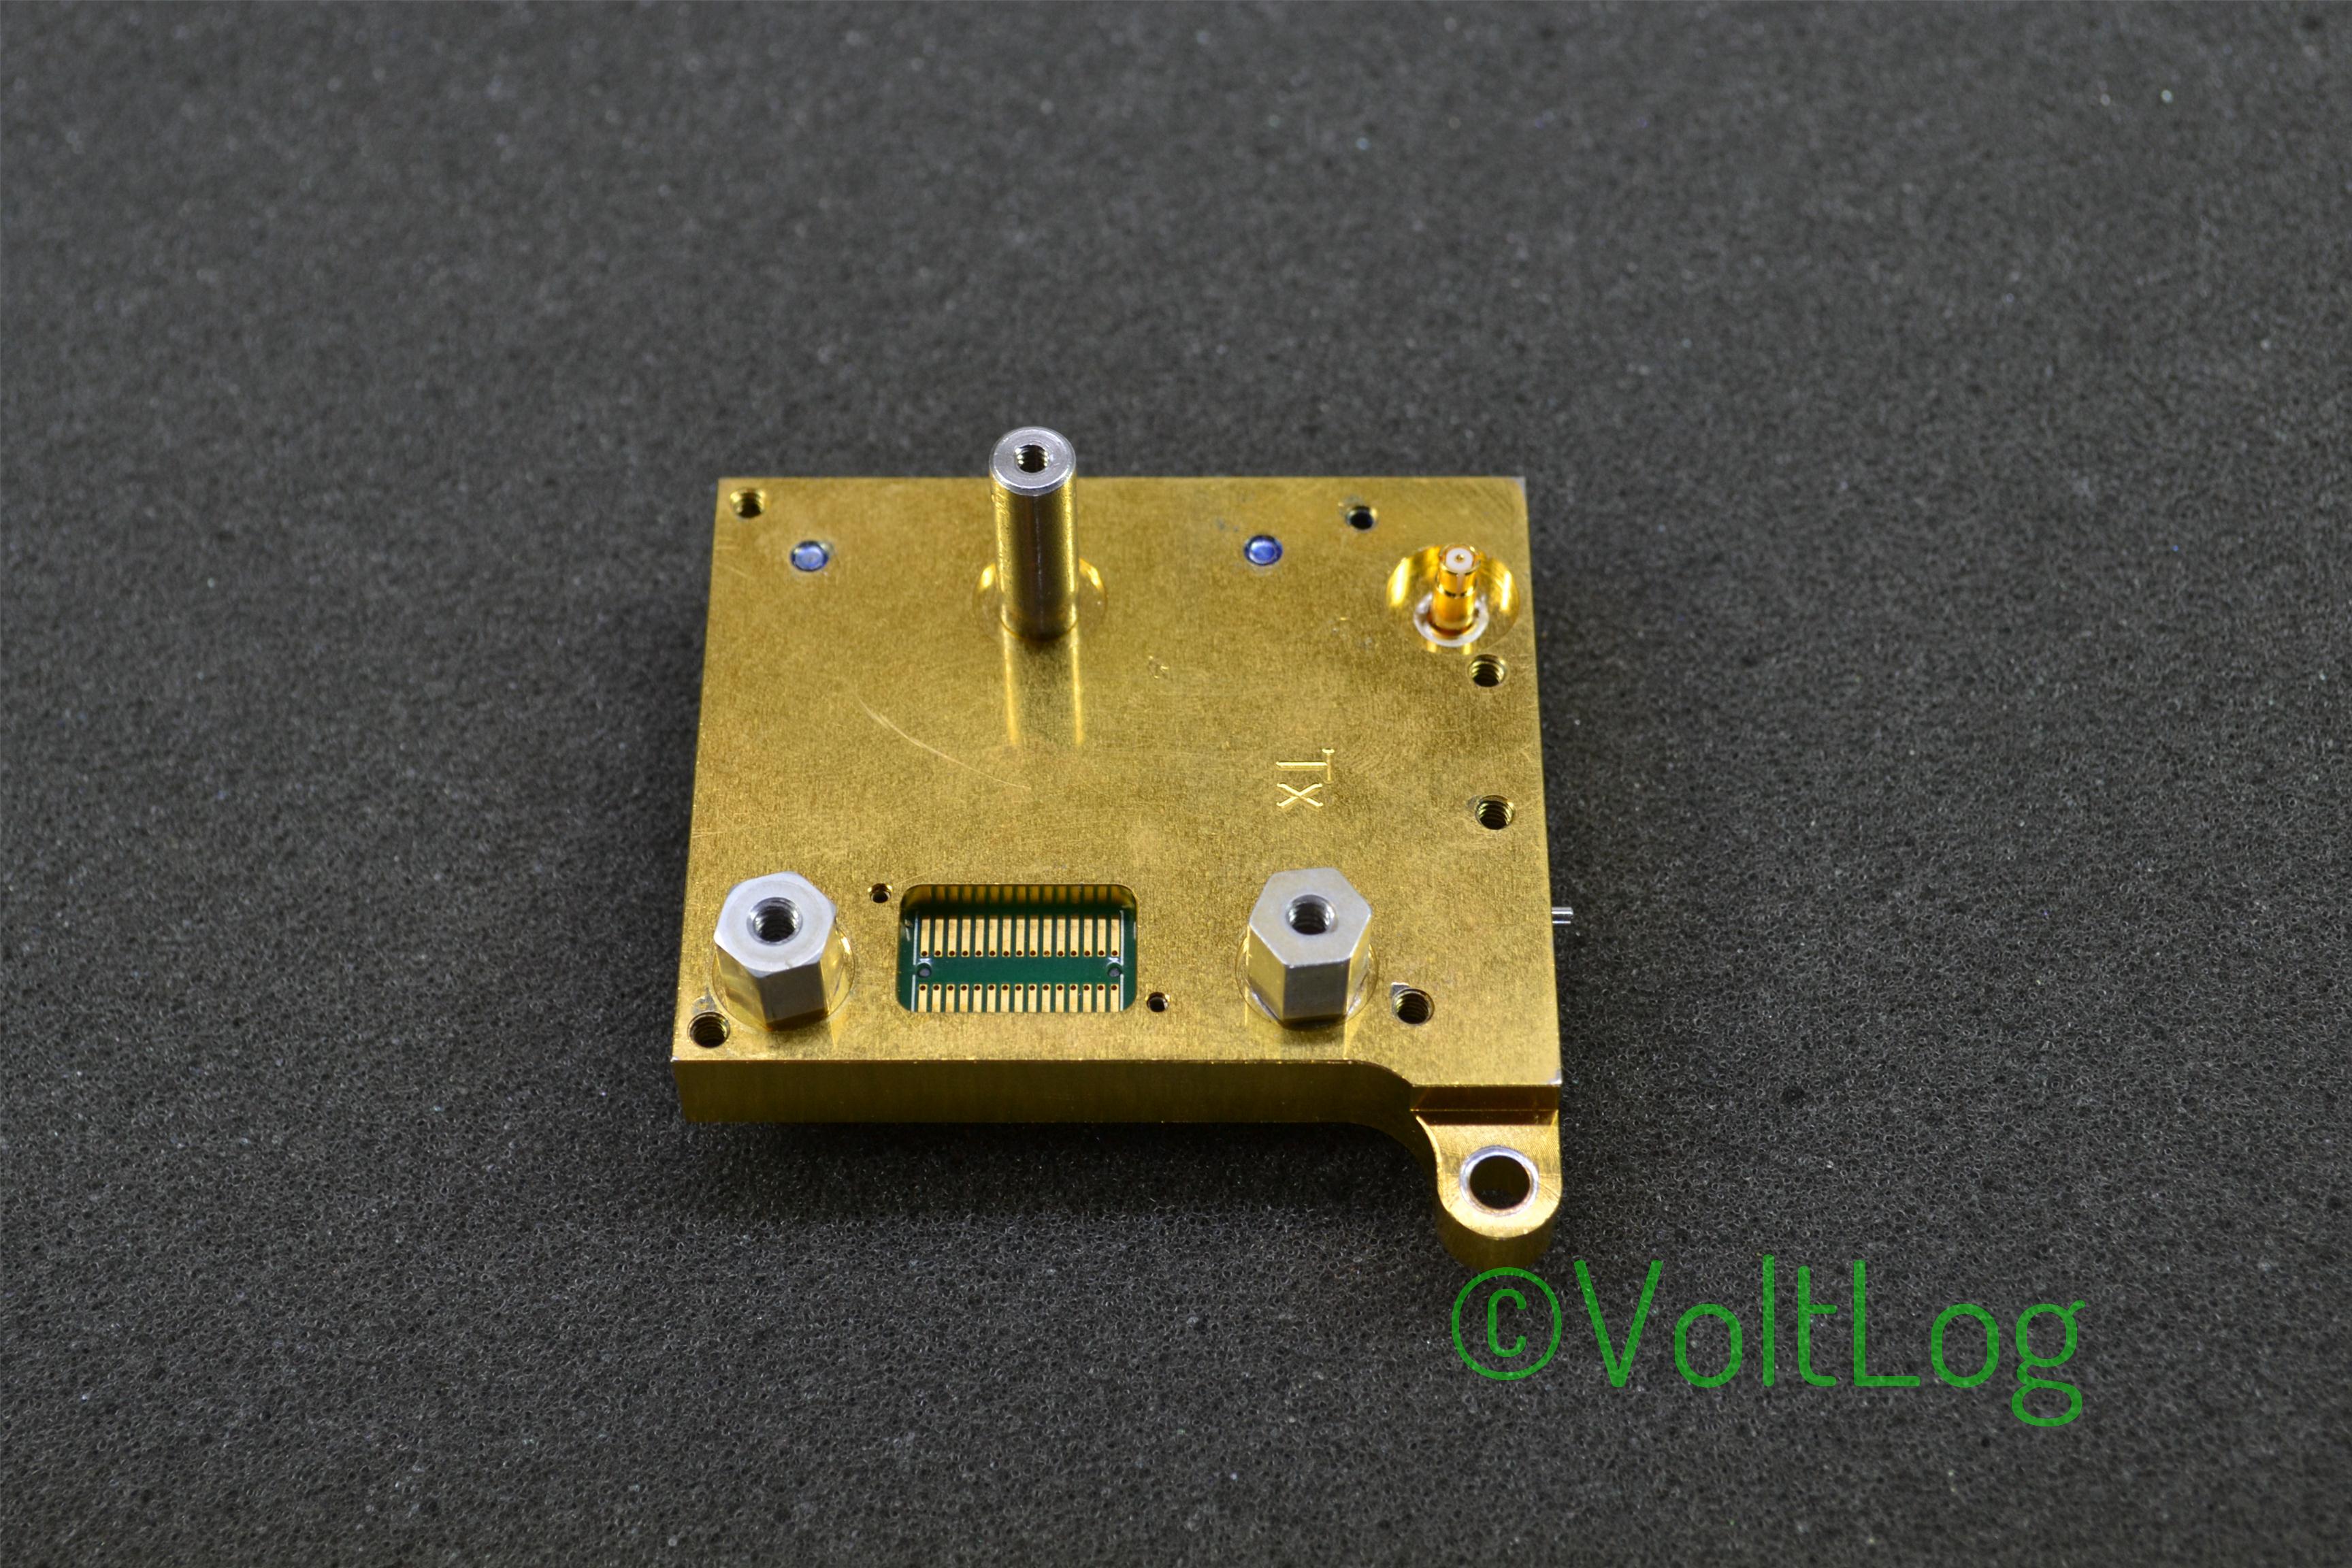
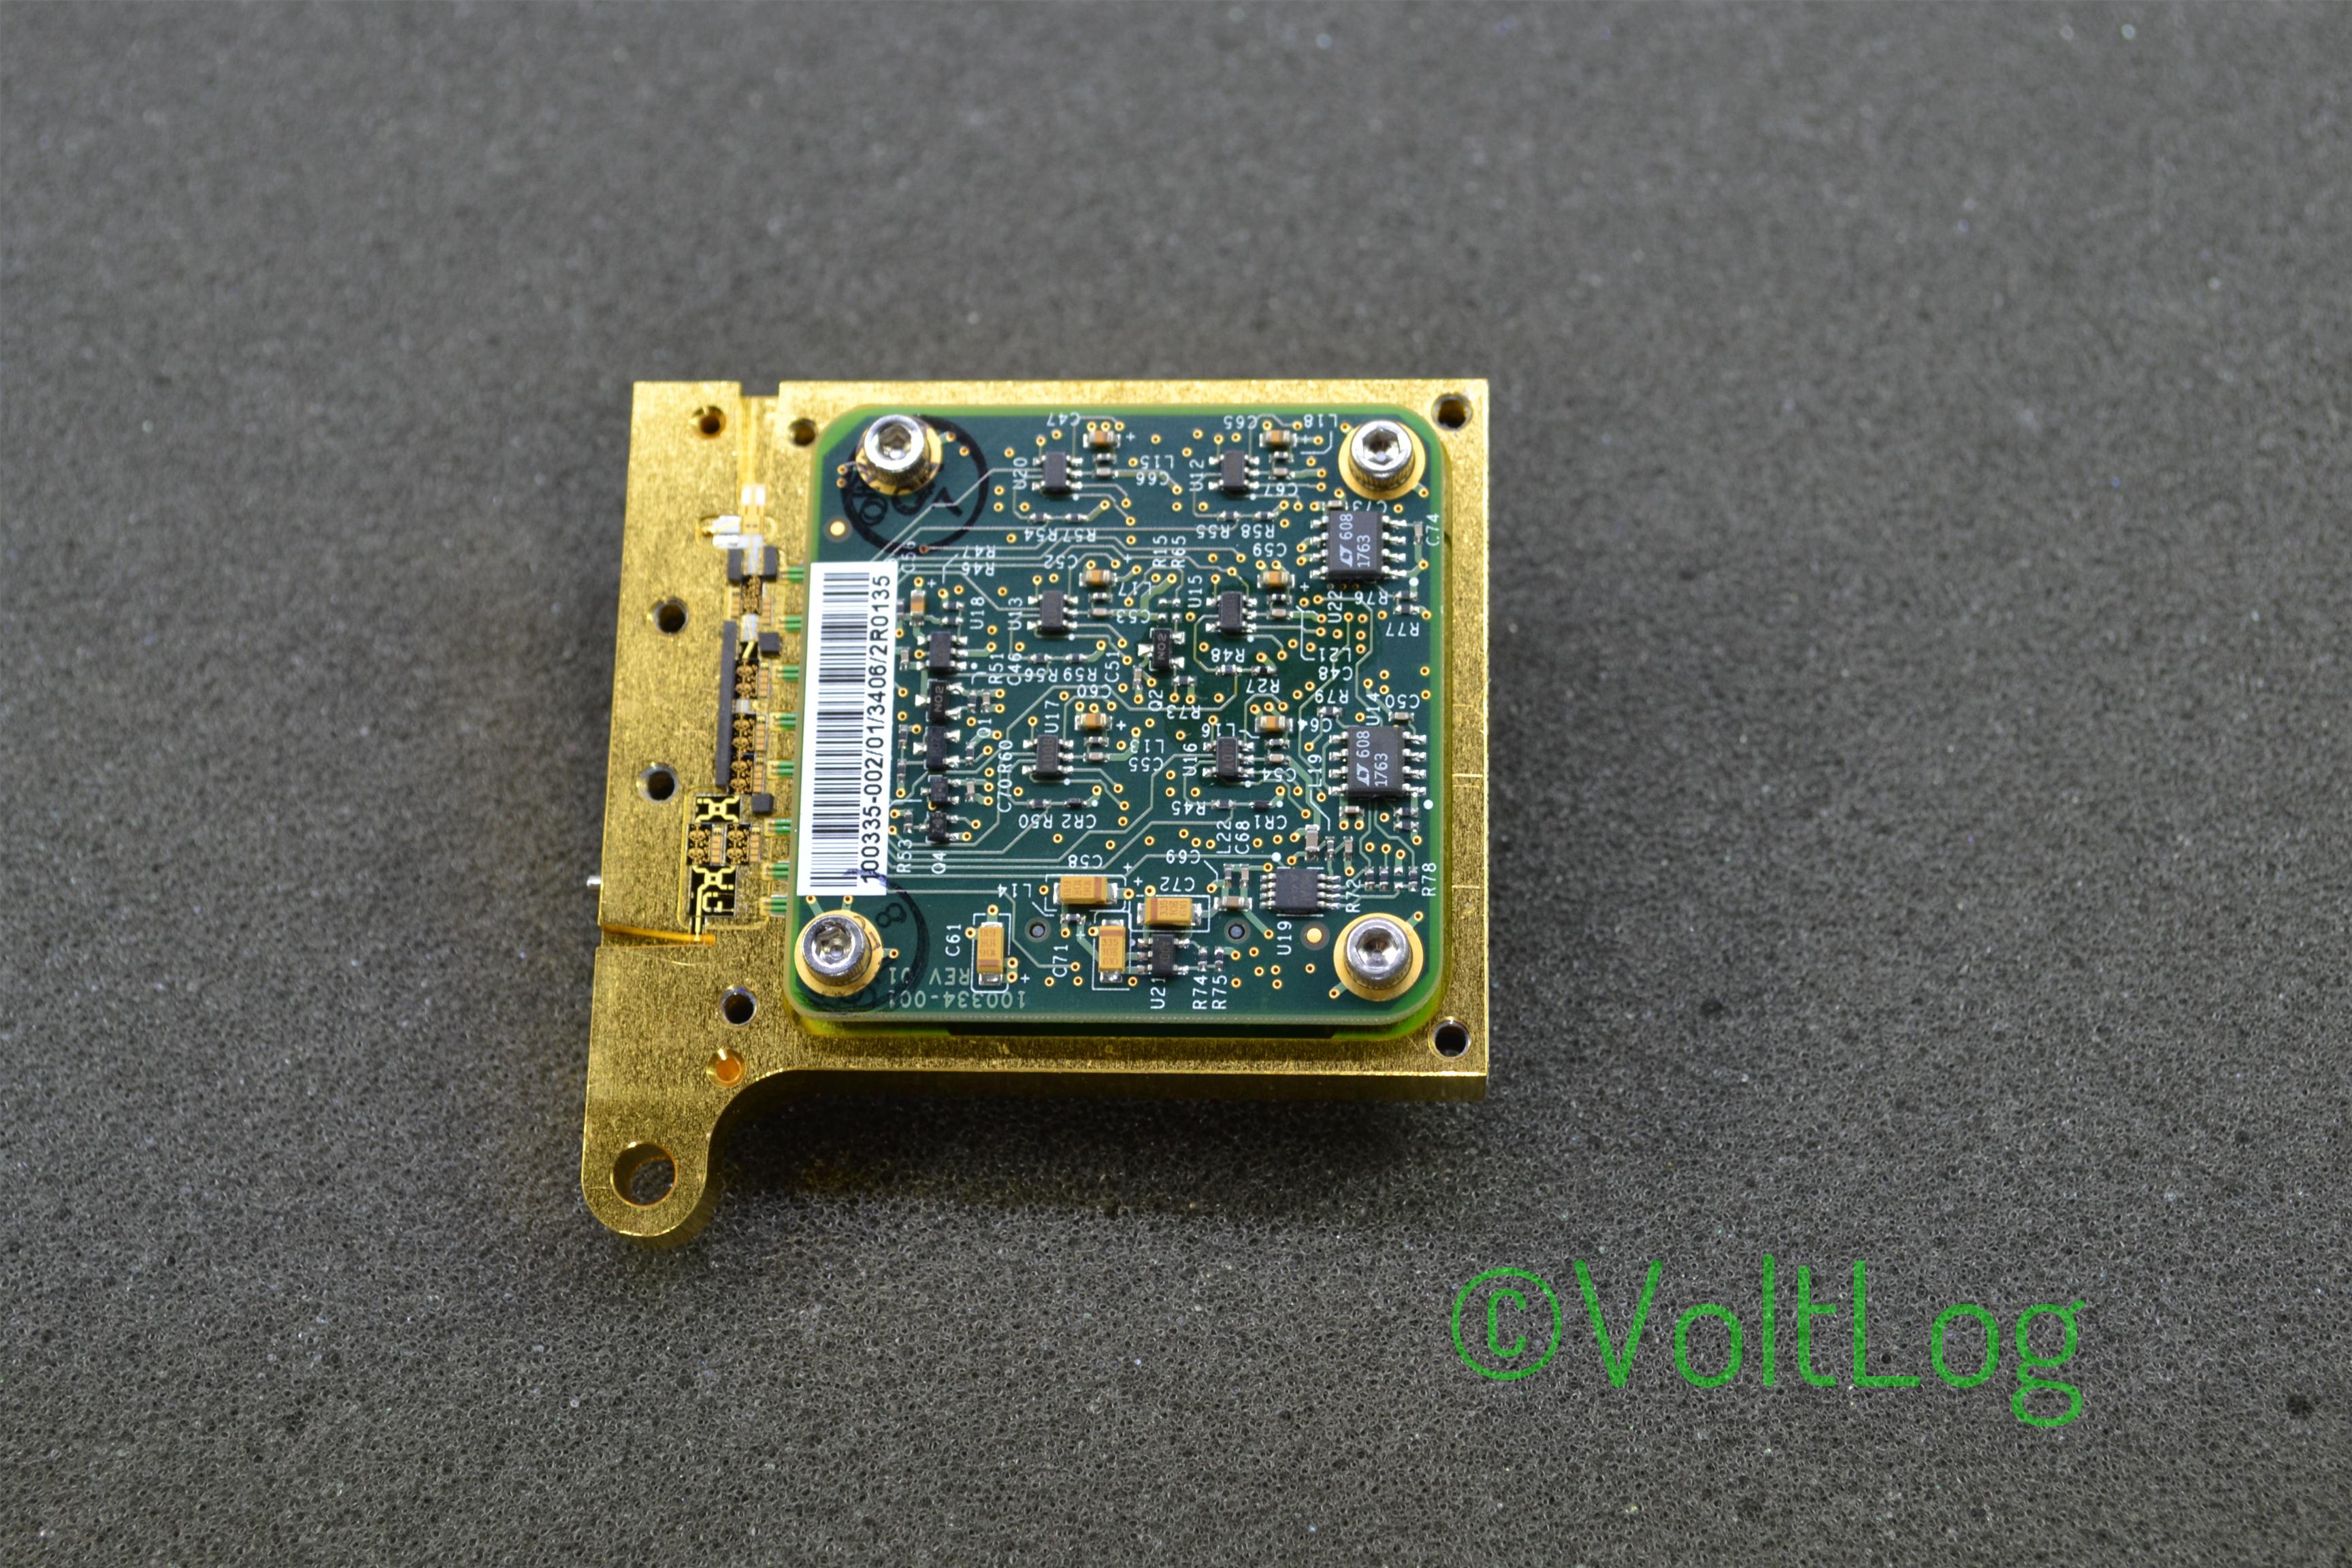
Hi, welcome to a new voltlog, today we’re going to teardown something interesting. As you can see on my left I have this huge antenna / radio assembly which btw weighs approximately 25 Kg so it’s not easy to handle in my small lab, in fact it takes up most of my bench so I will probably do the teardown on the floor.
This antenna is called Gigabeam Wifiber and it’s manufactured by a company called Gigabeam Corporation that went bankrupt in 2010. The system is supposed to act like a transparent access point offering gigabit links over radio where fiber infrastructure is difficult to implement.
The radios operate in the 71-76 and 81-86 GHz radio spectrum bands and the modulation format is BiPhase Shift Key (BPSK). They have a transmit power of 20 dBm which translates to 100mW and that is not really a great deal of power but the antenna has a large gain of 50dB. The system takes a gigabit fiber input and on the other side from the receiving antenna you get a gigabit fiber output.
I have a pair of these, one of them is broken and I’m going to attempt to find the fault and maybe fix it. I’m hoping the problem is somewhere in the power section because that will be an easy fix because otherwise I don’t have a spectrum analyzer to take a look at the different RF stages.
Anyway In this video you are only going to see the teardown but that should interesting on its own because I expect to see lots of RF magic inside and interesting system design.
Also checkout the high res photos below:
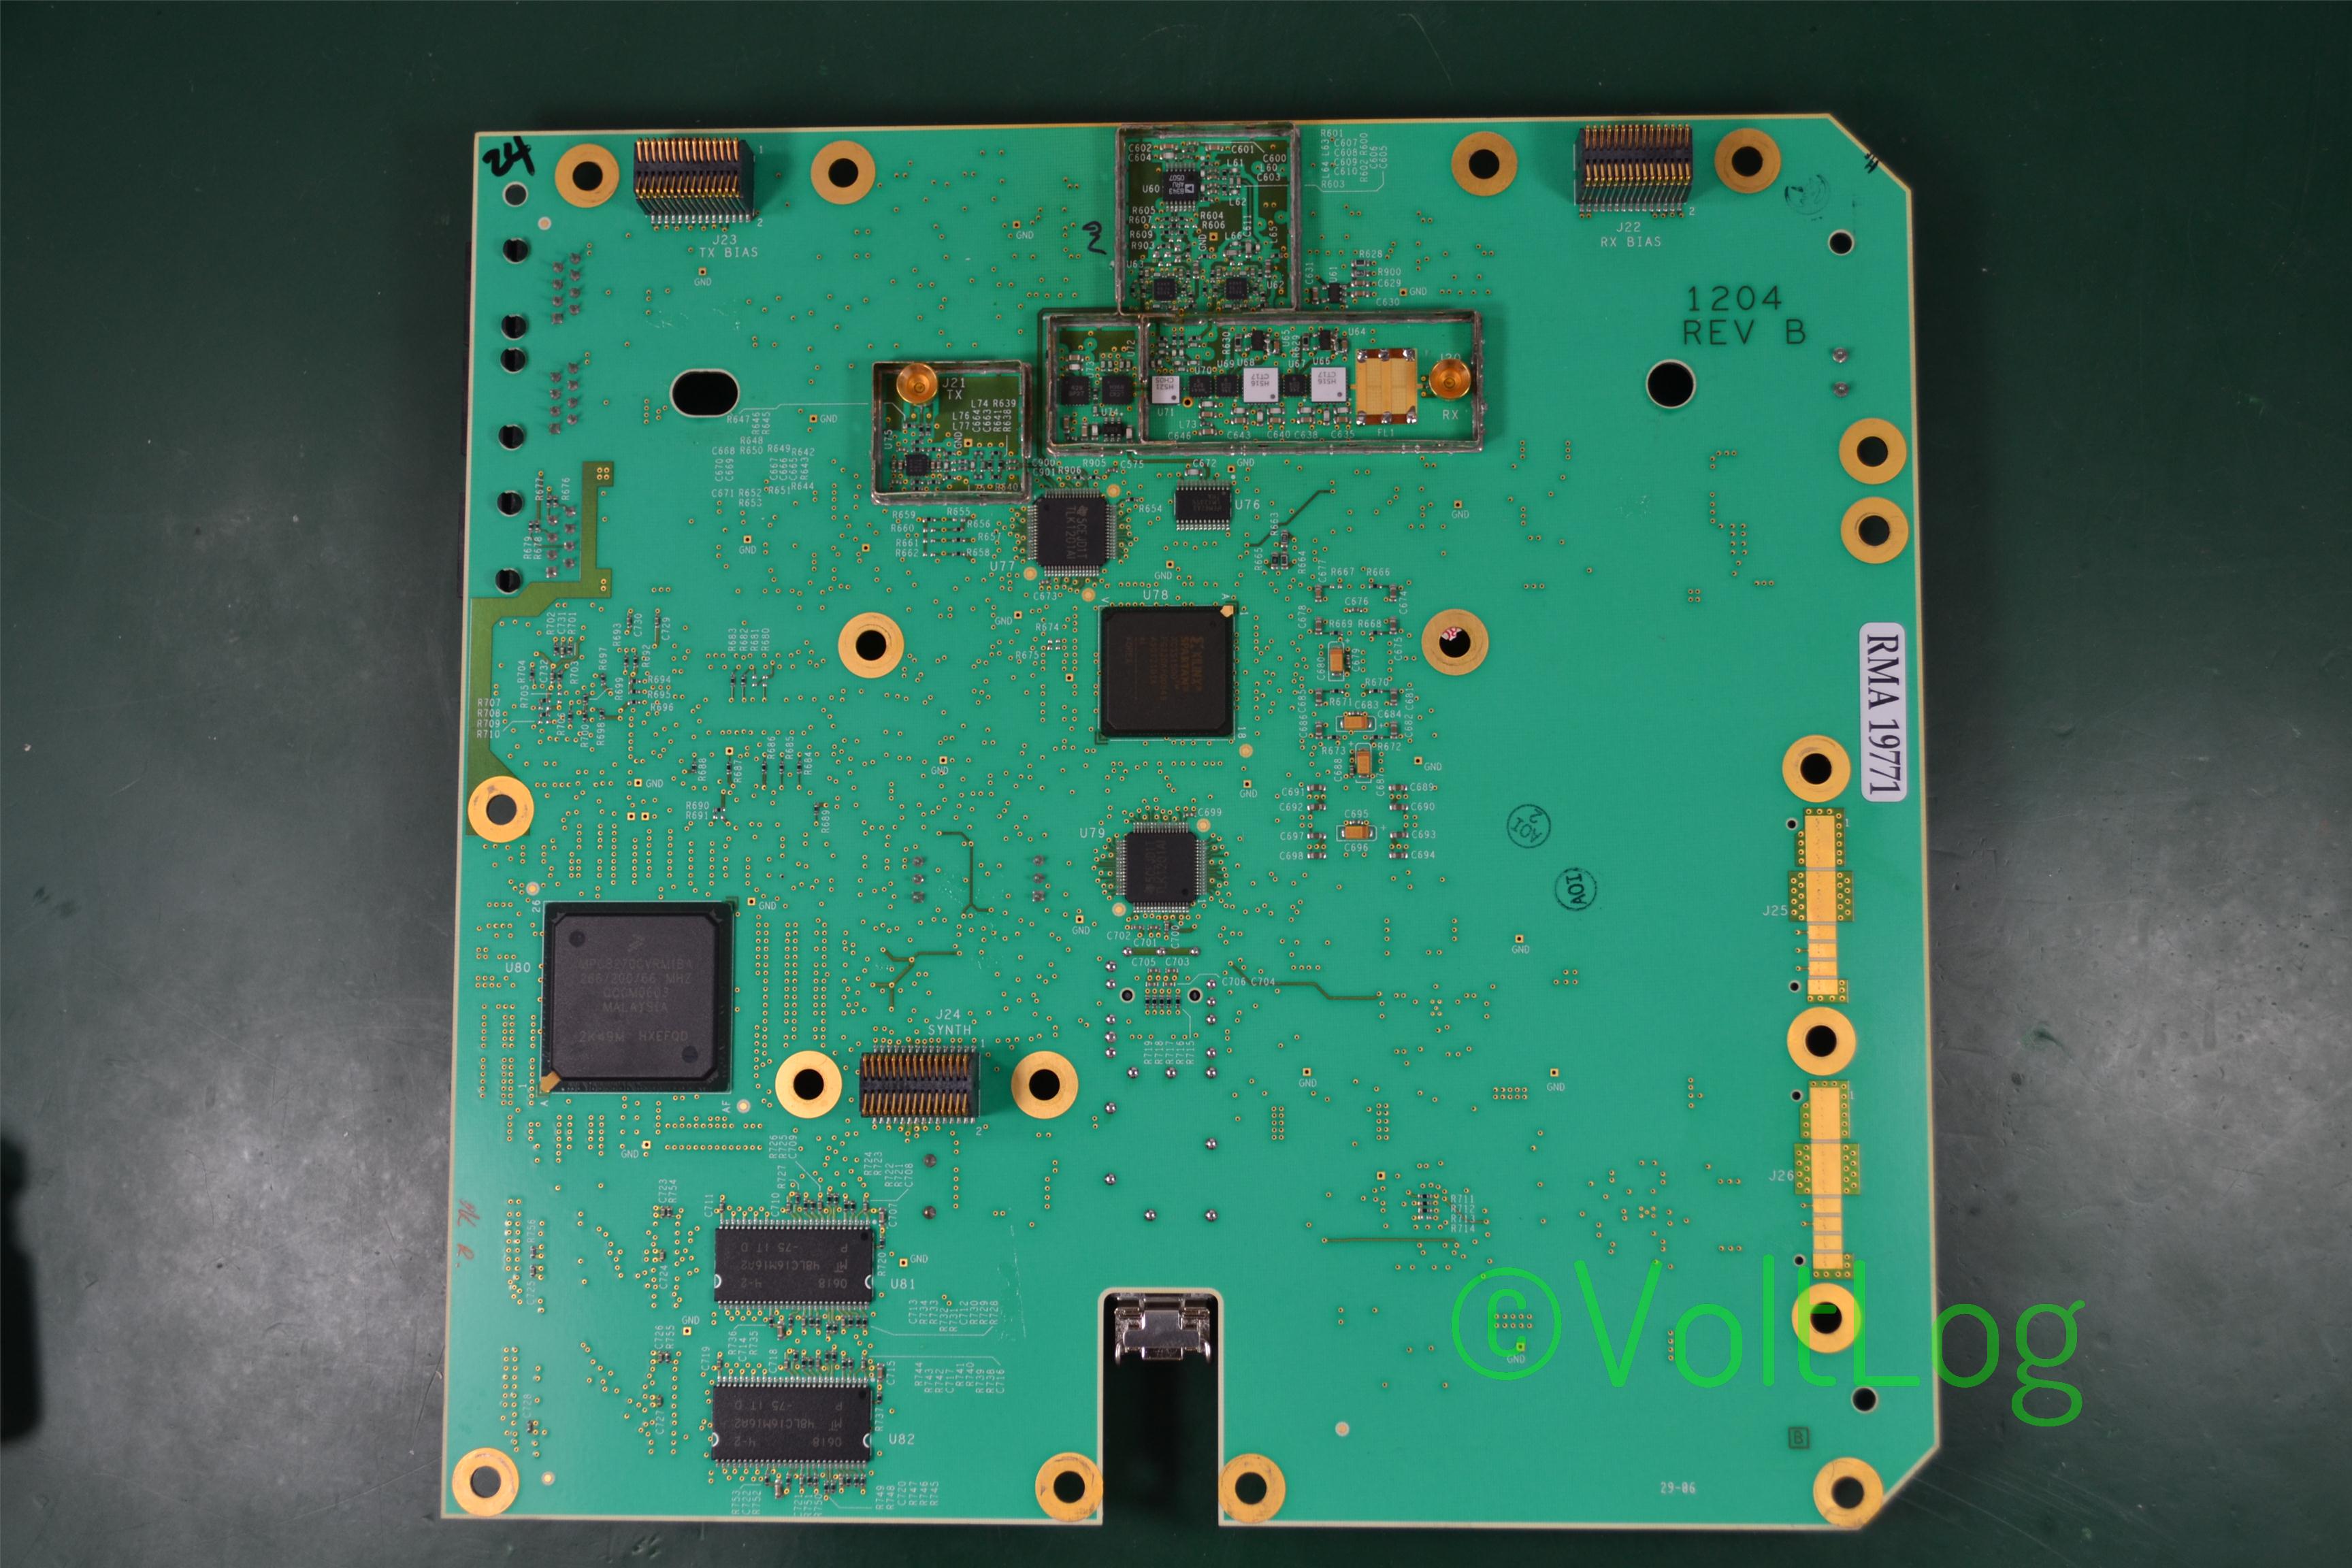
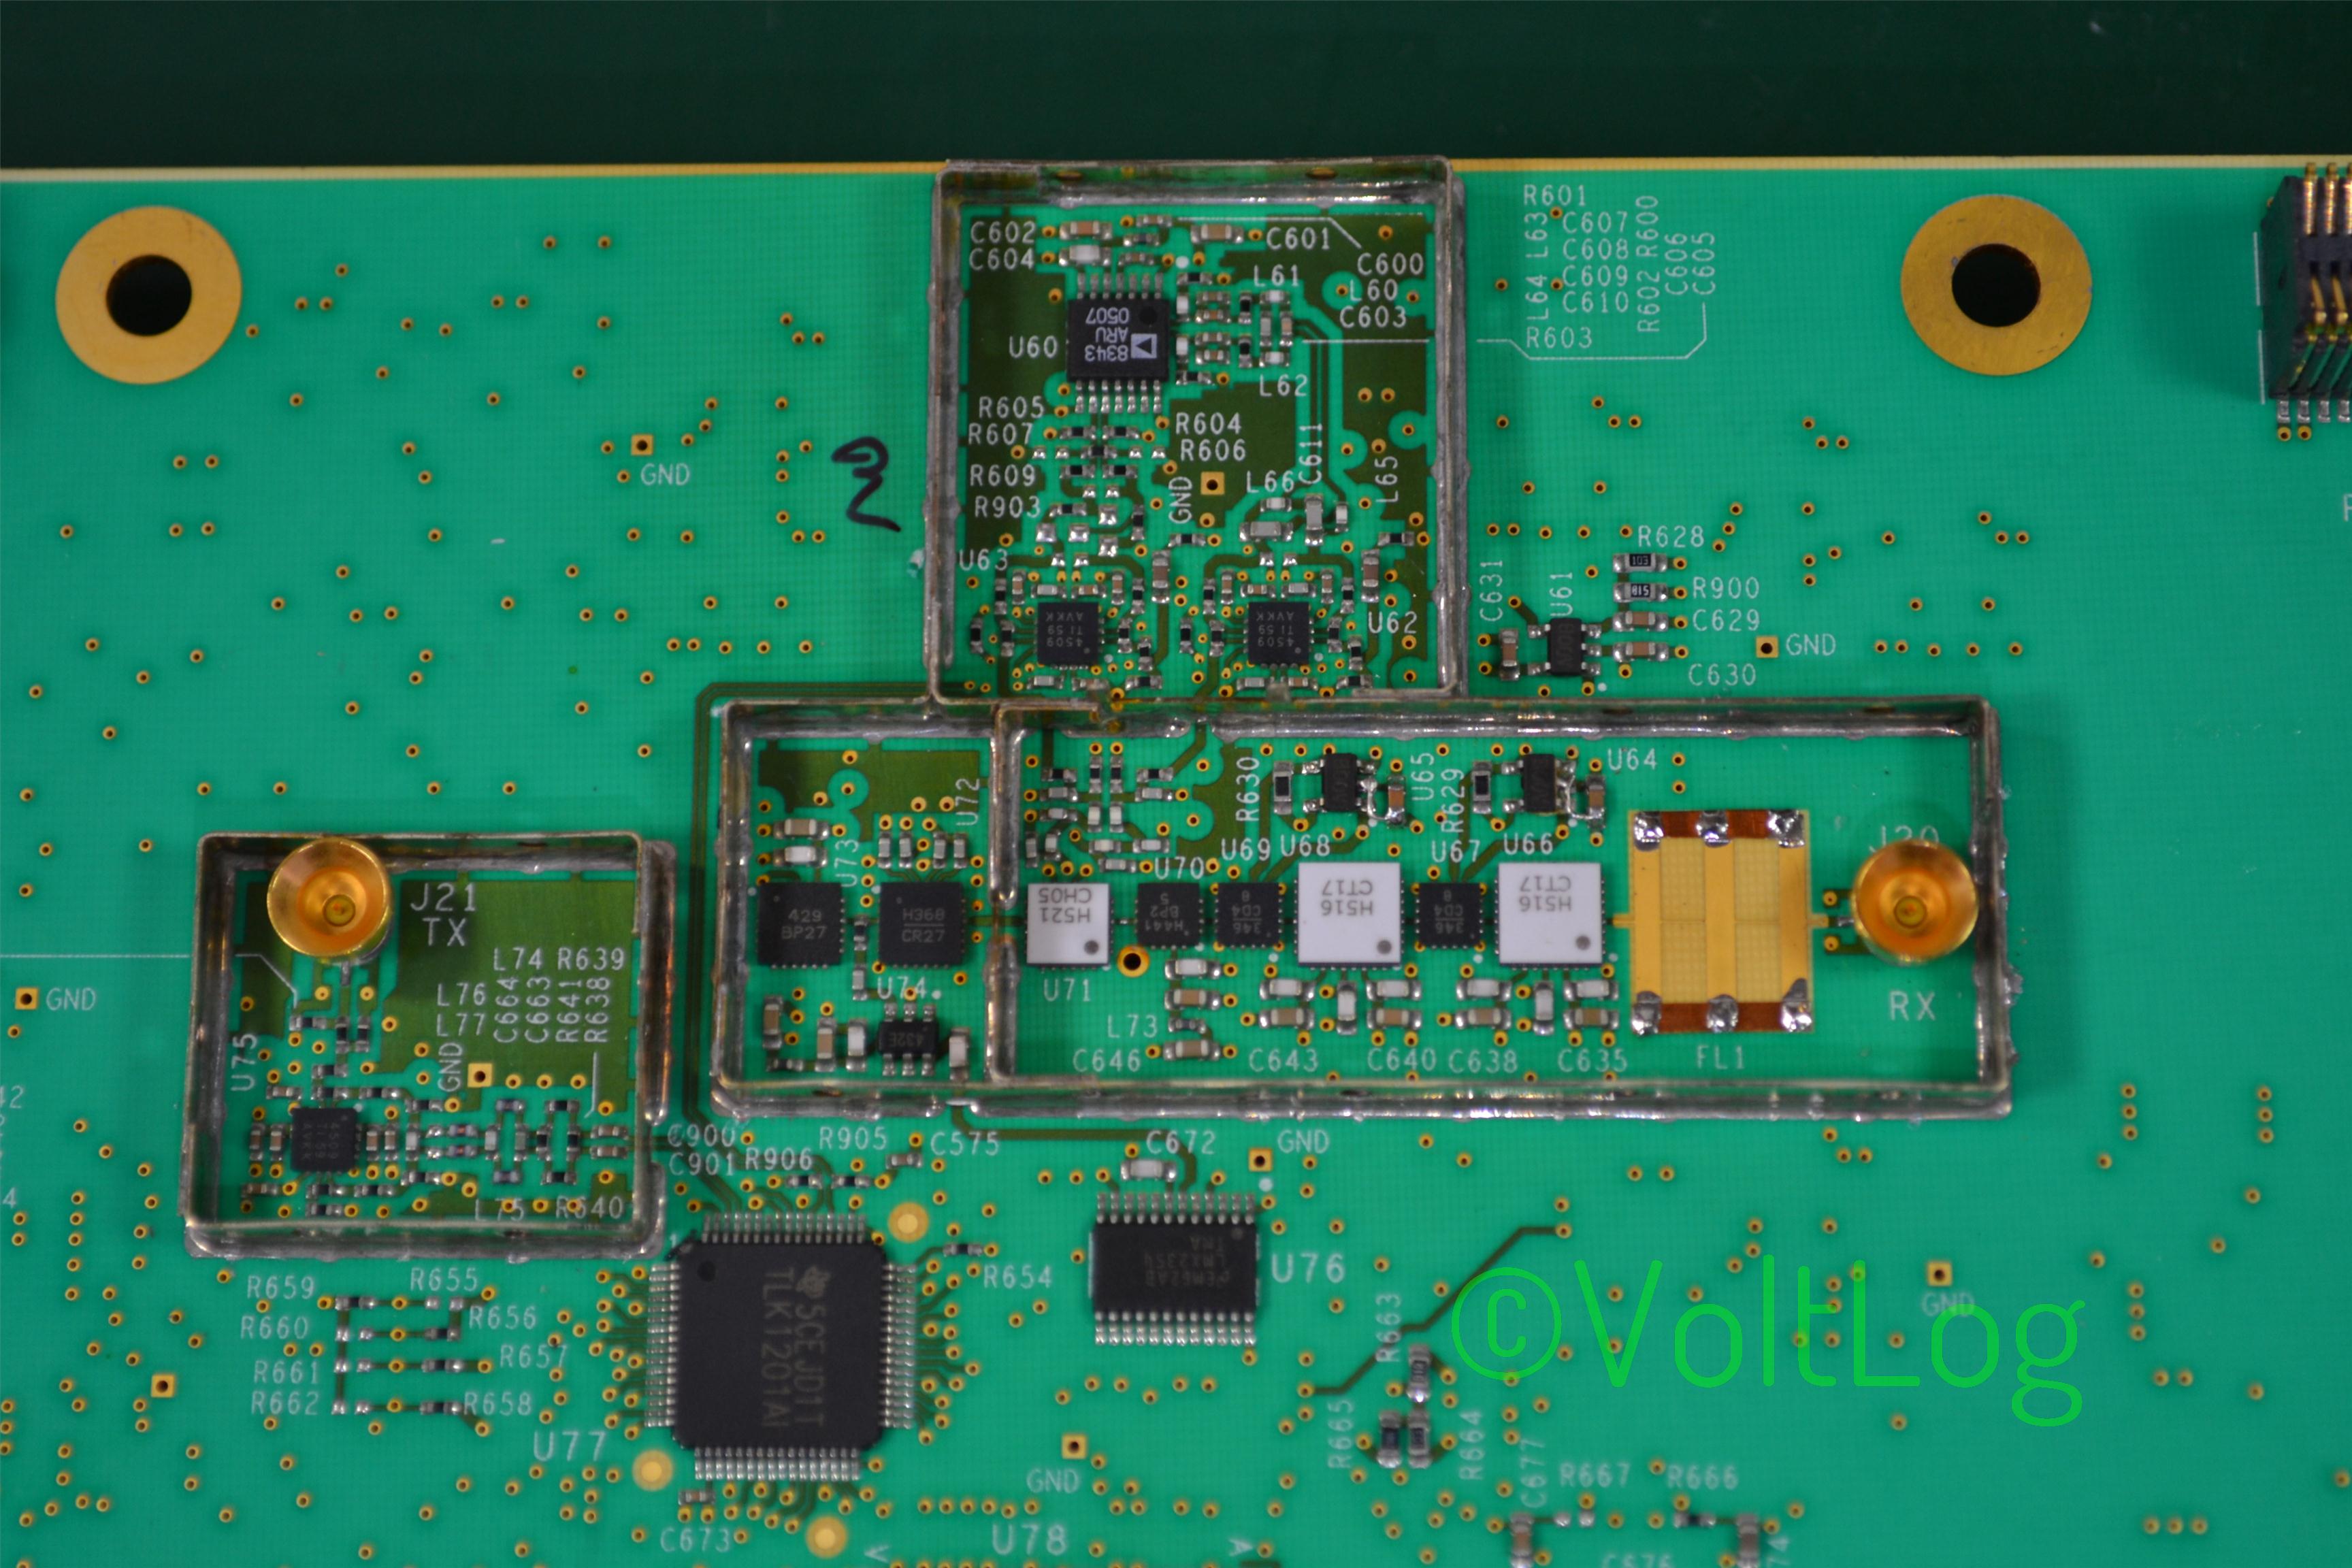
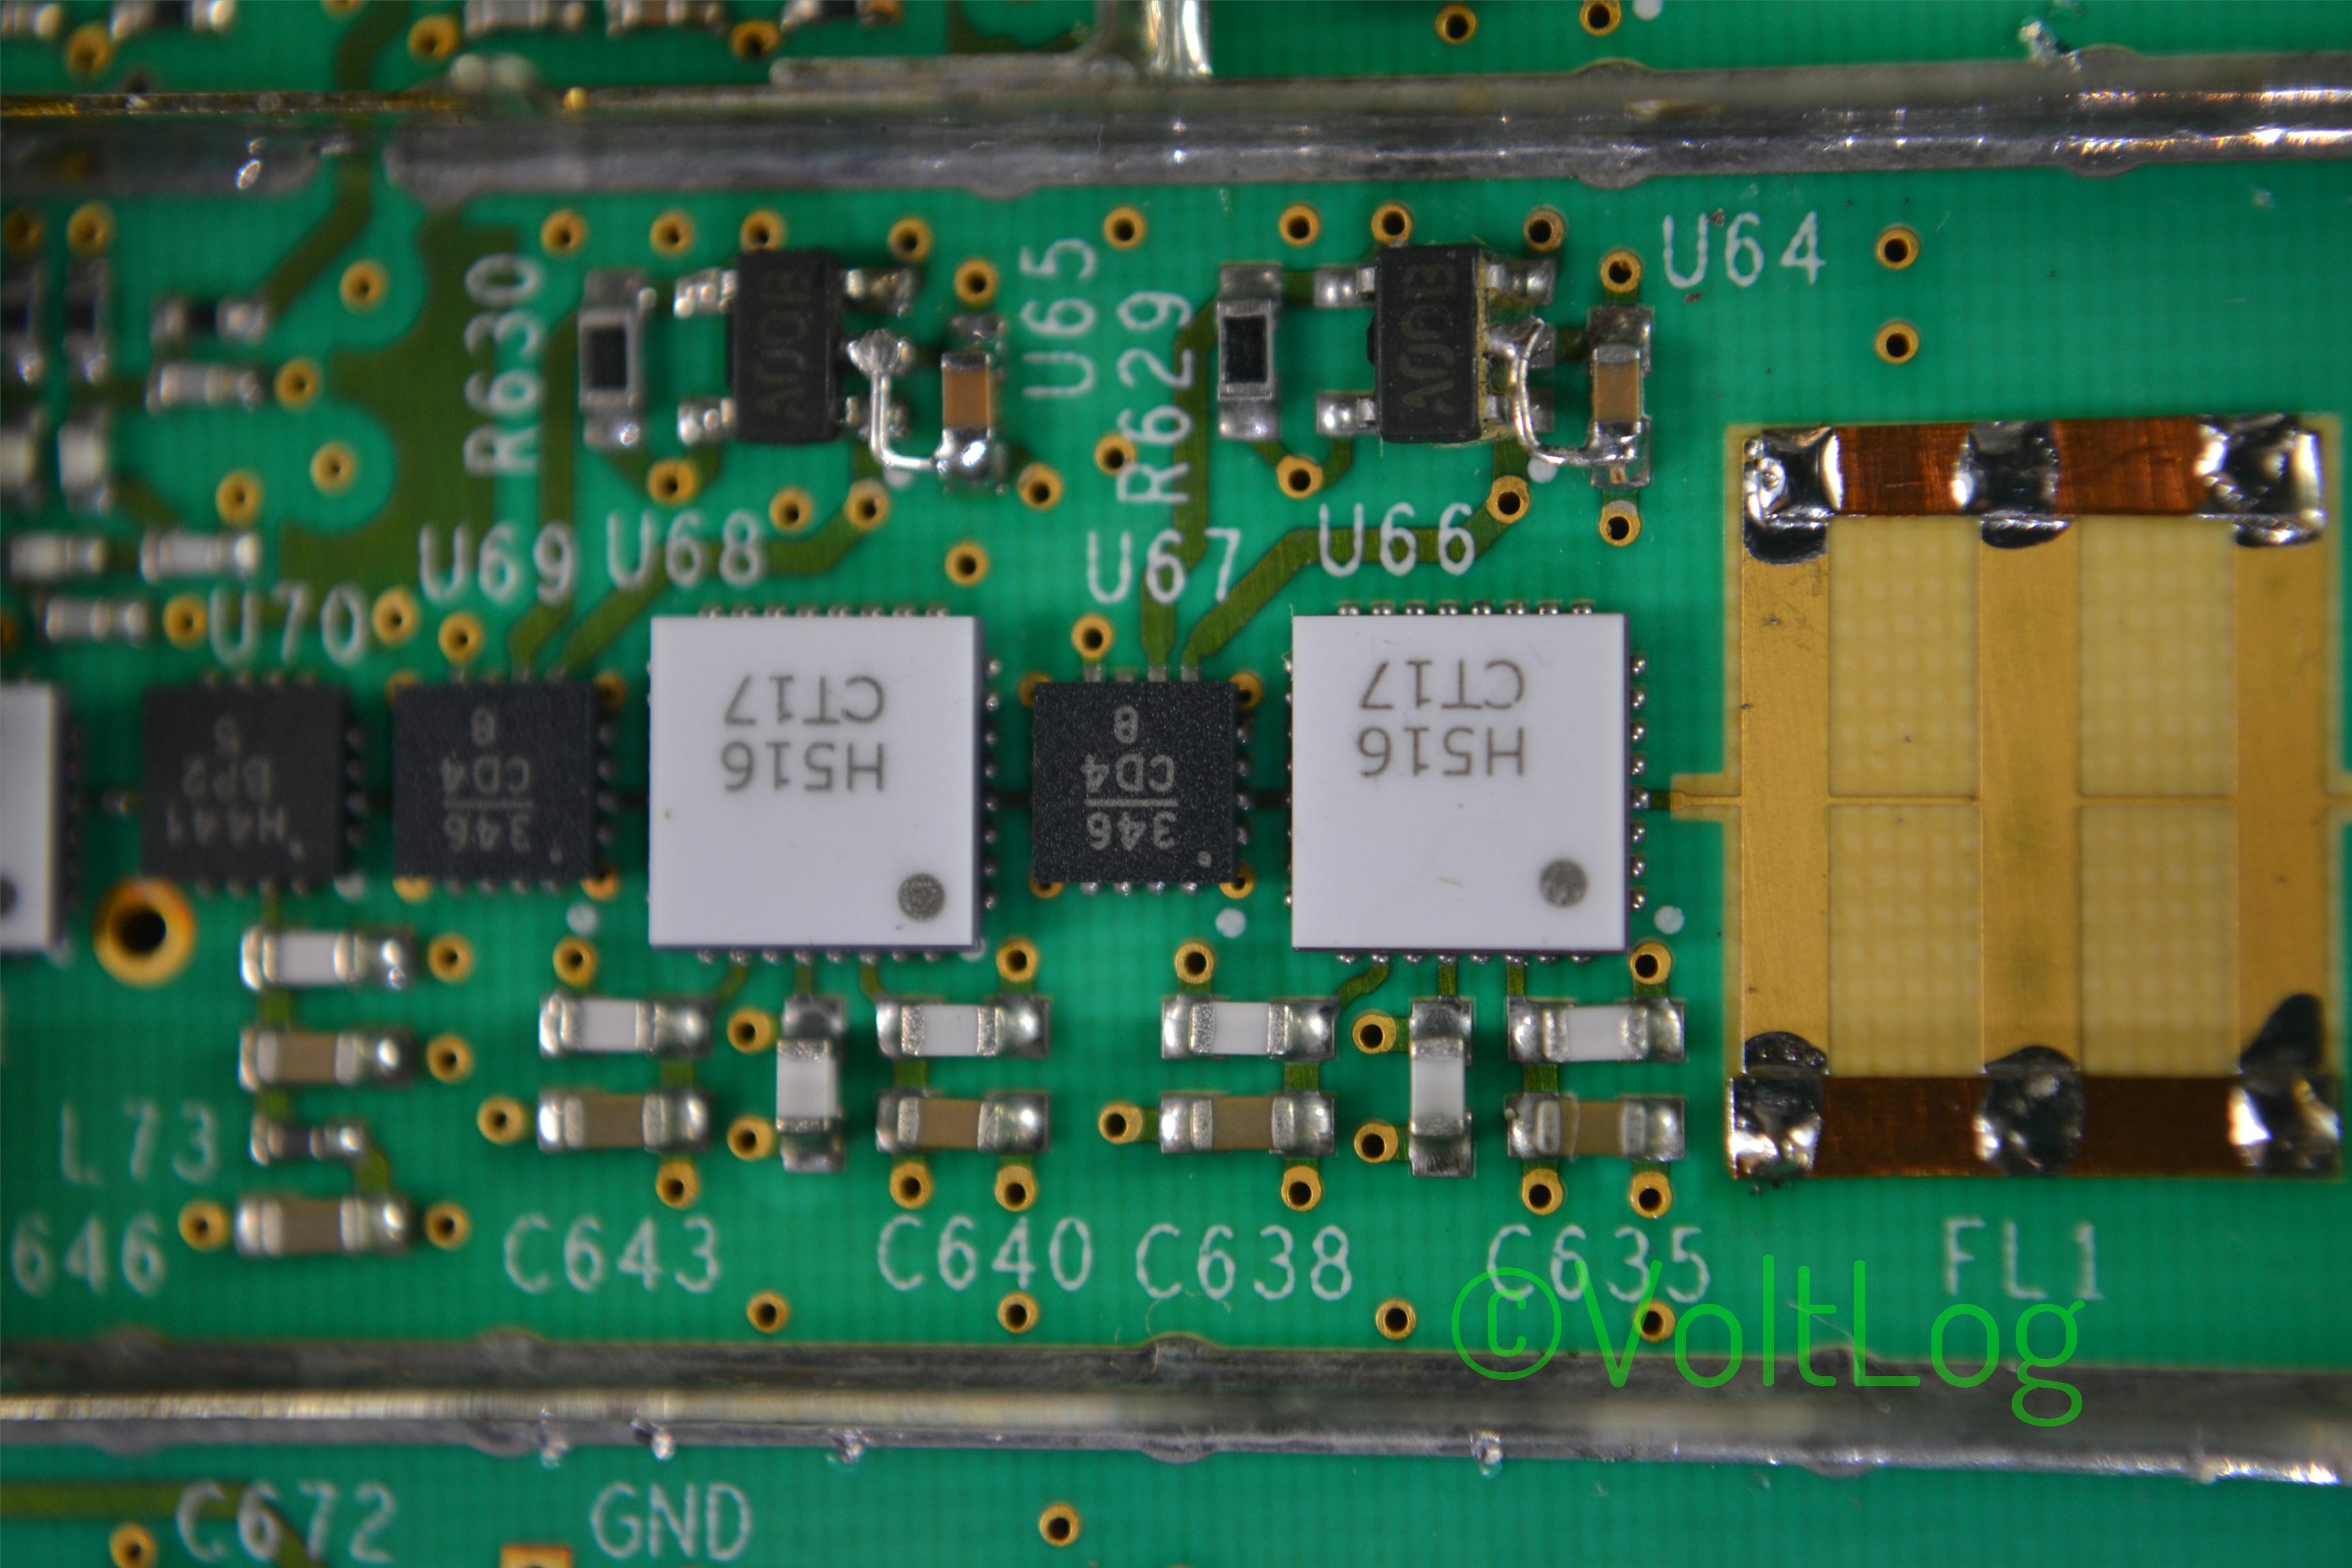
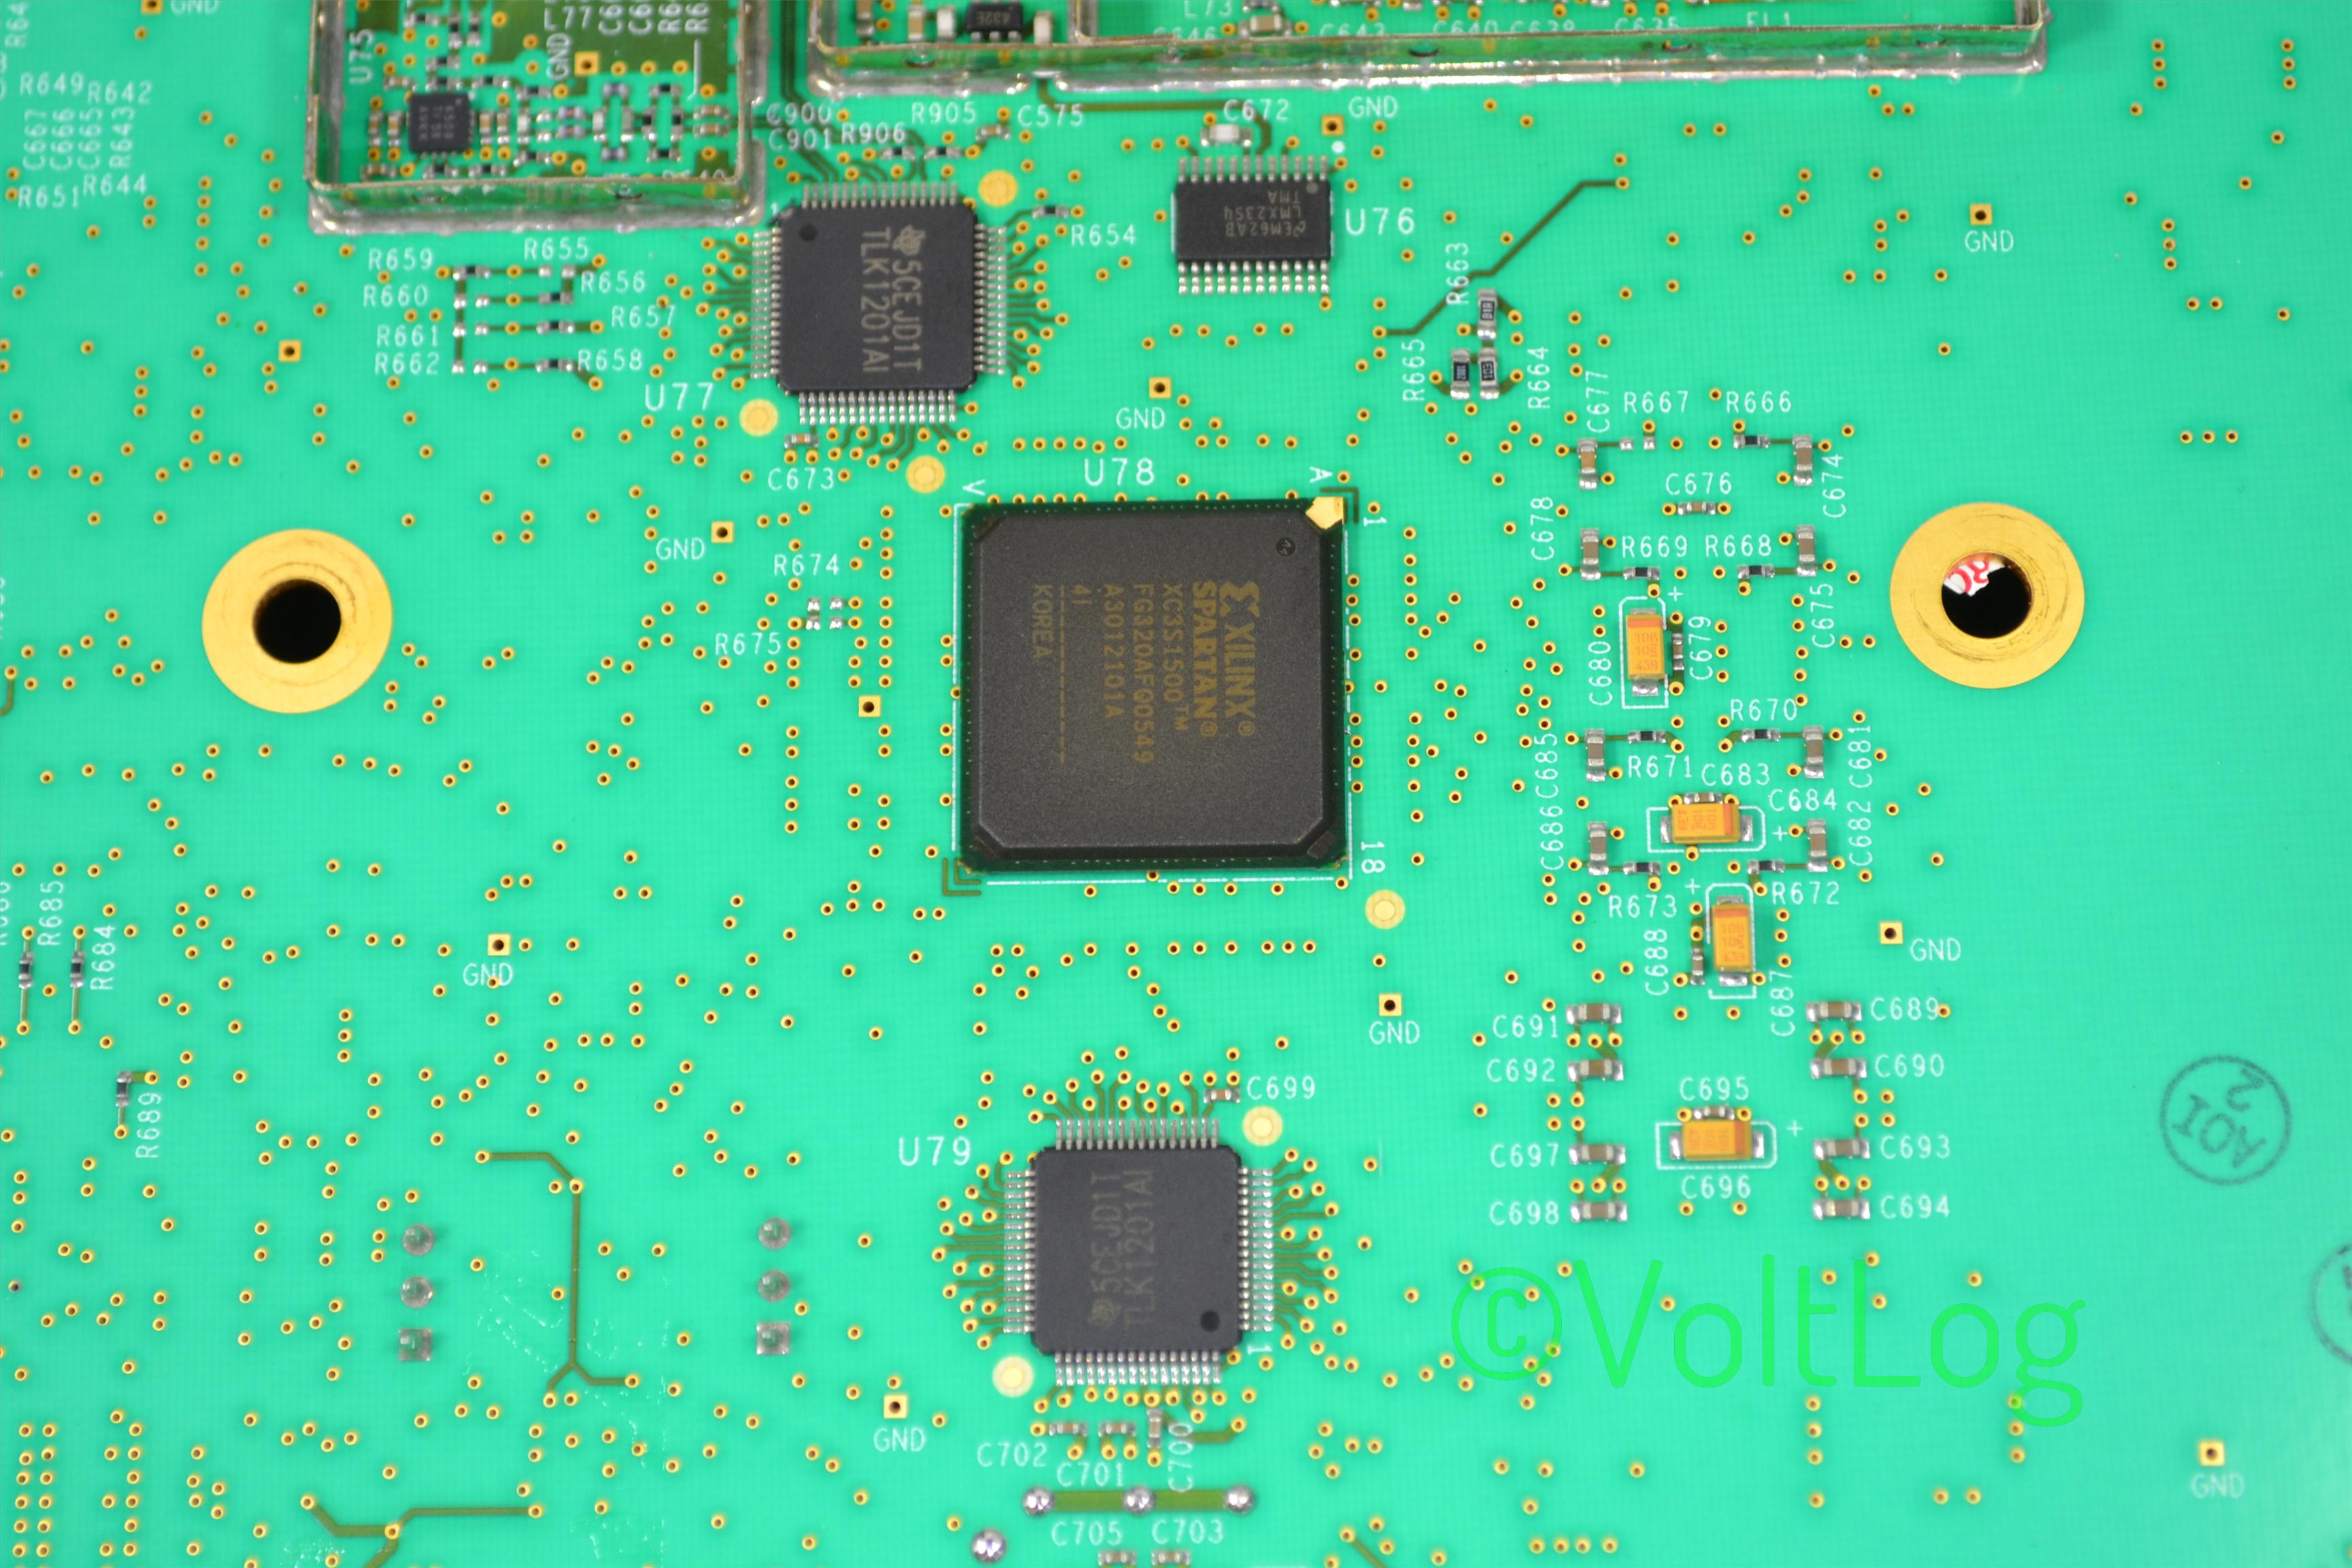
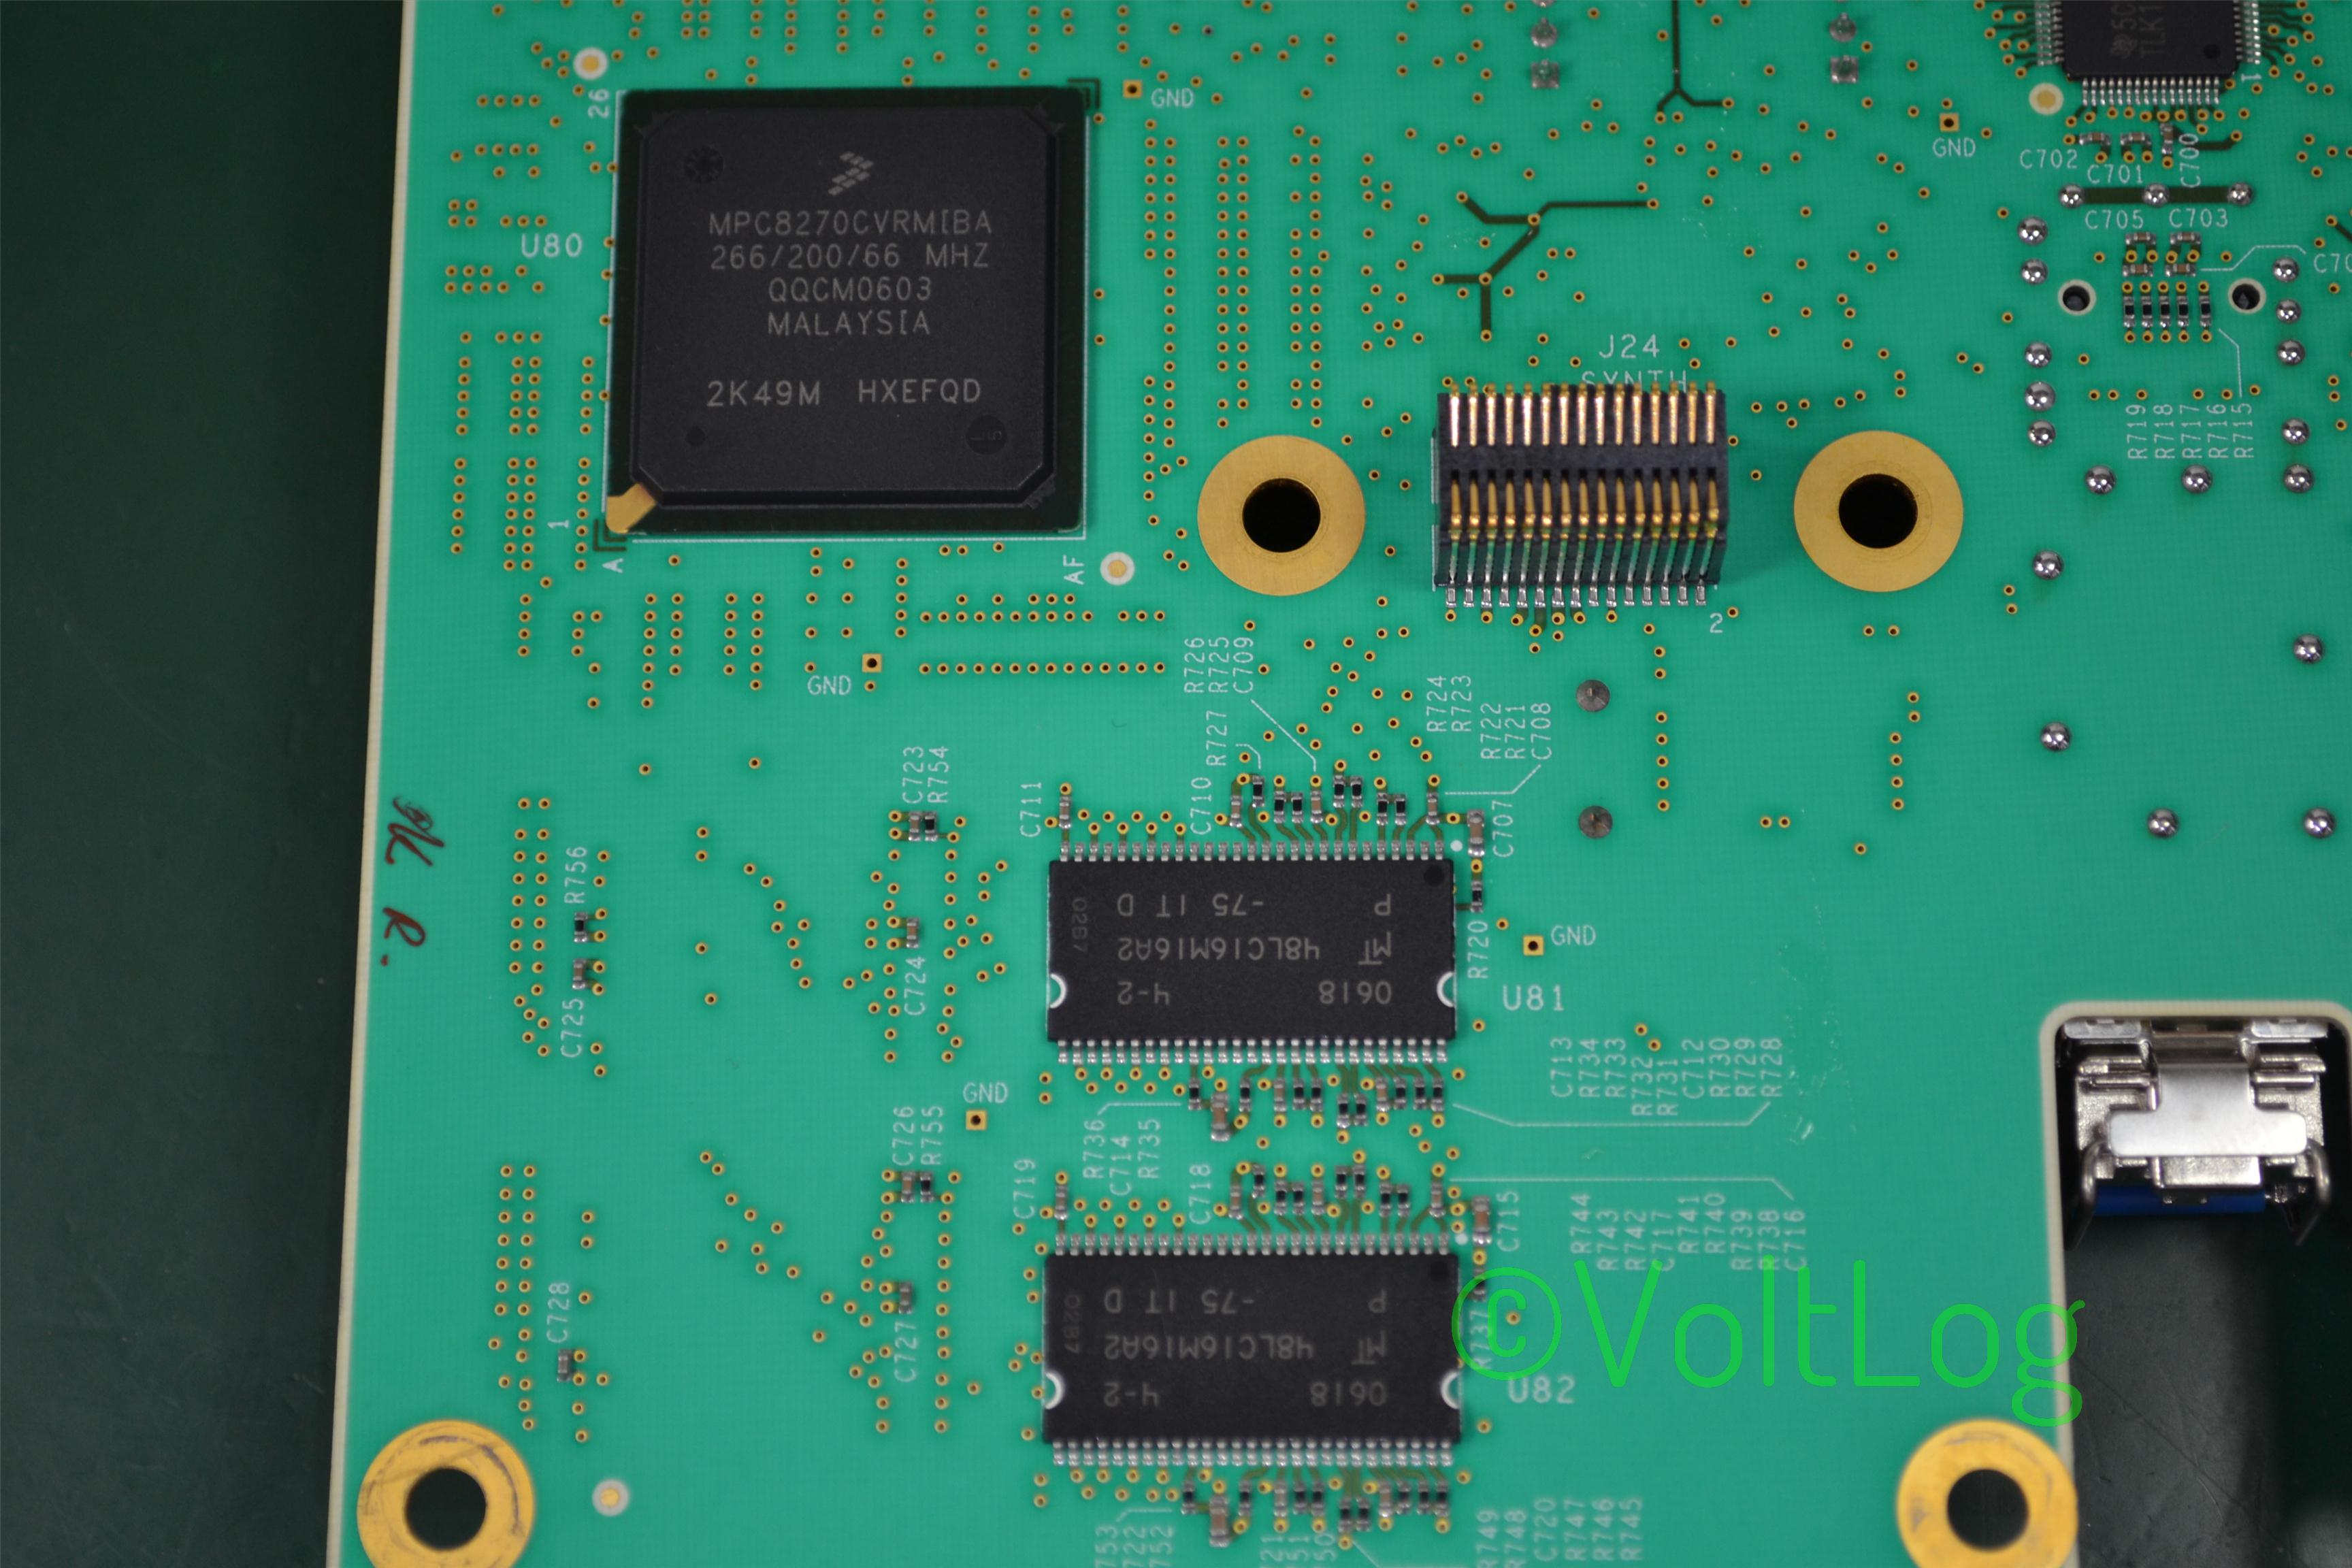
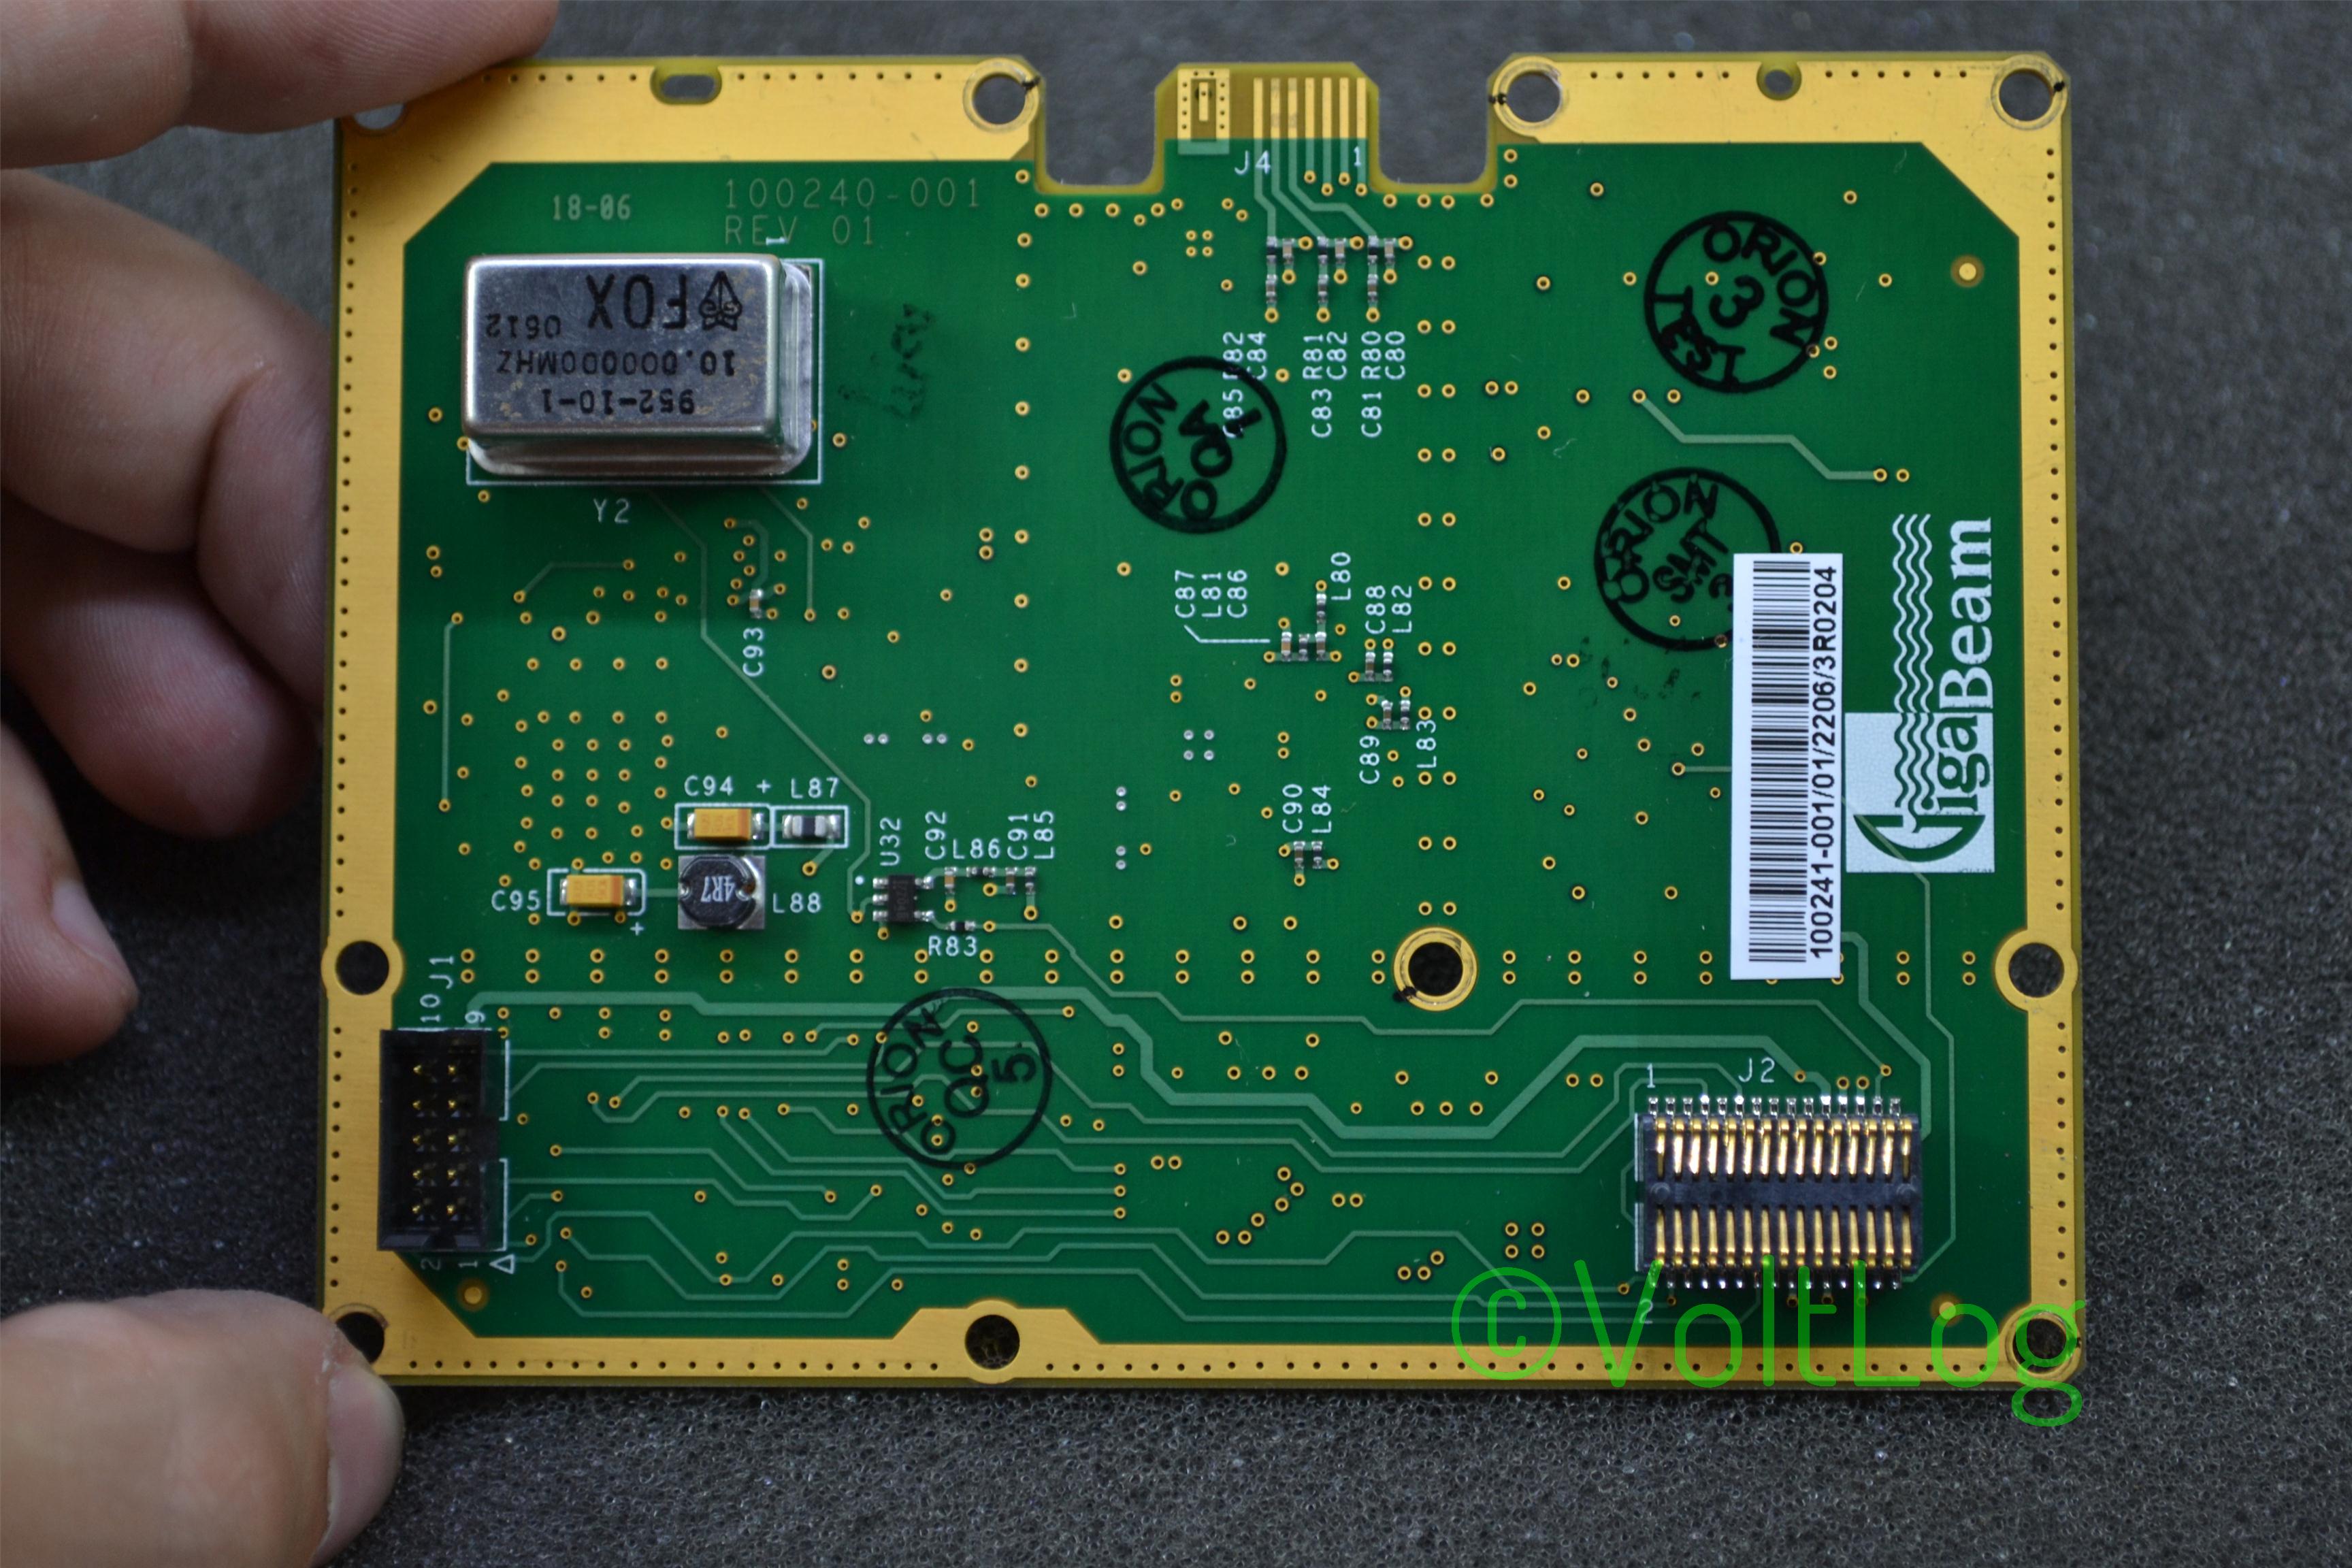
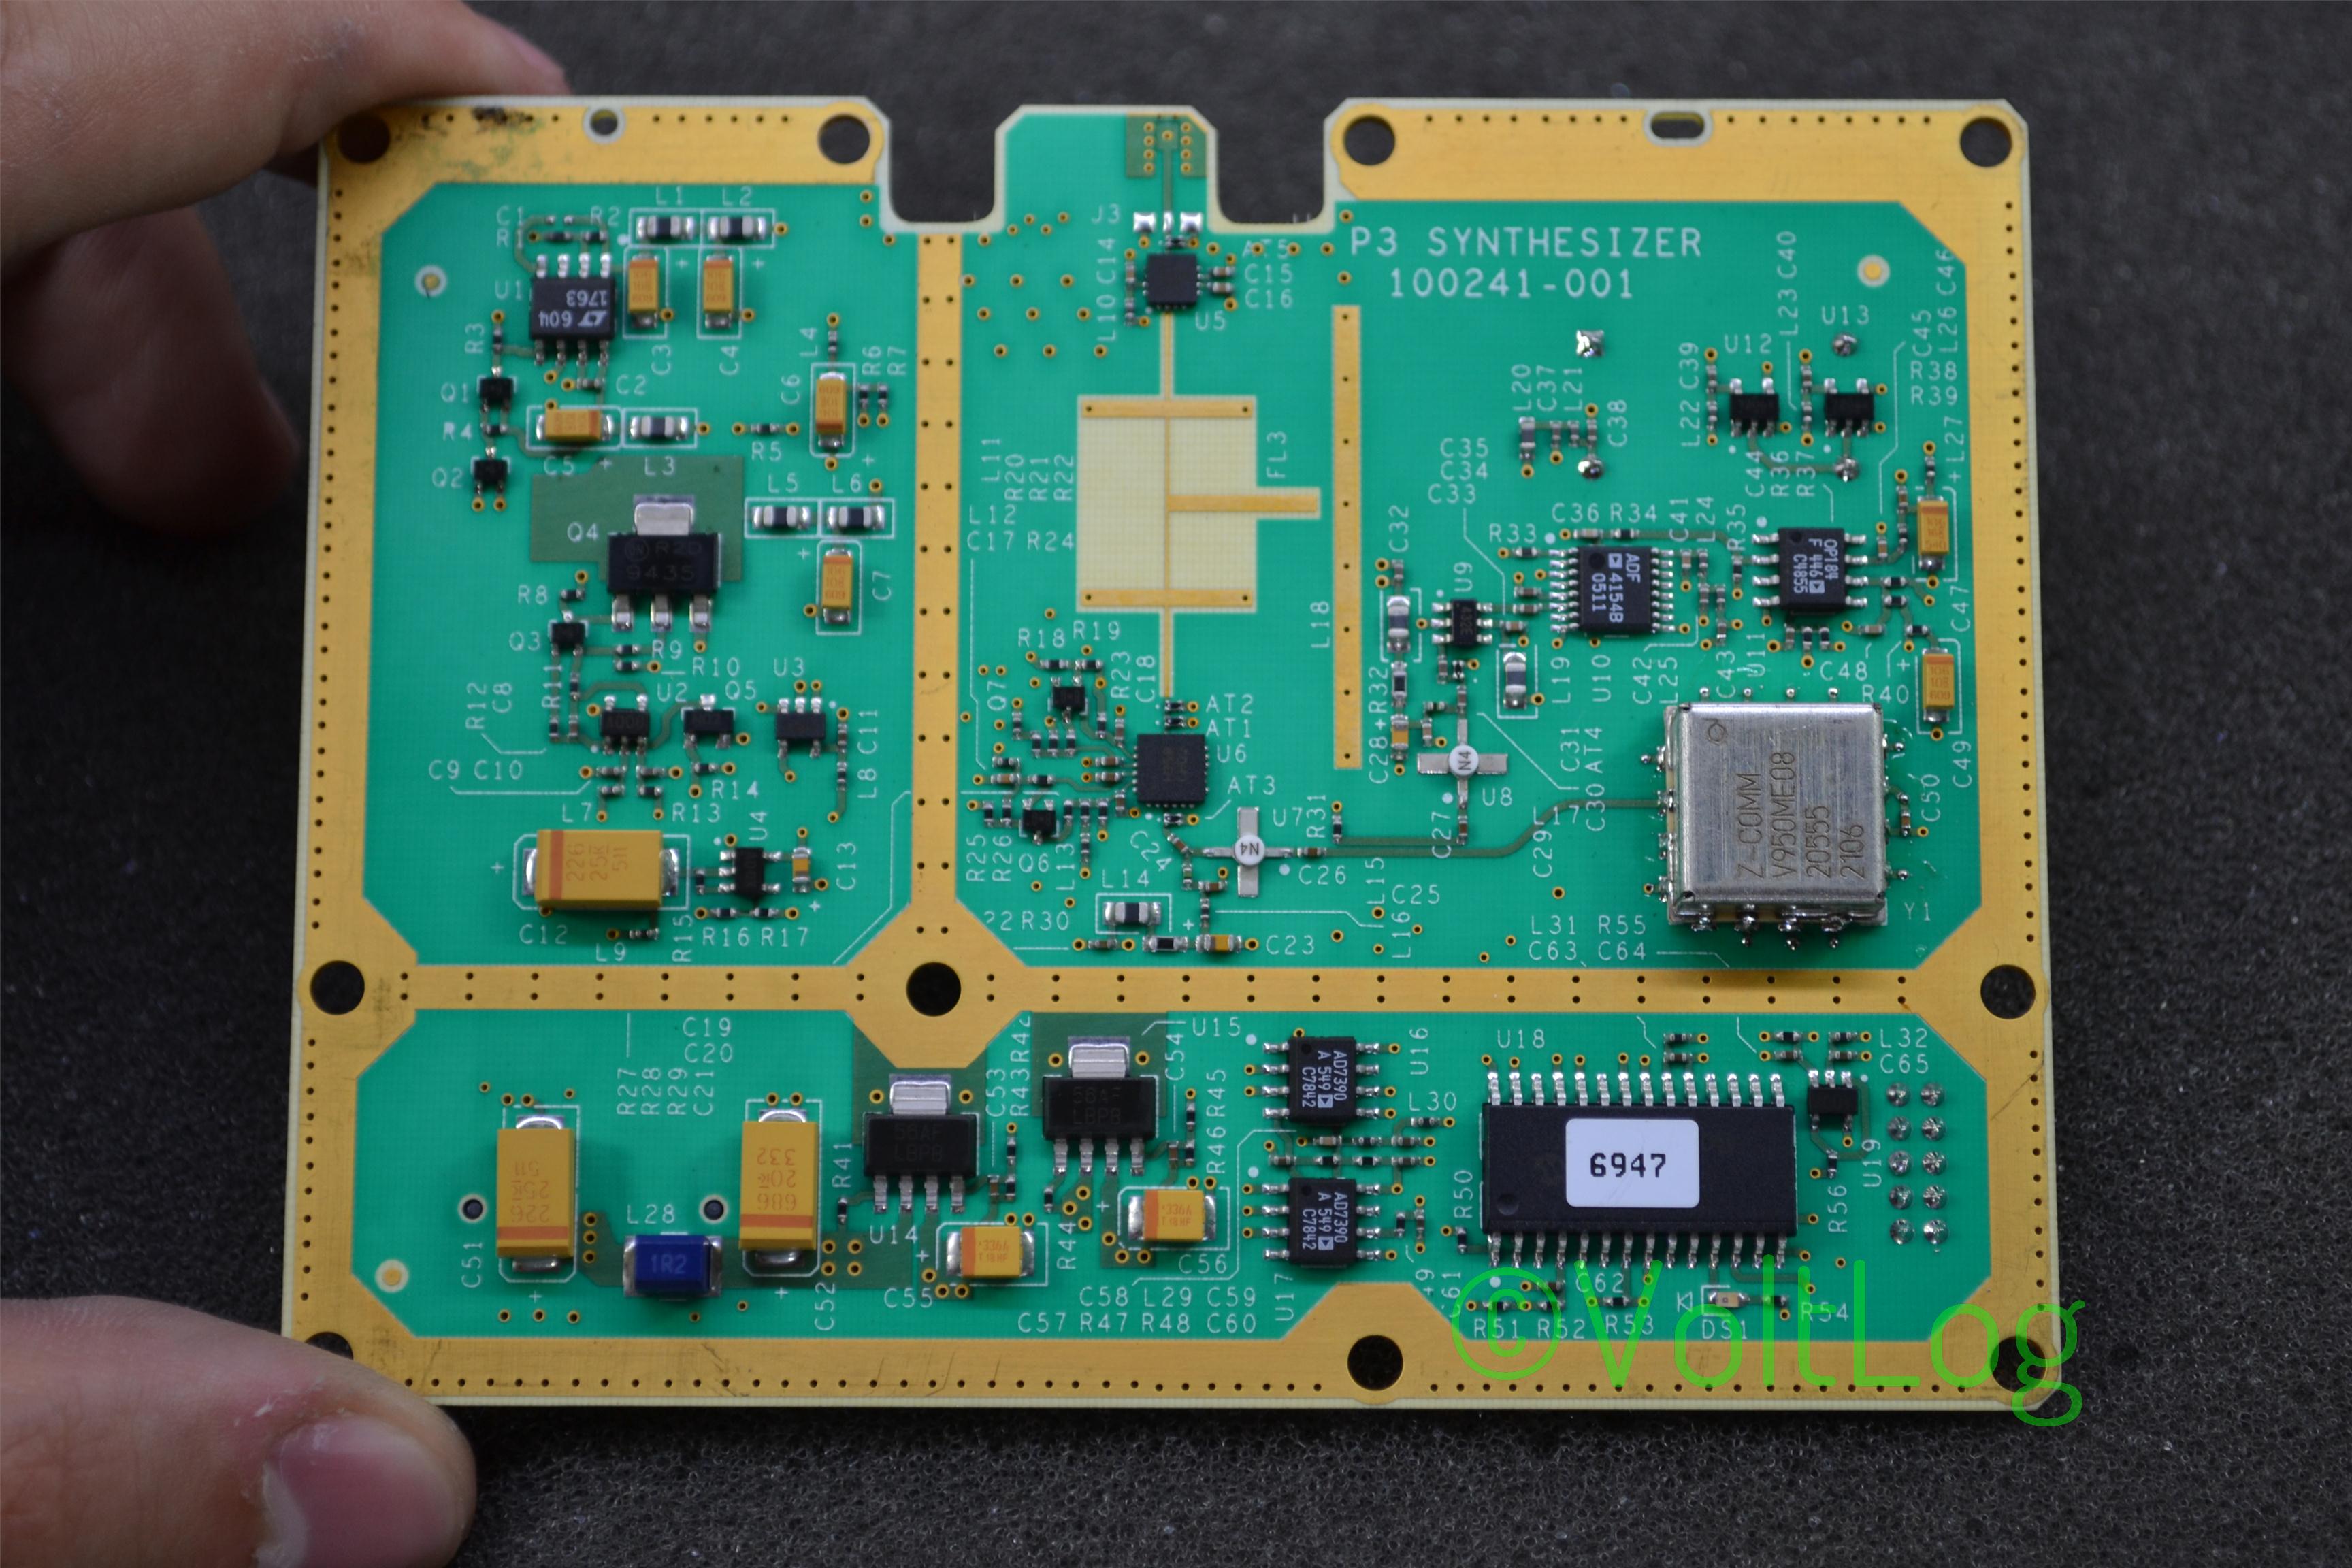
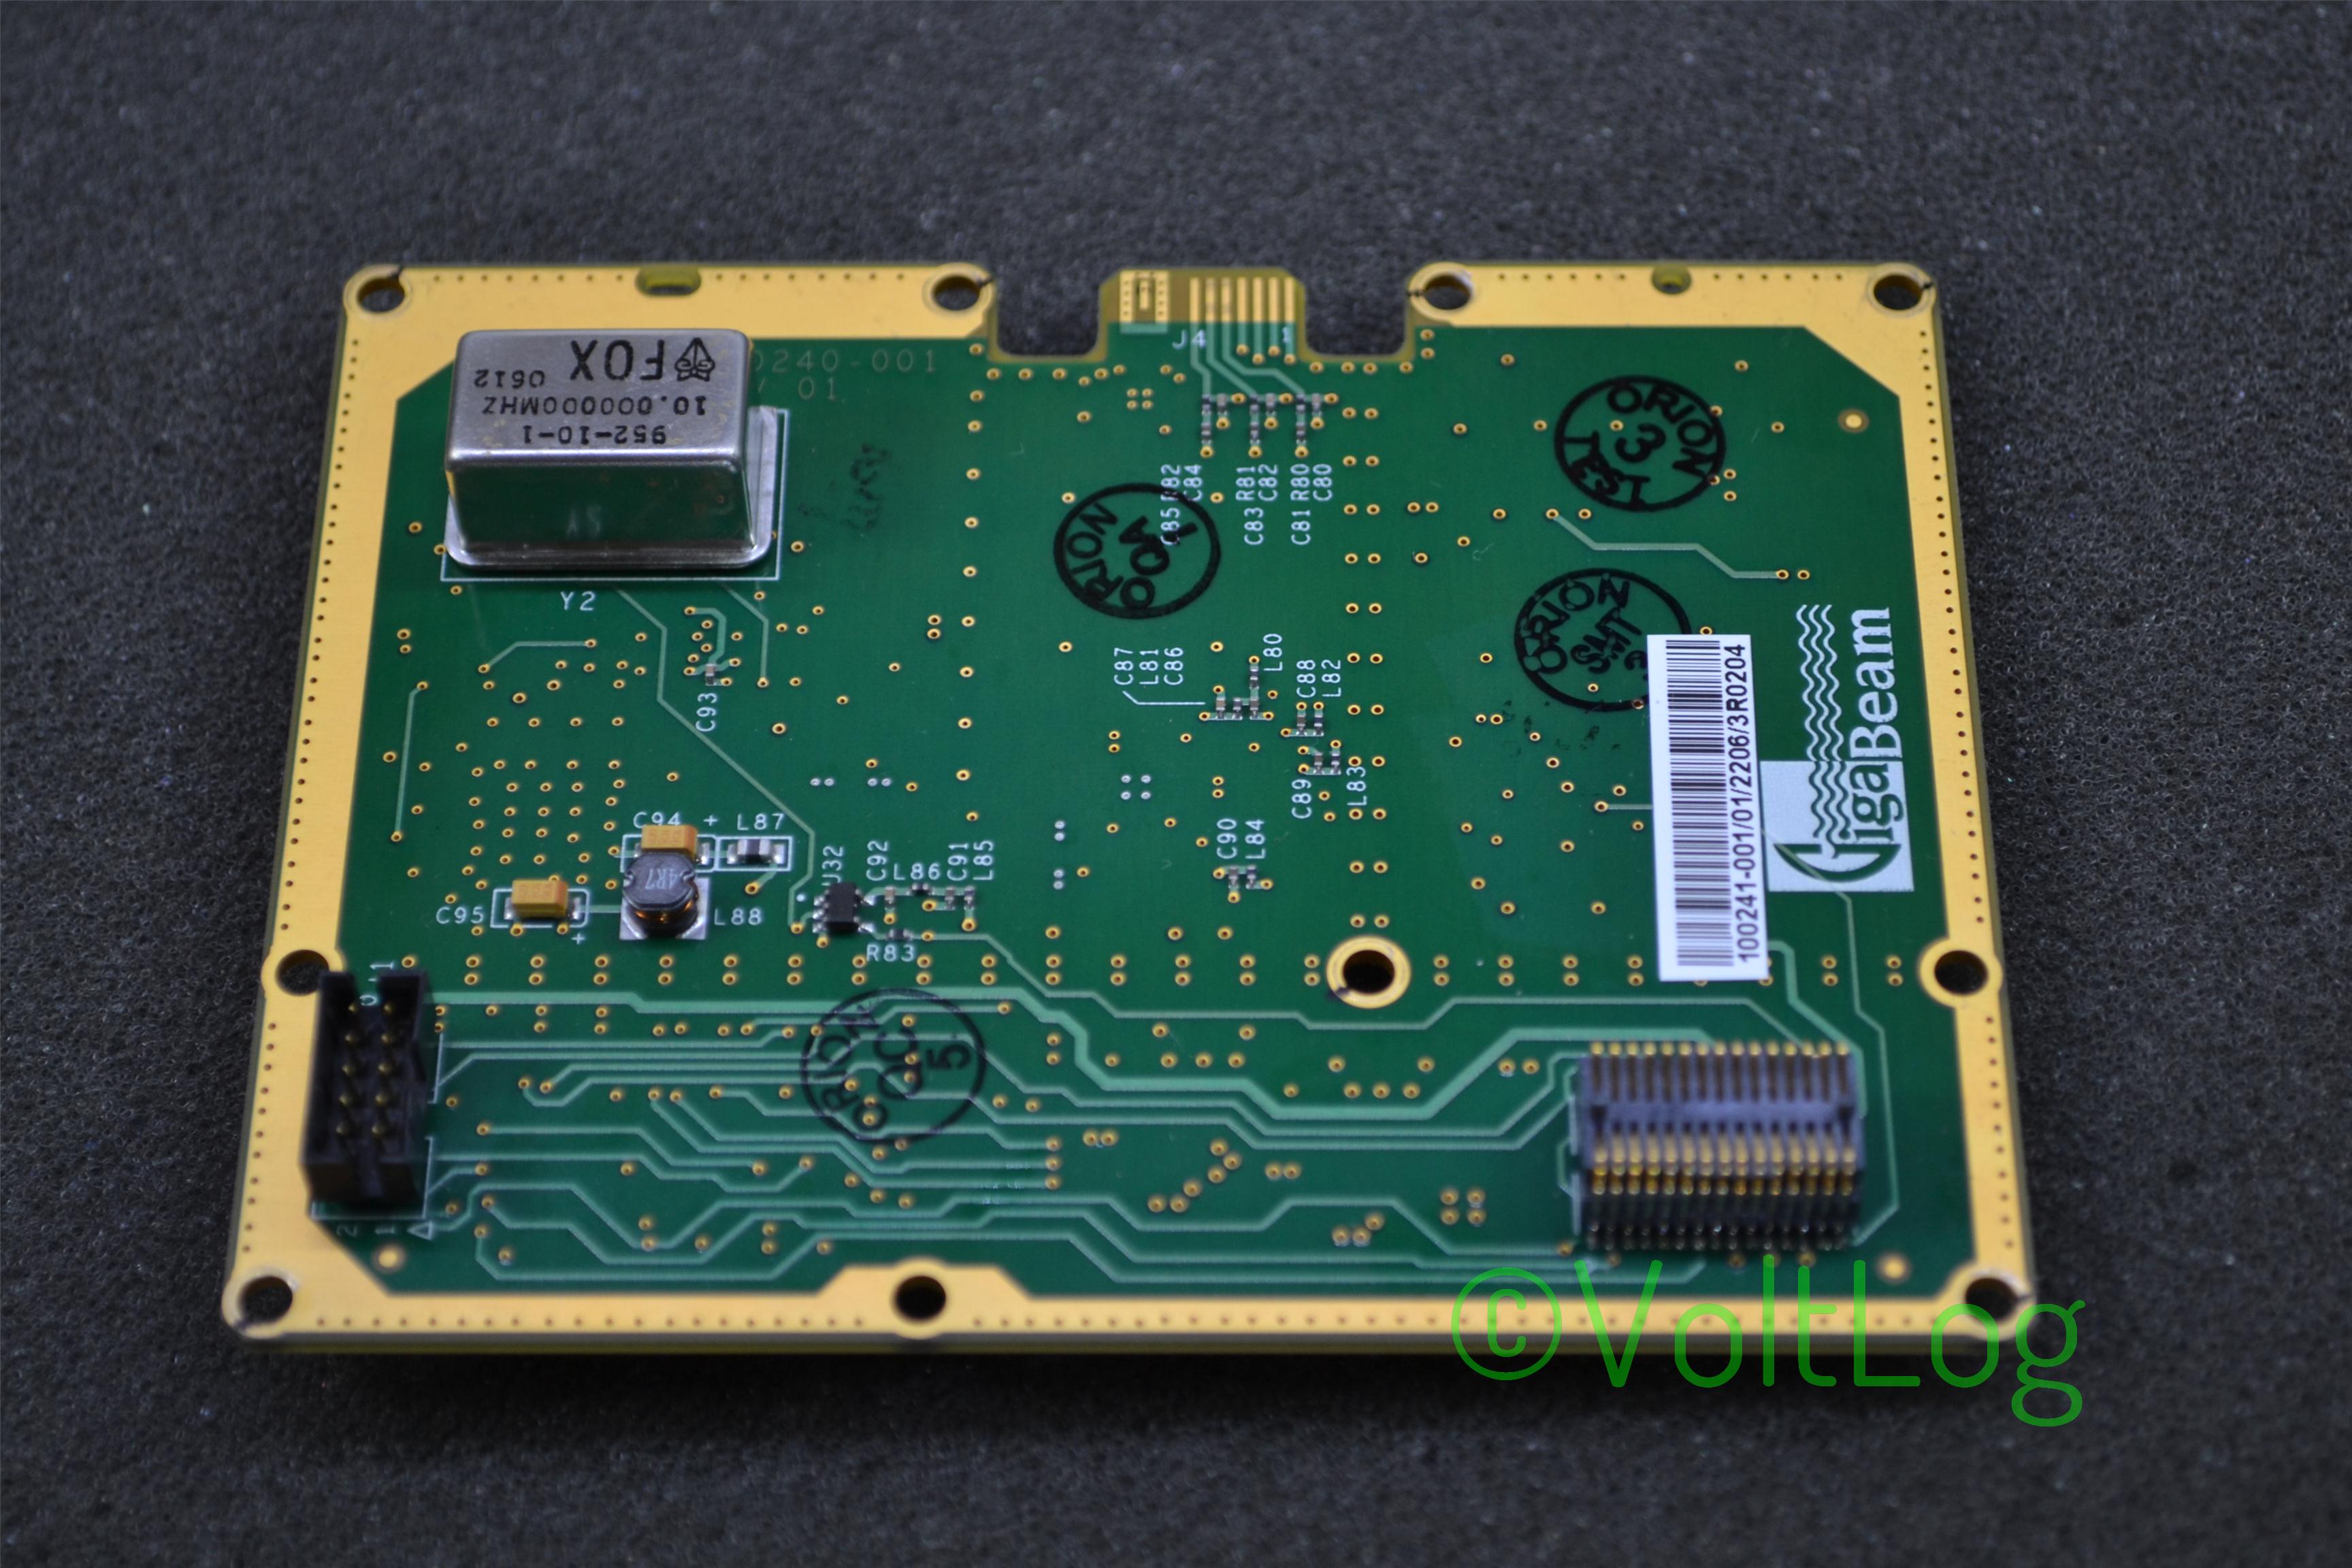
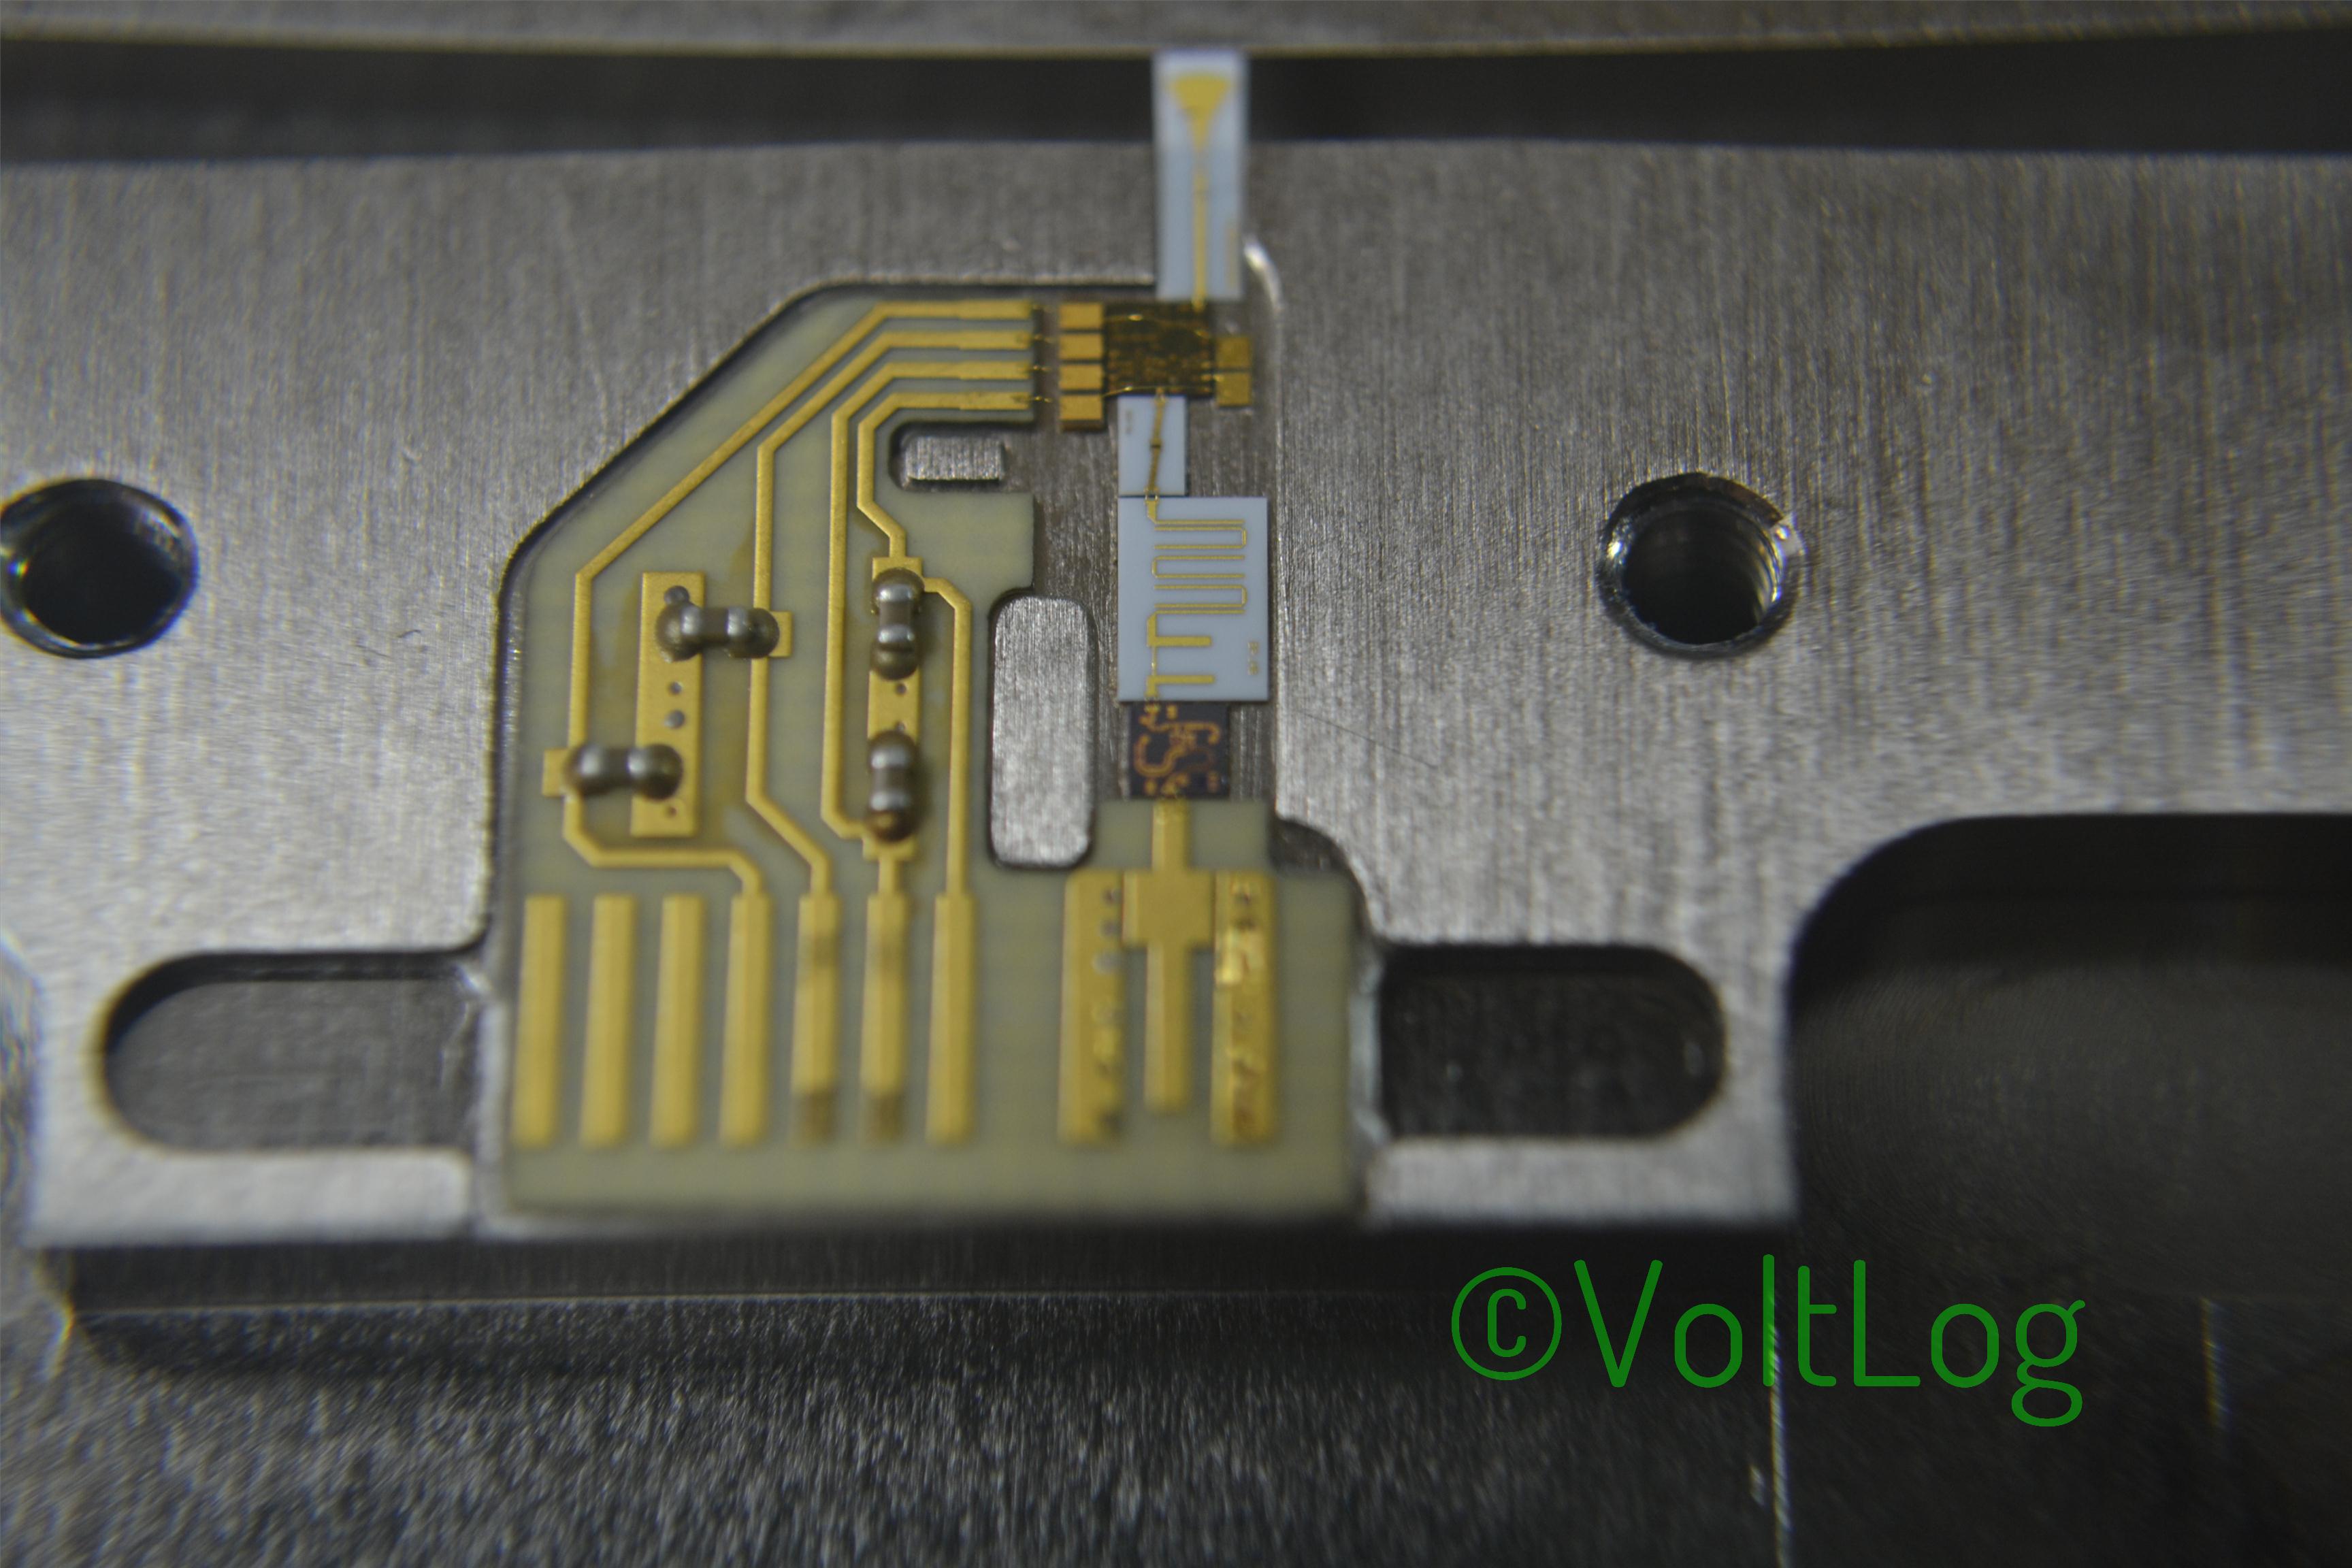
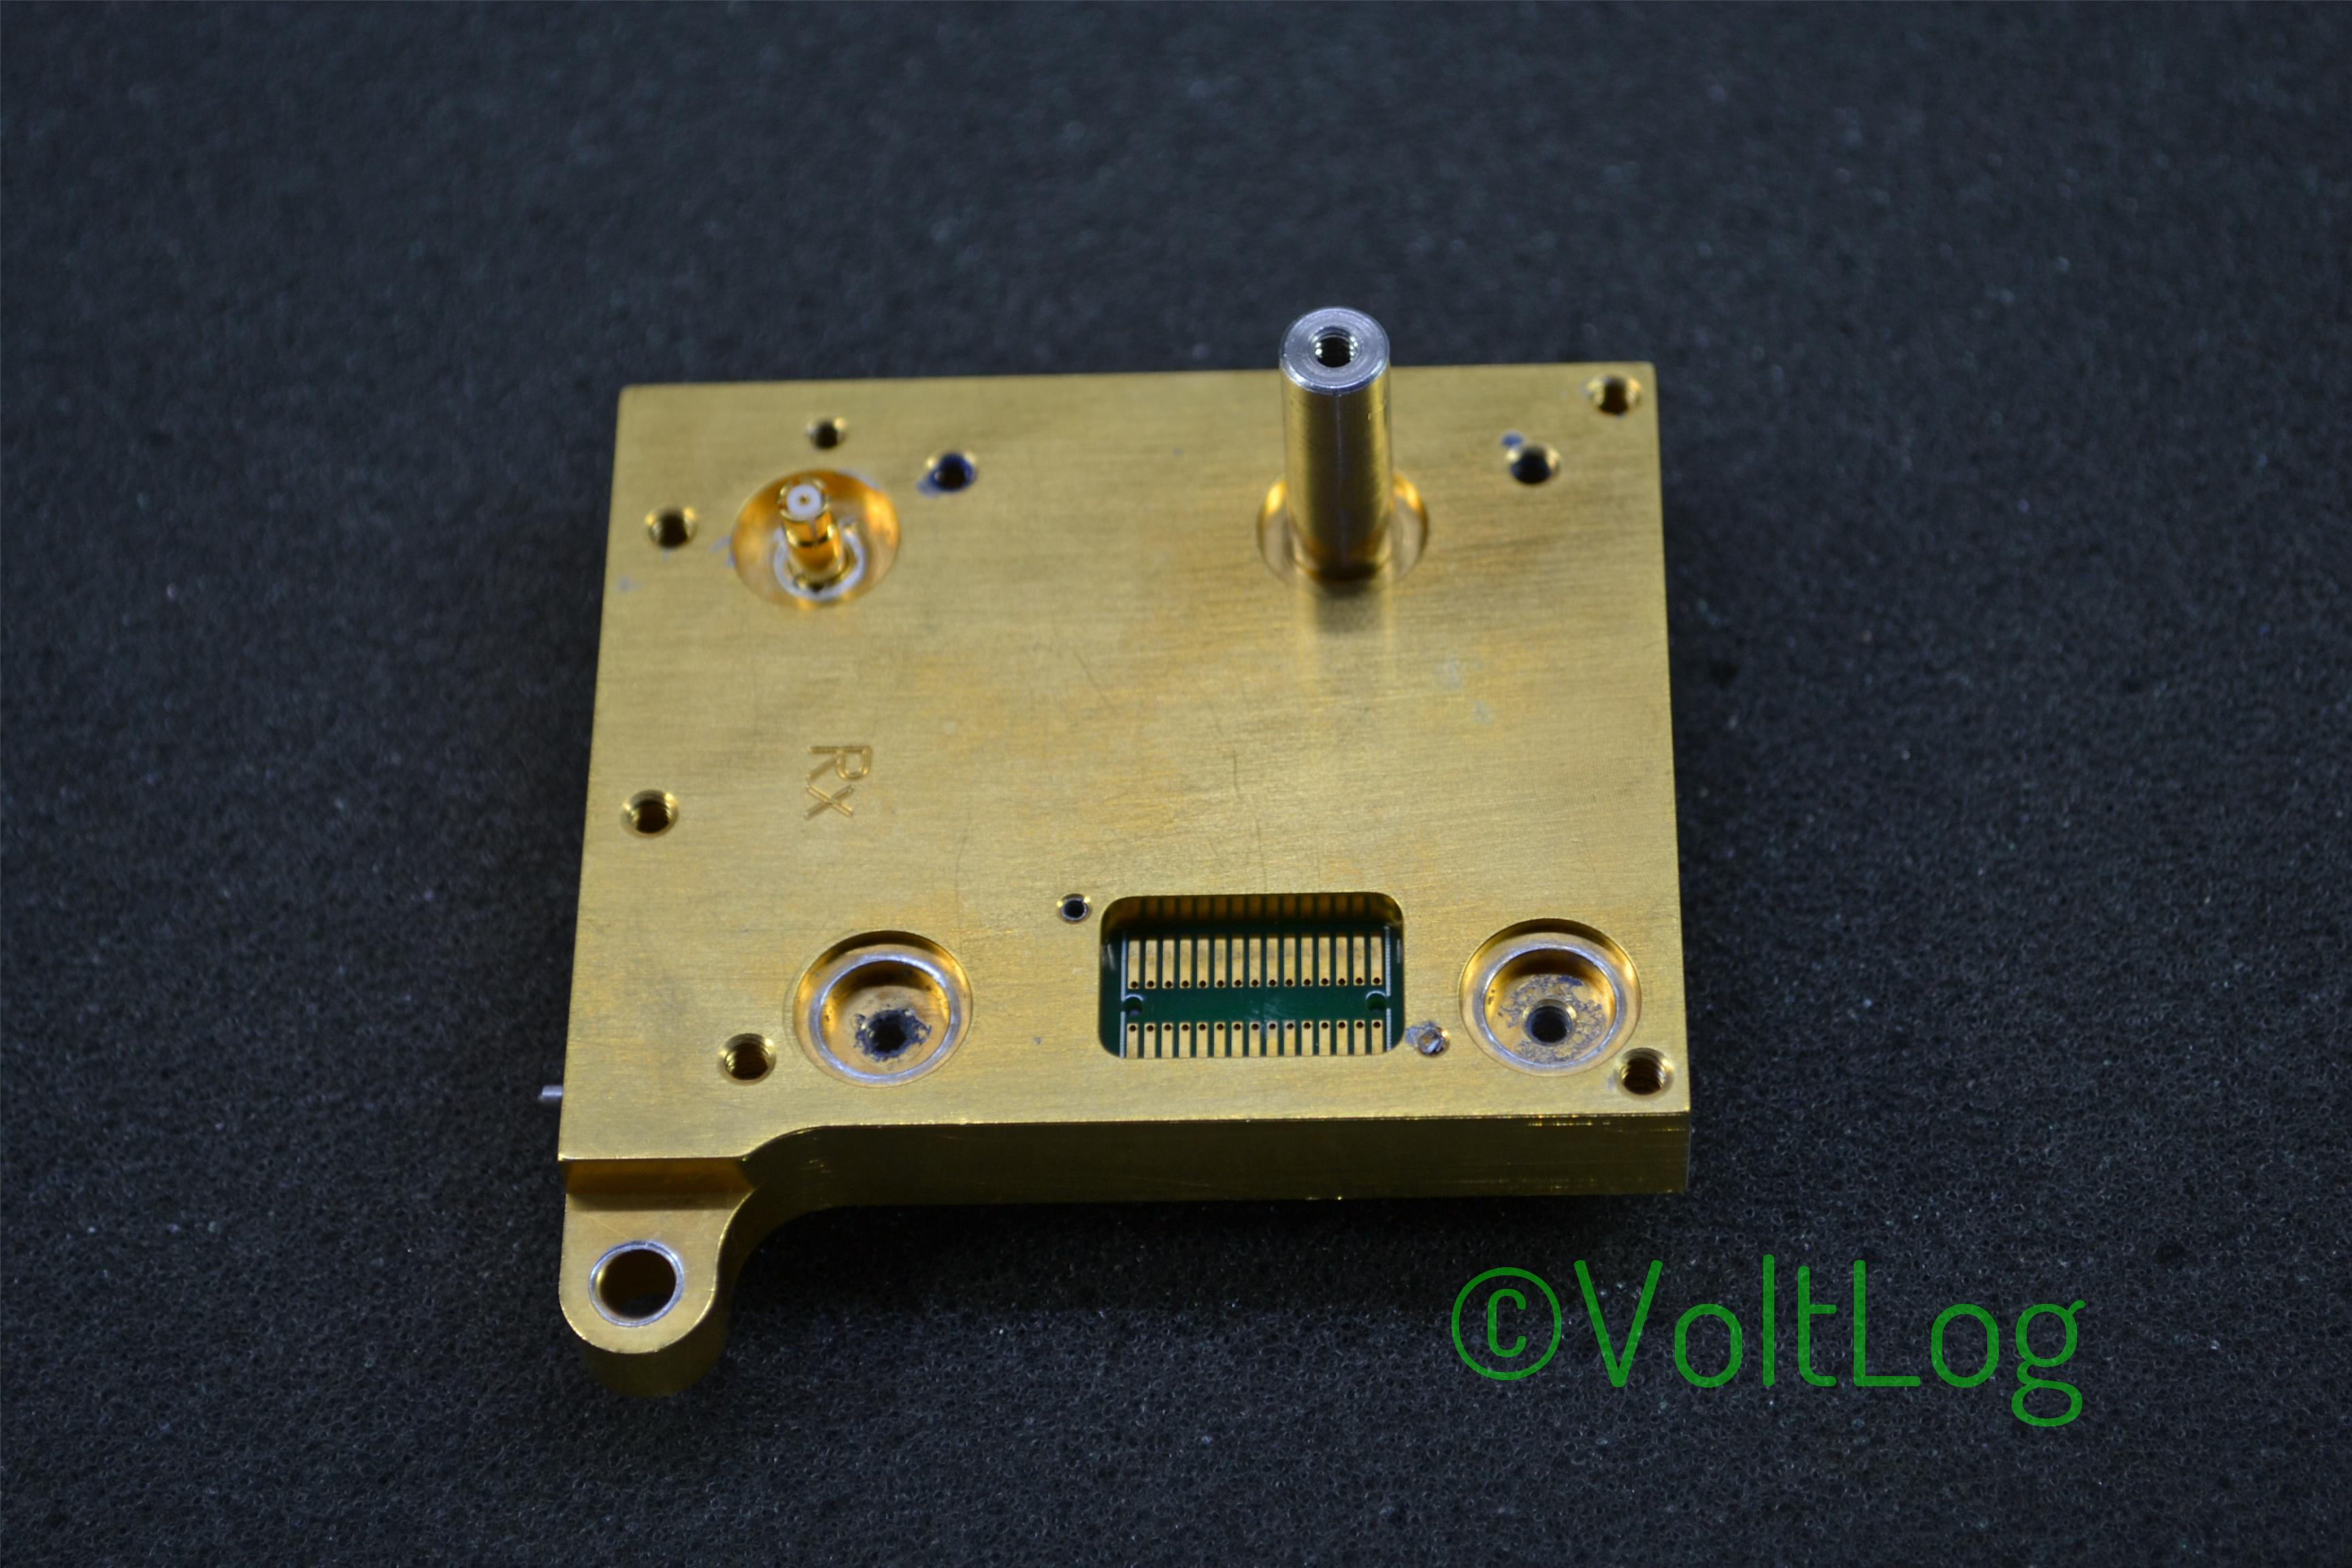
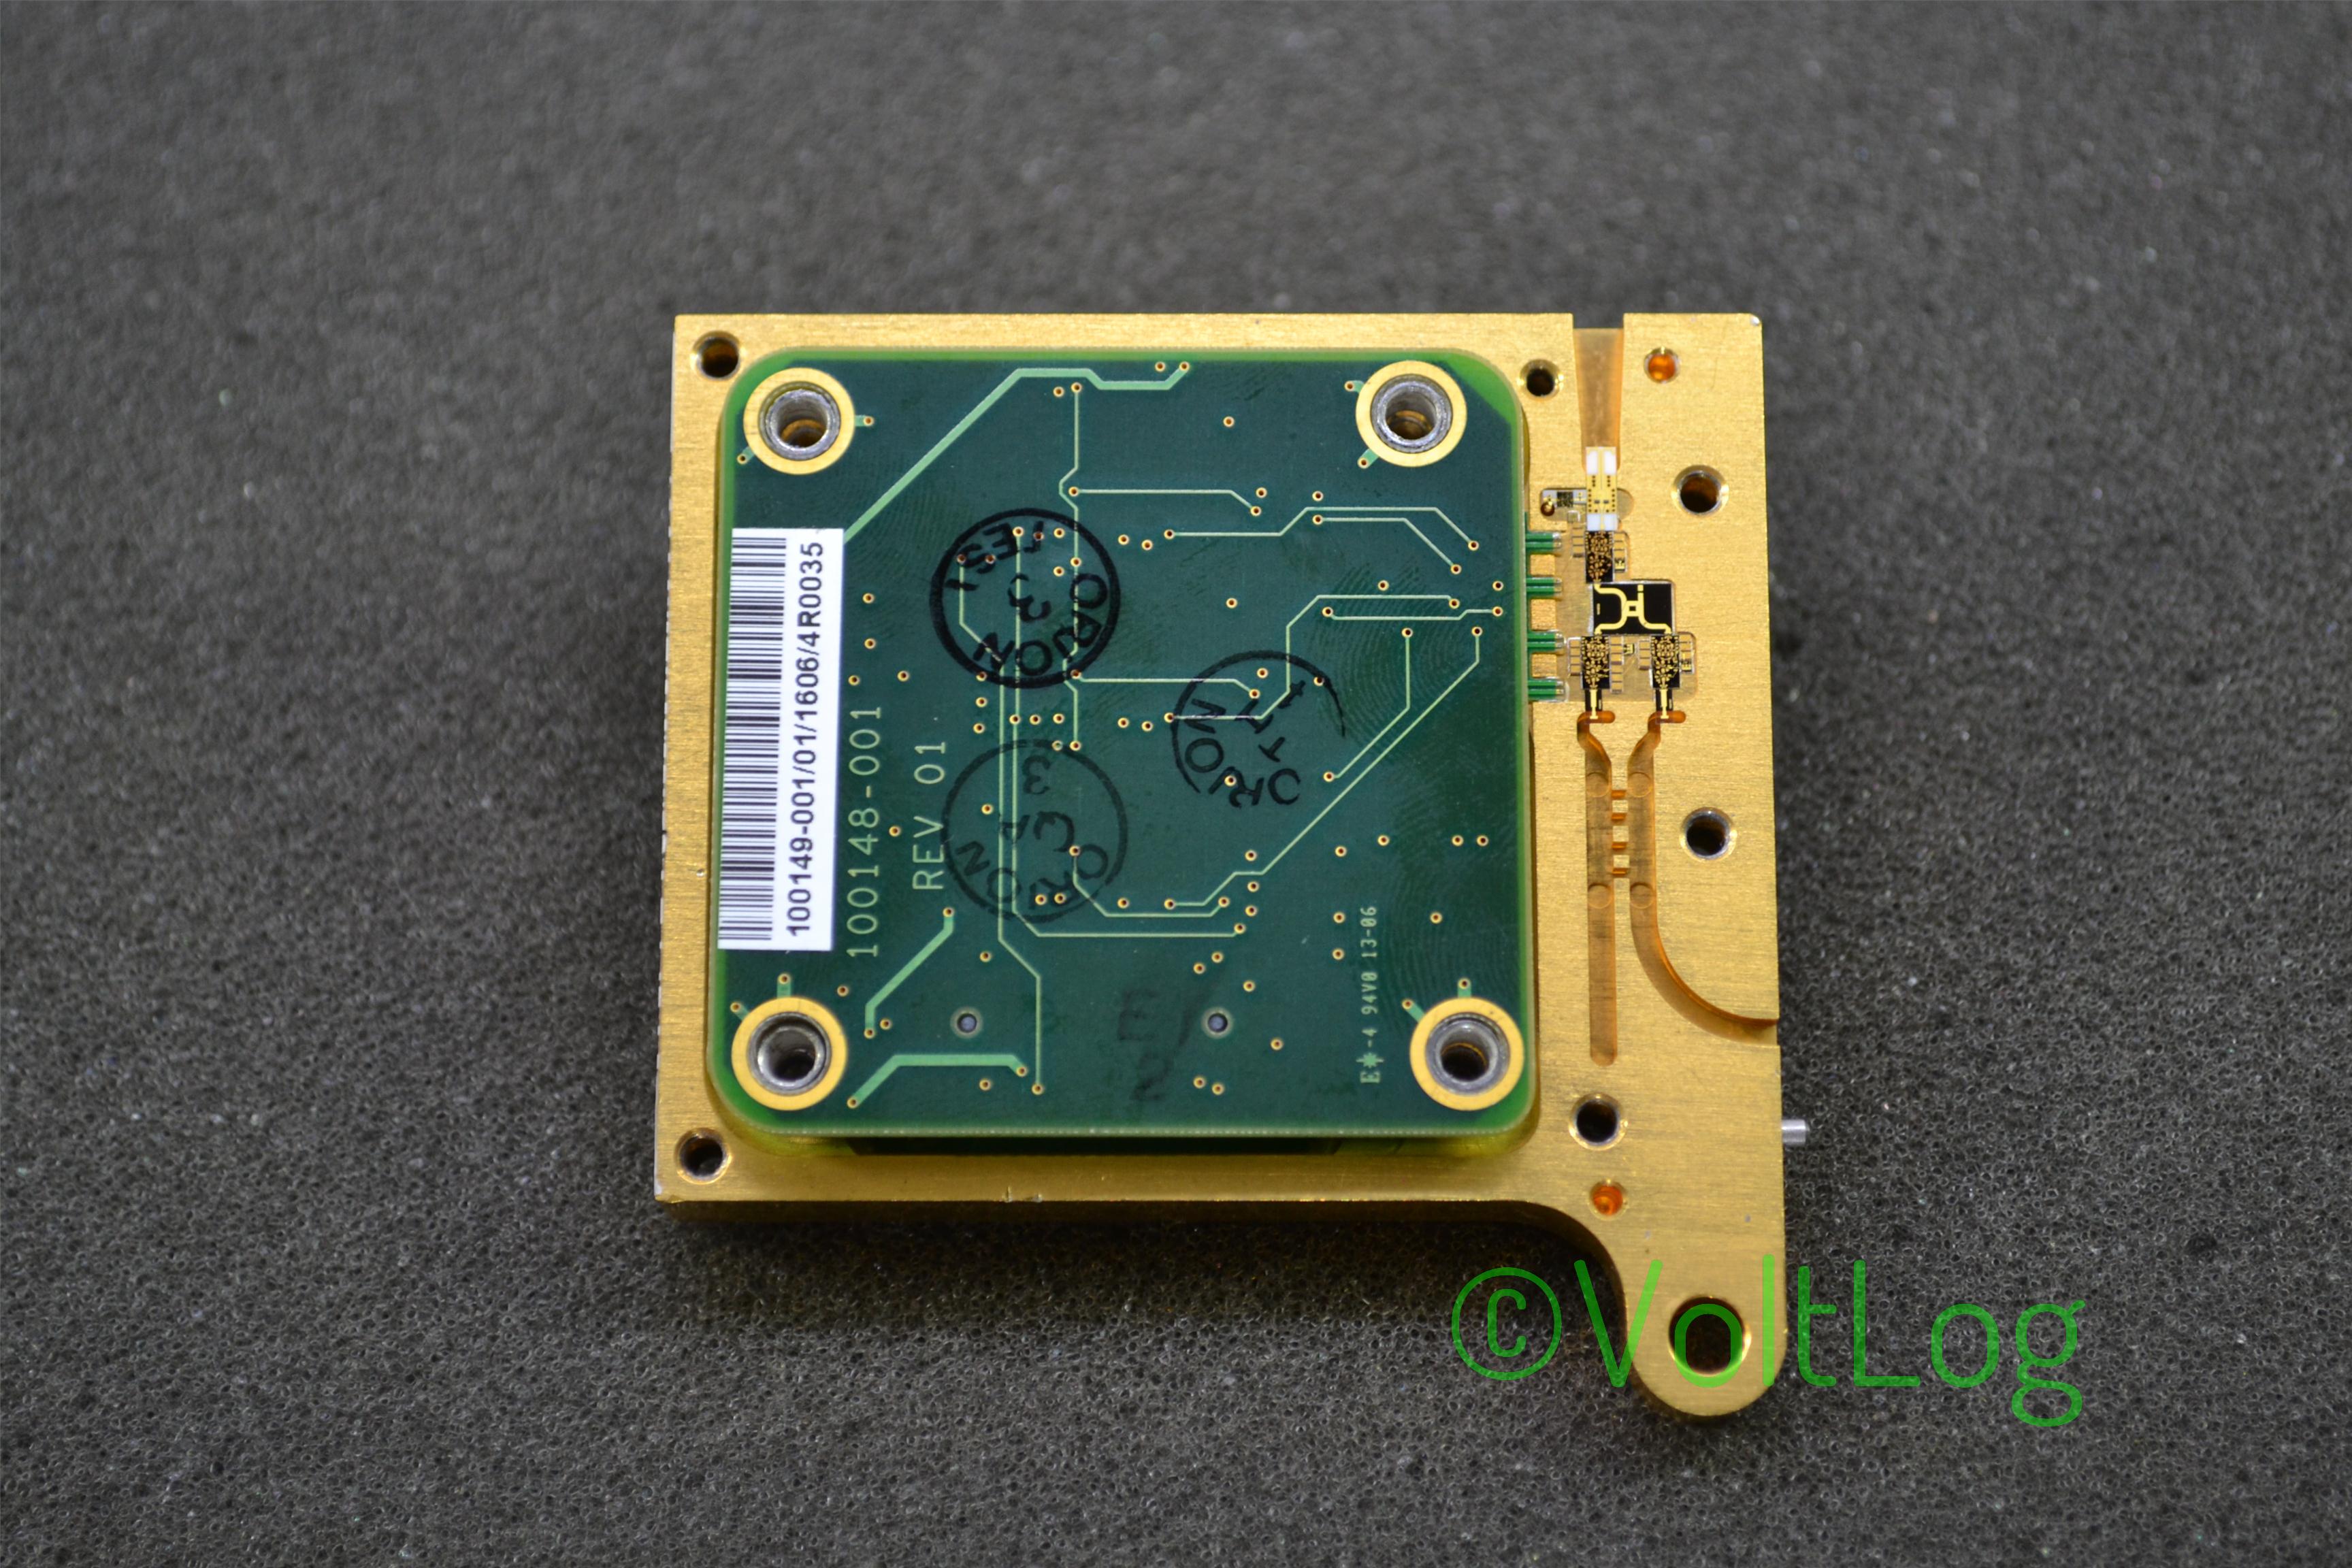
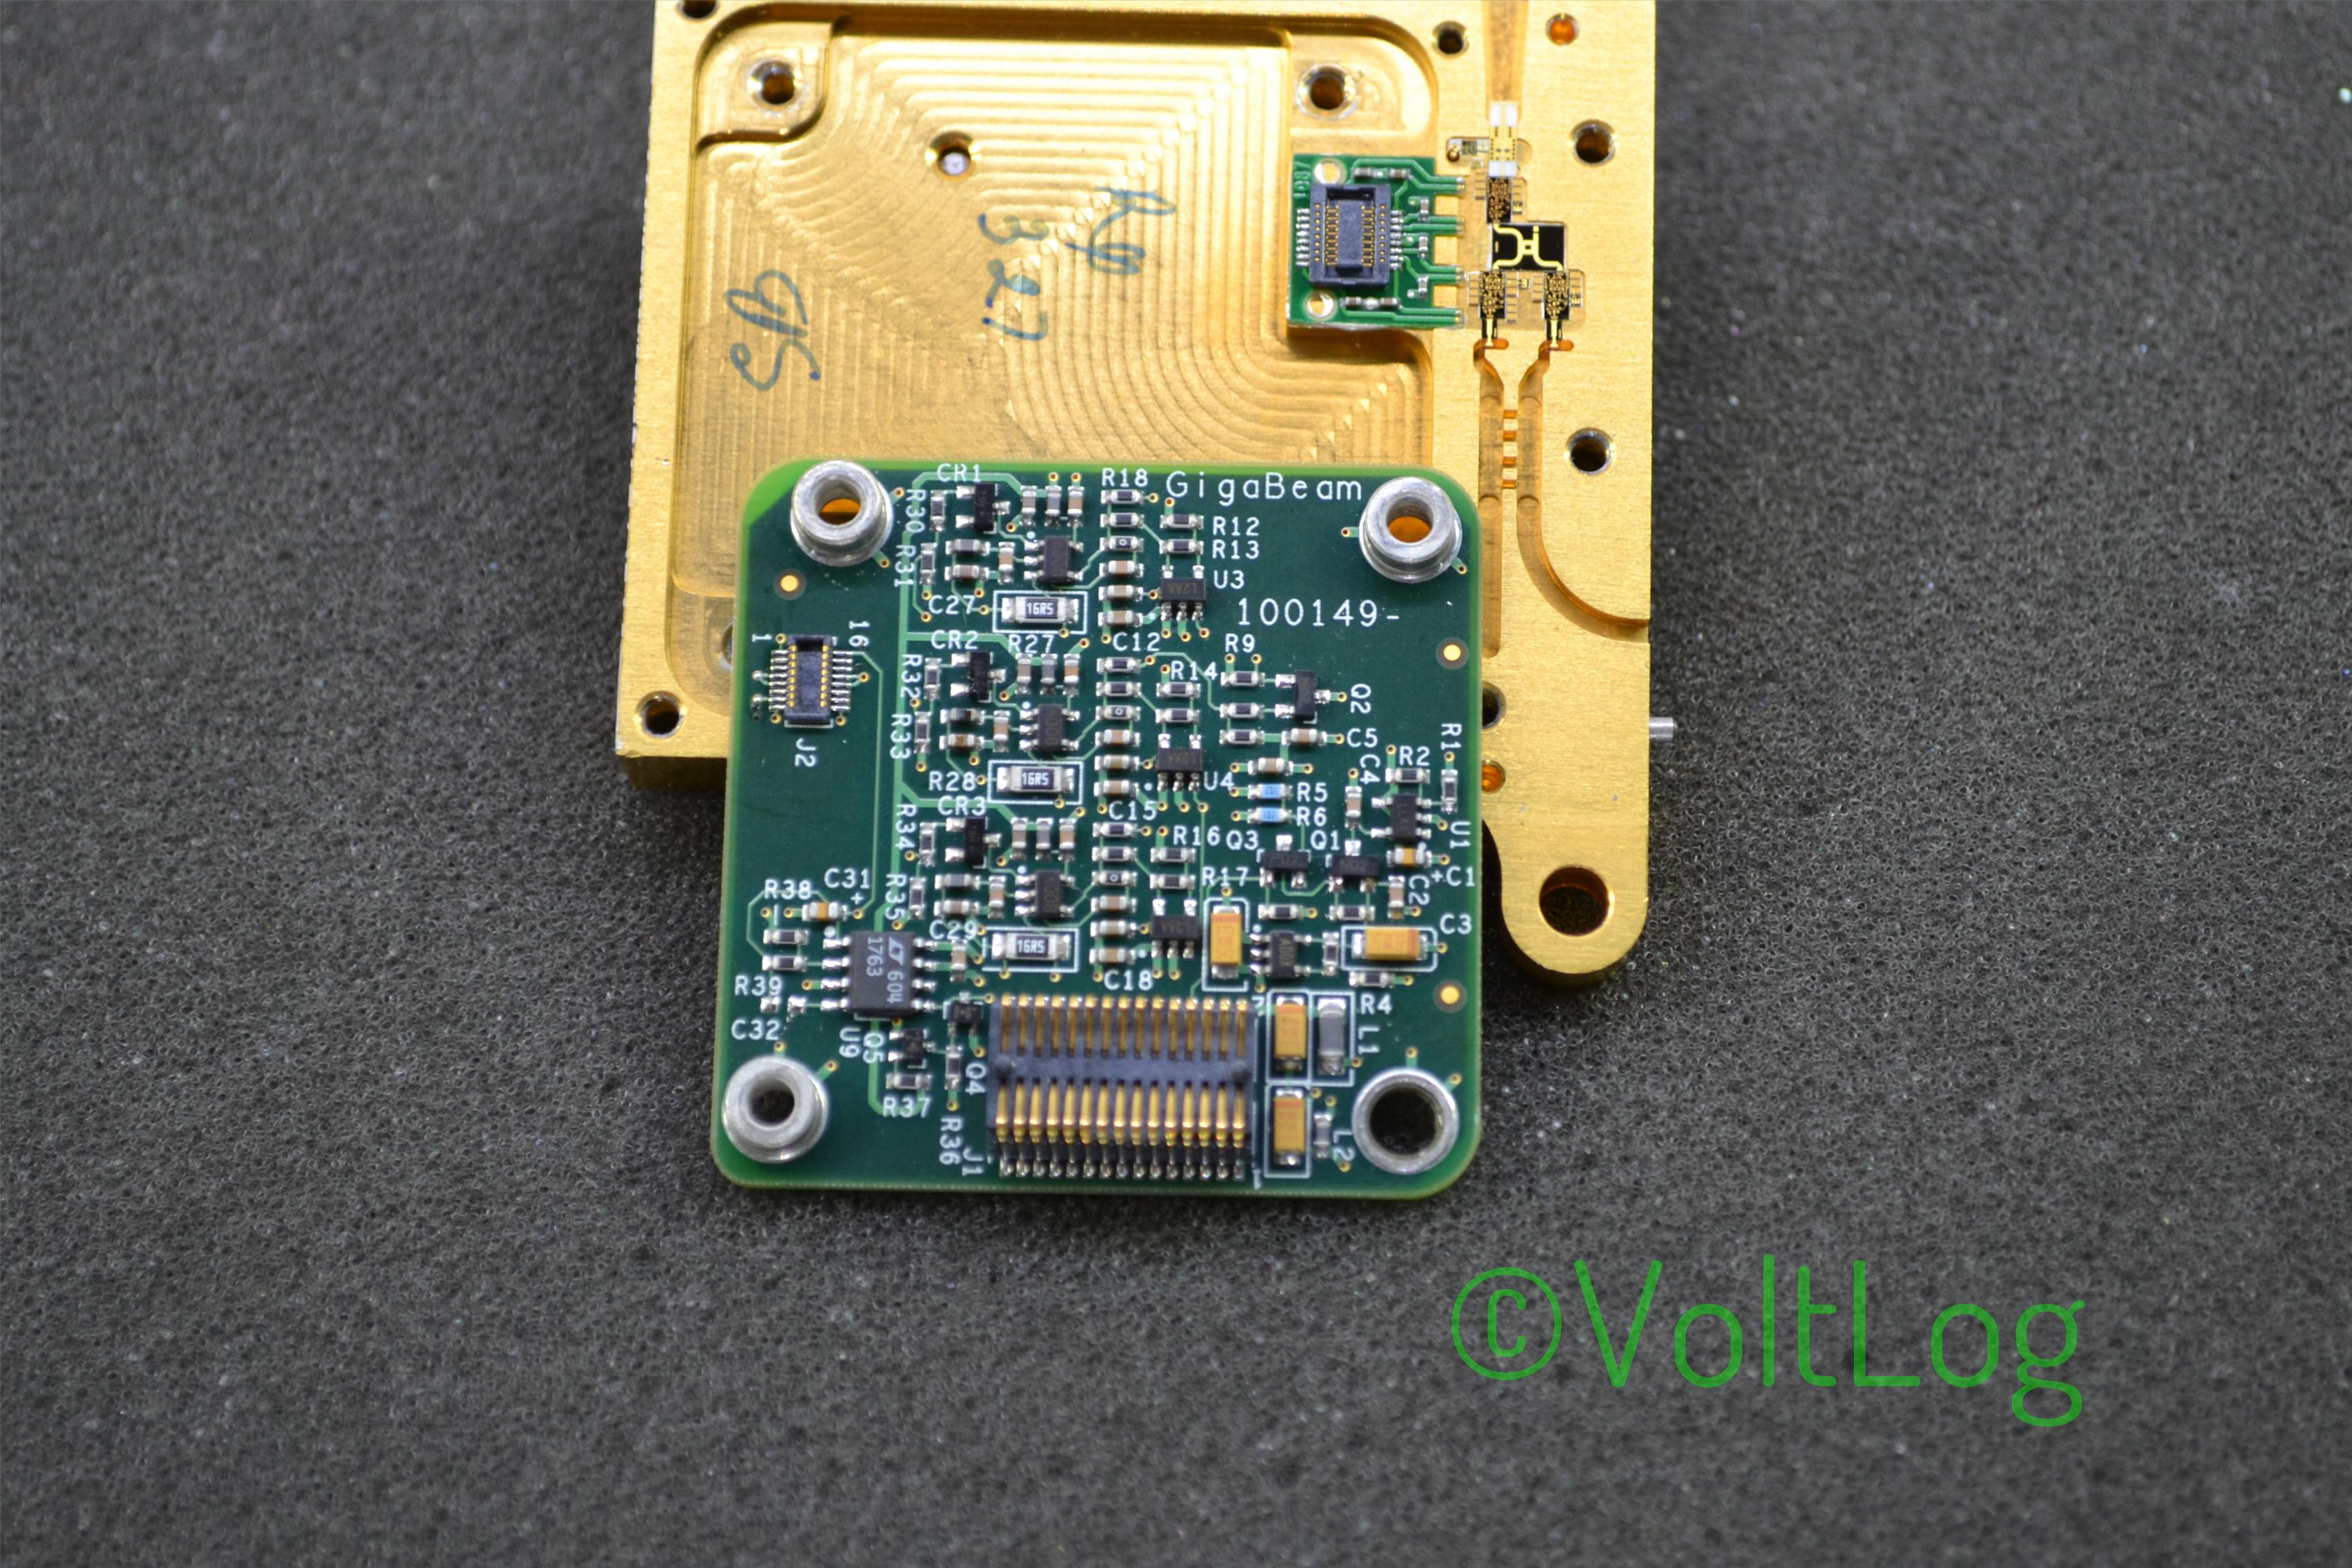

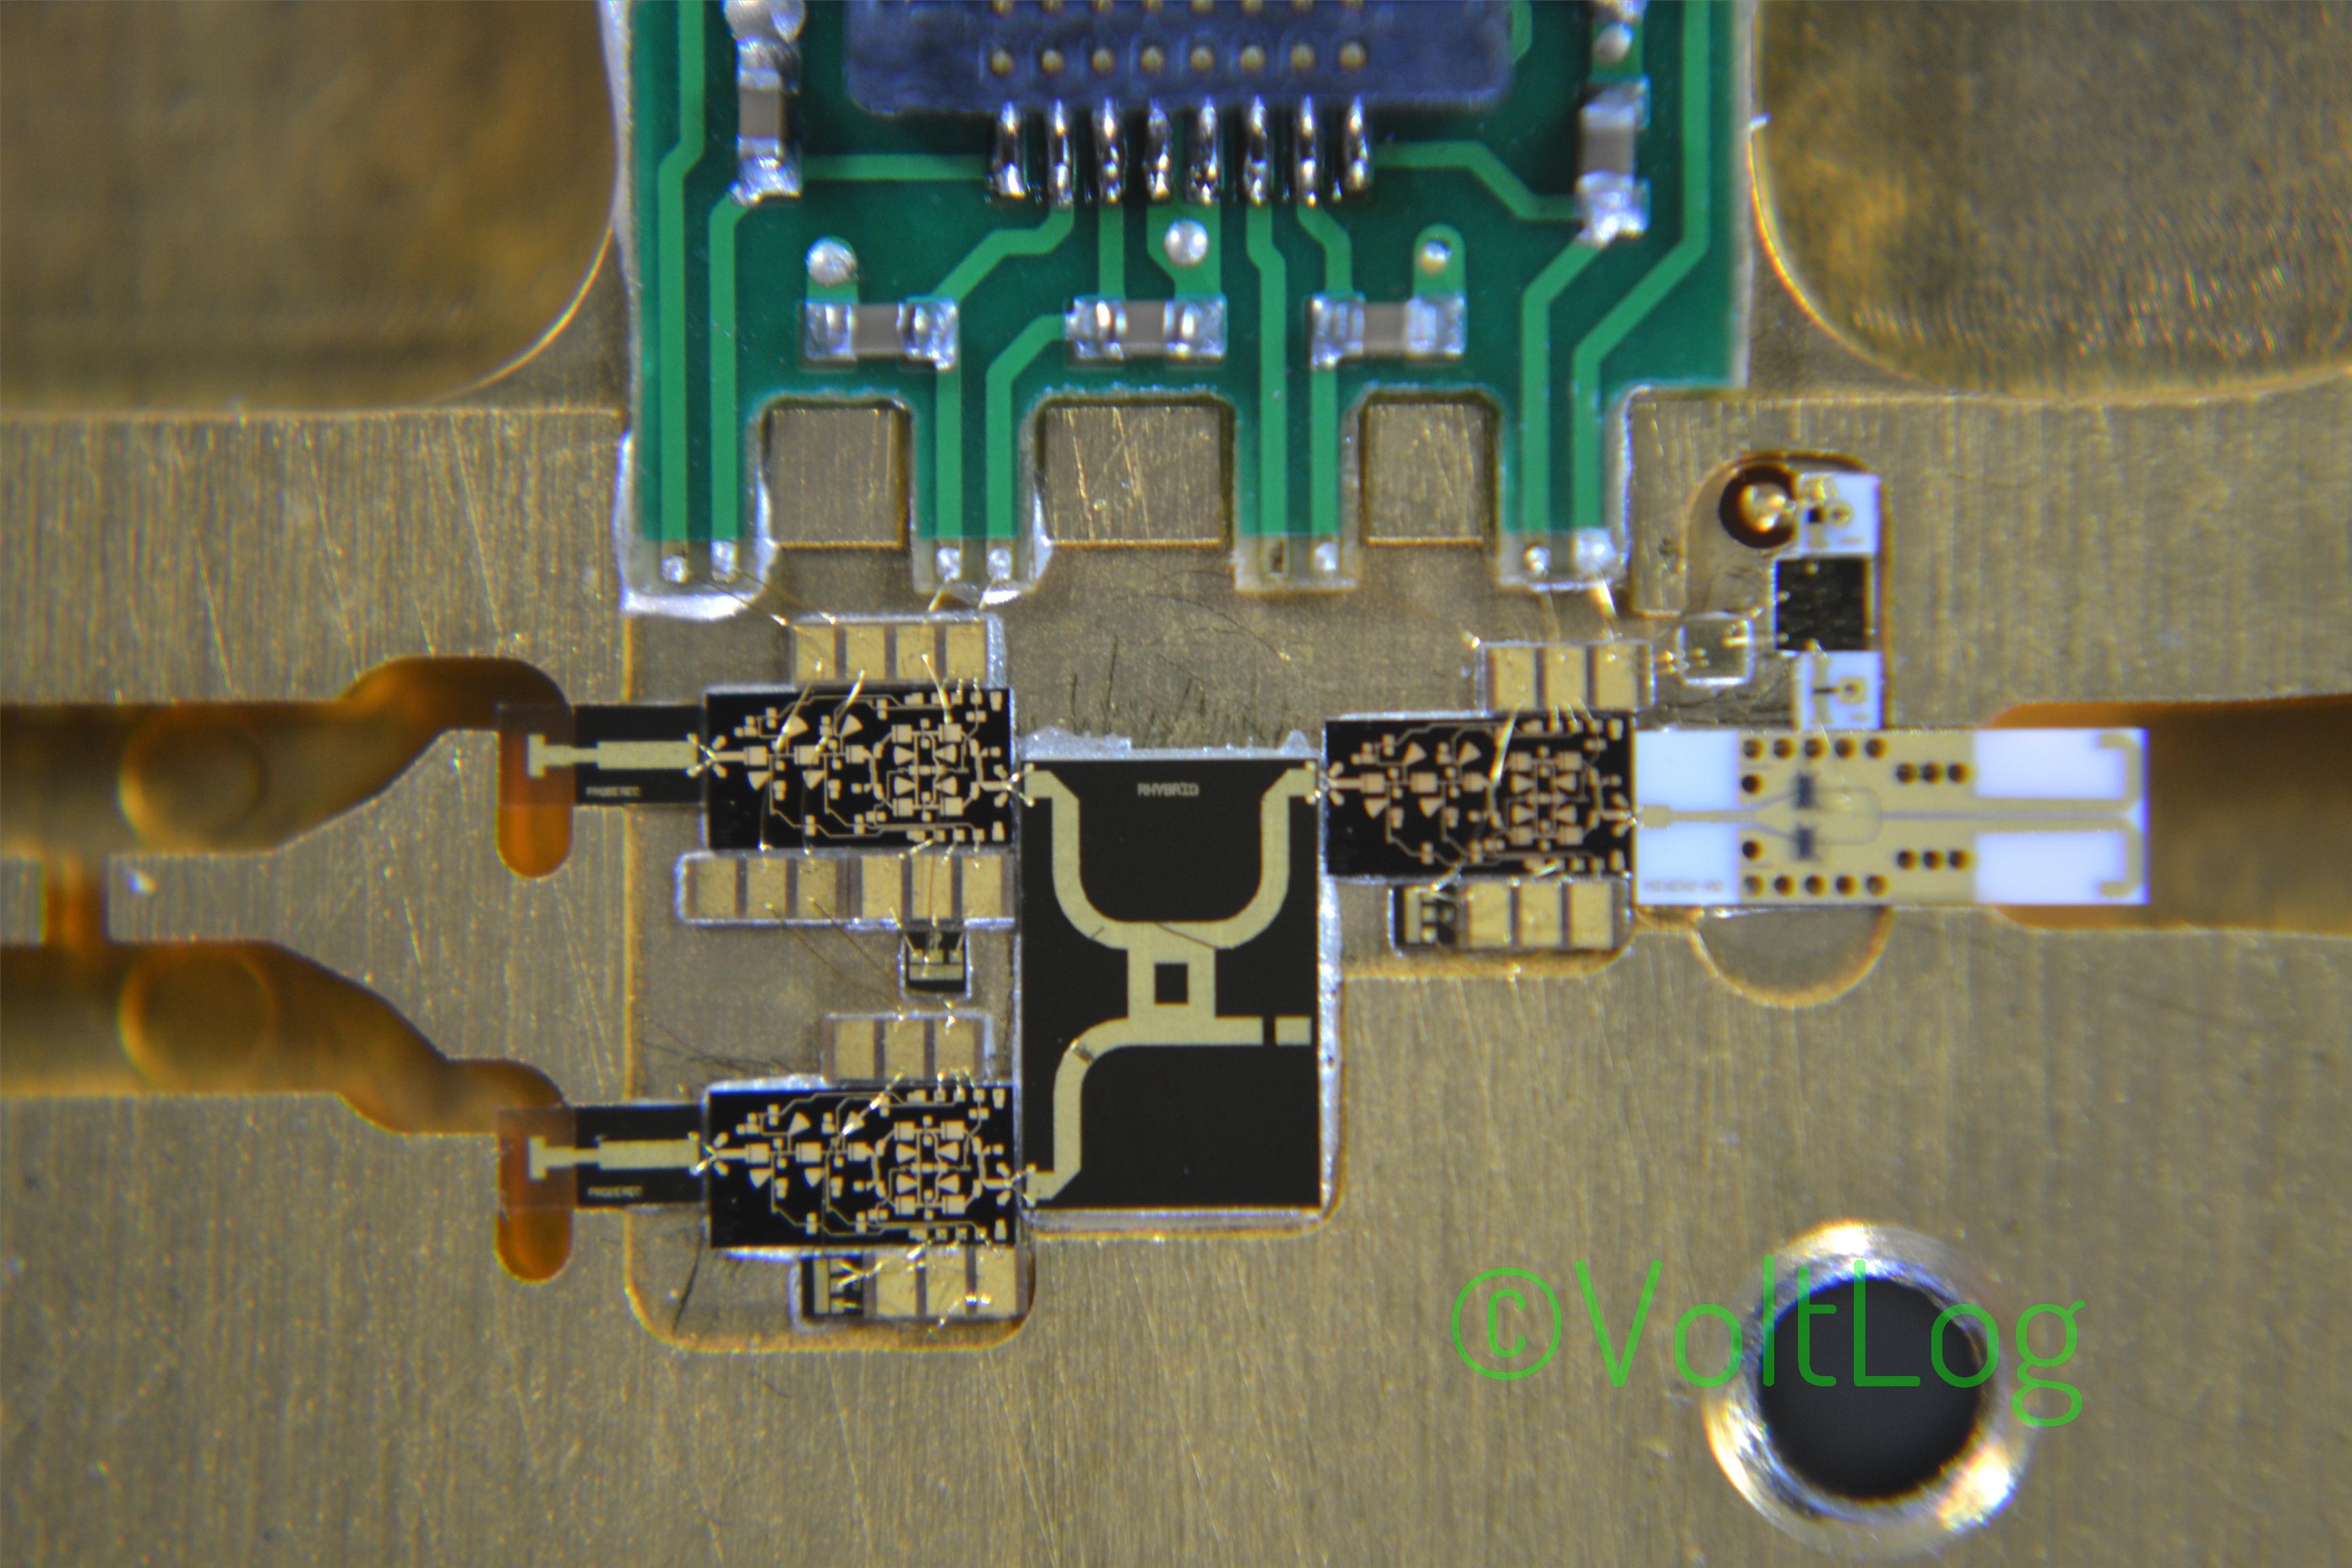
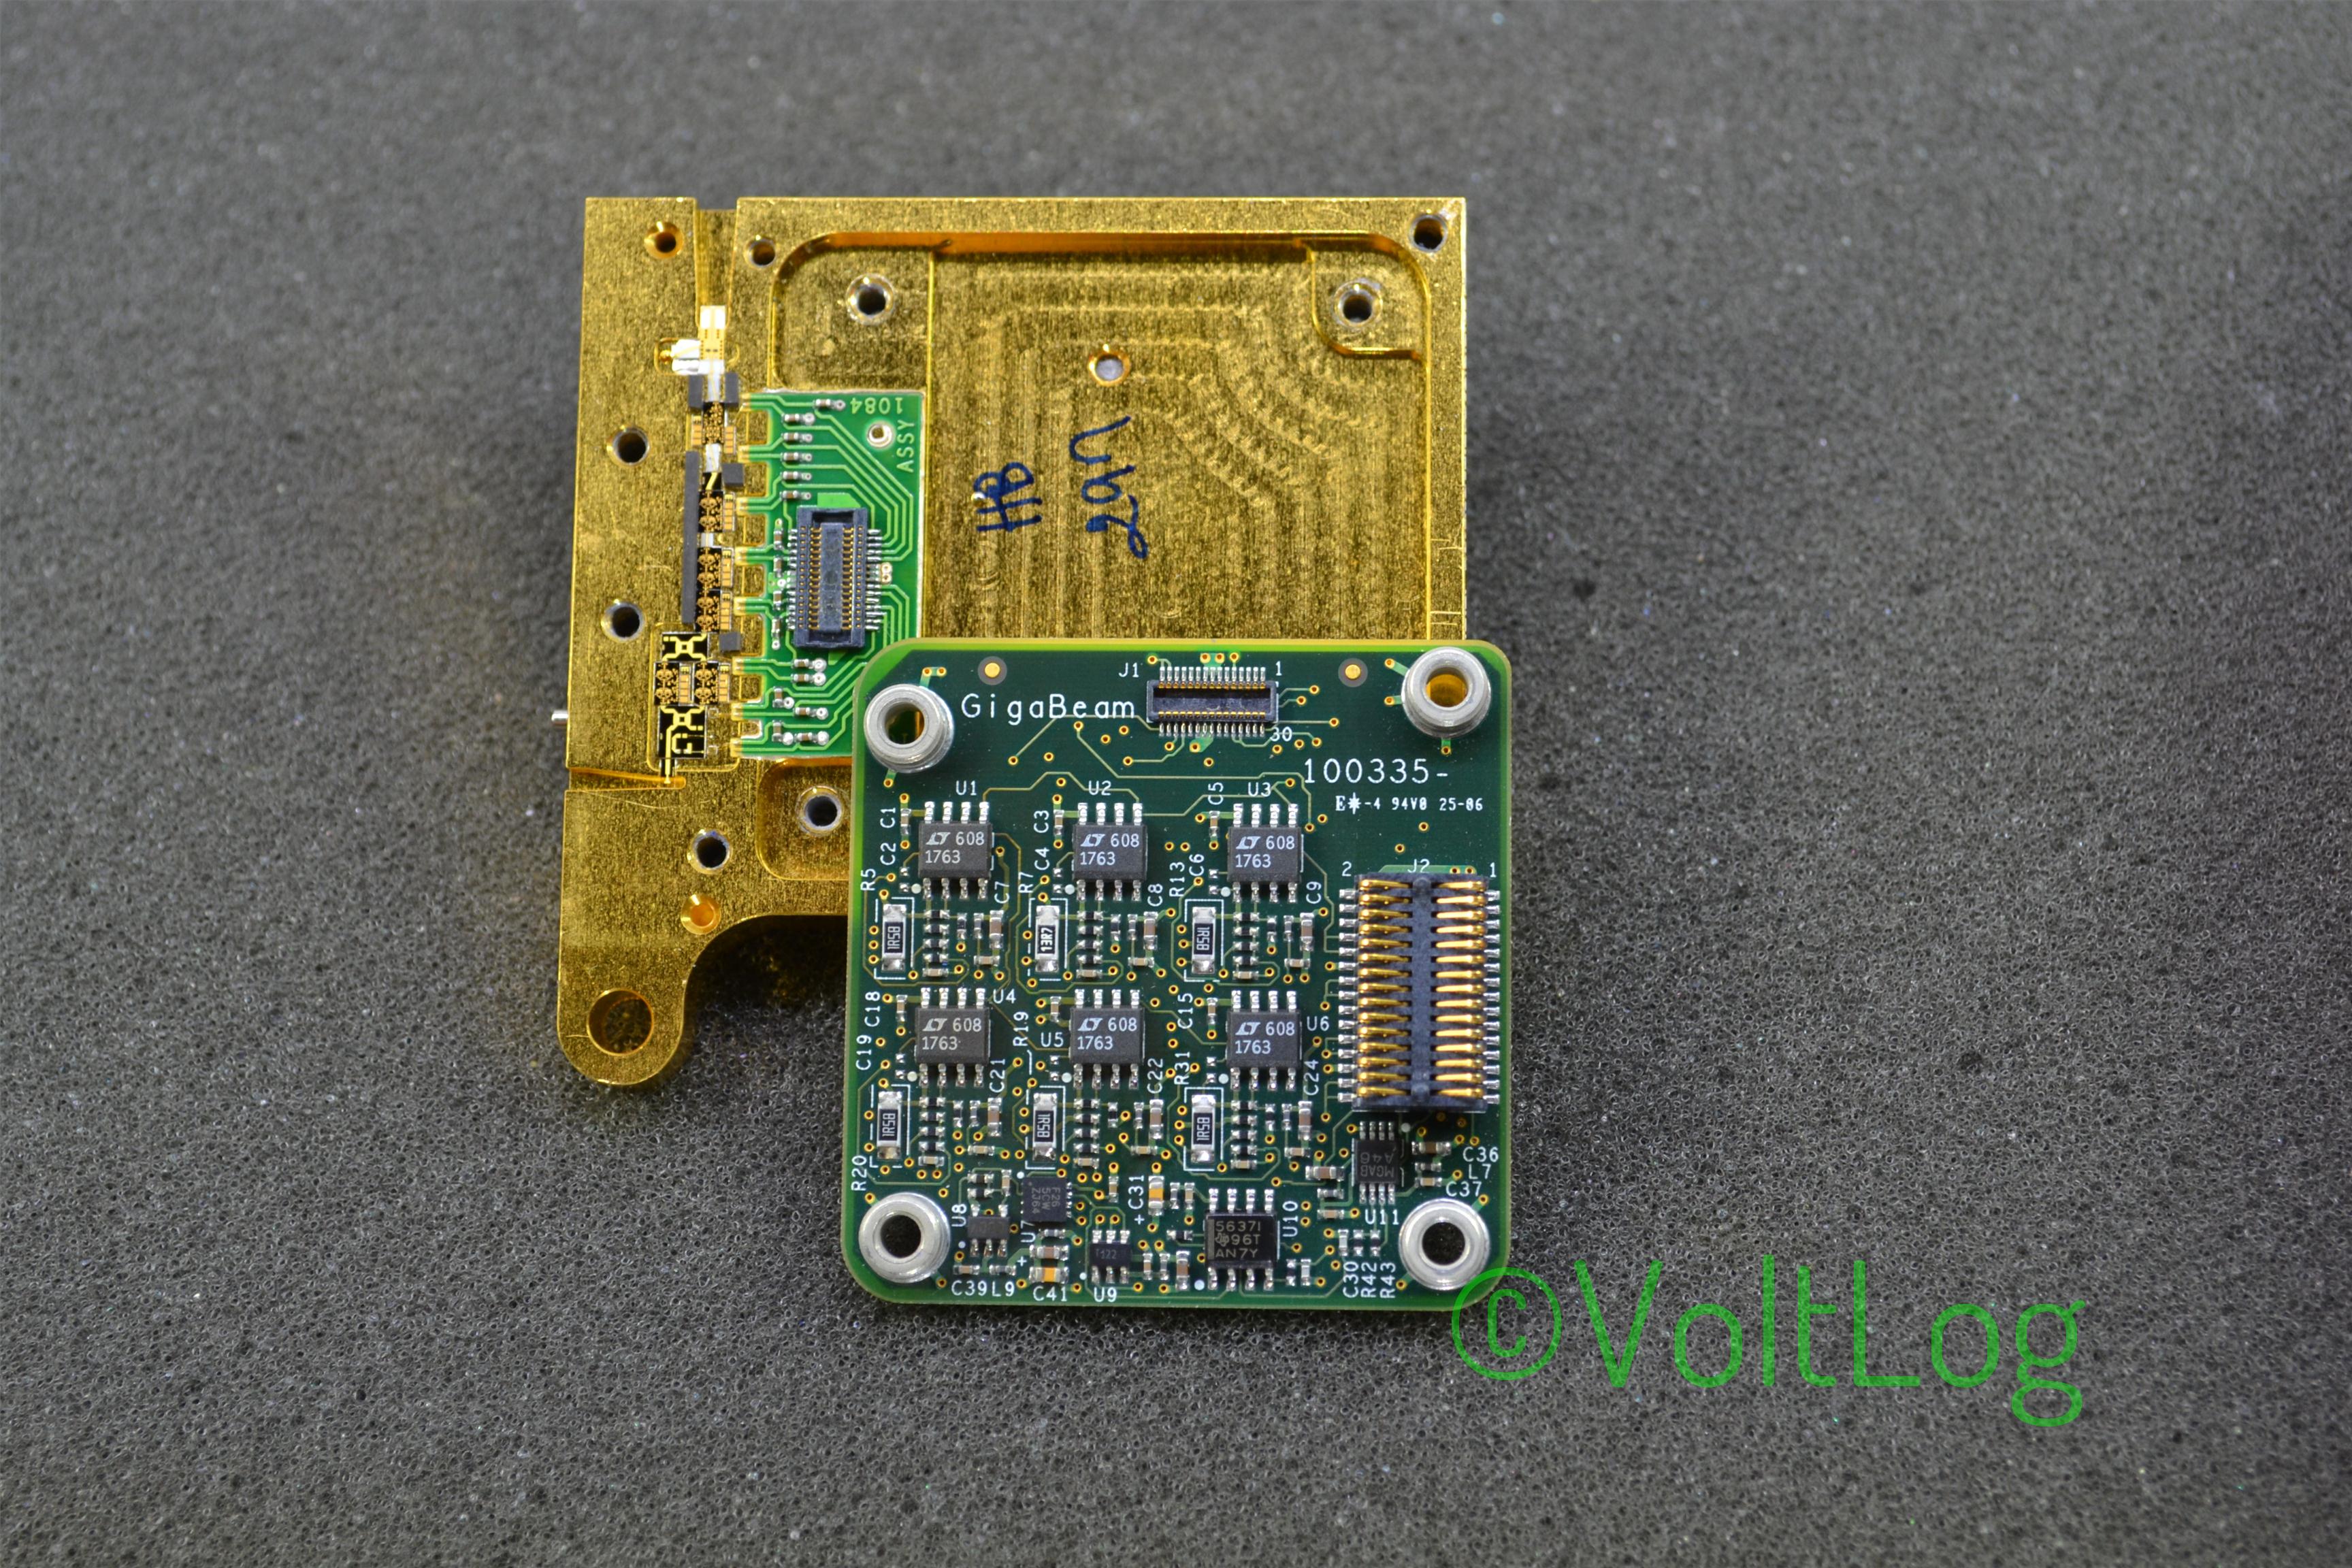
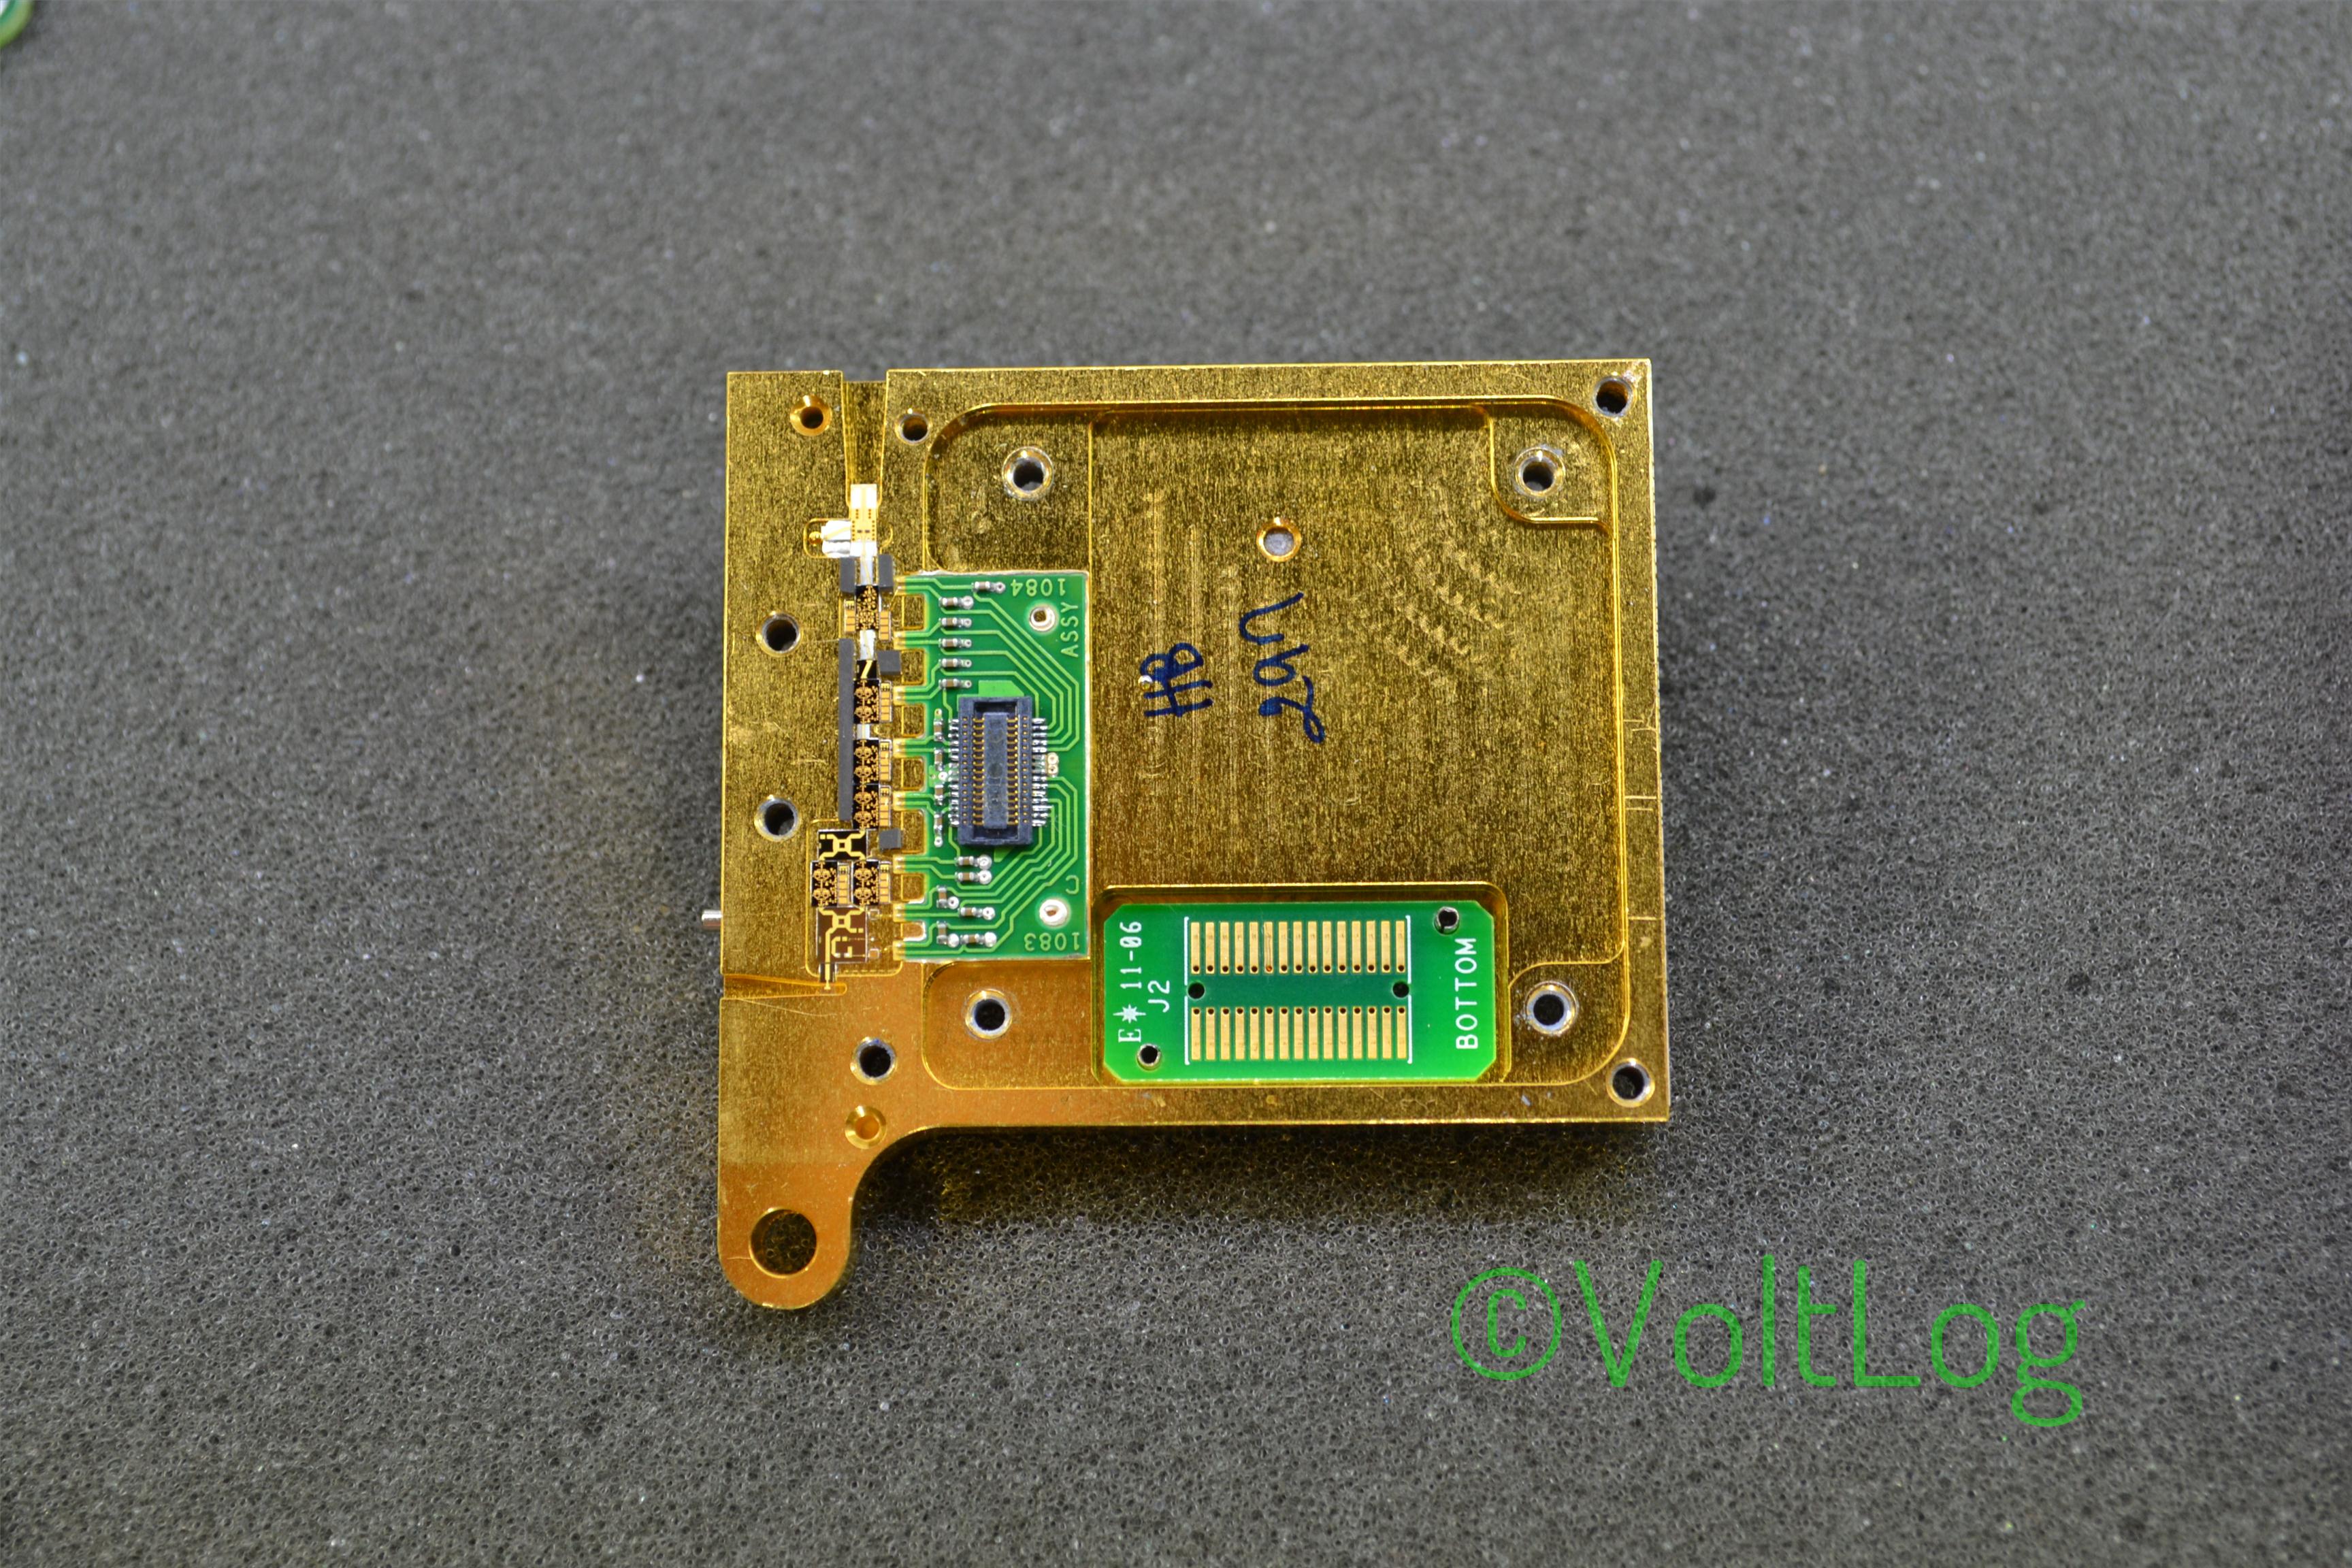
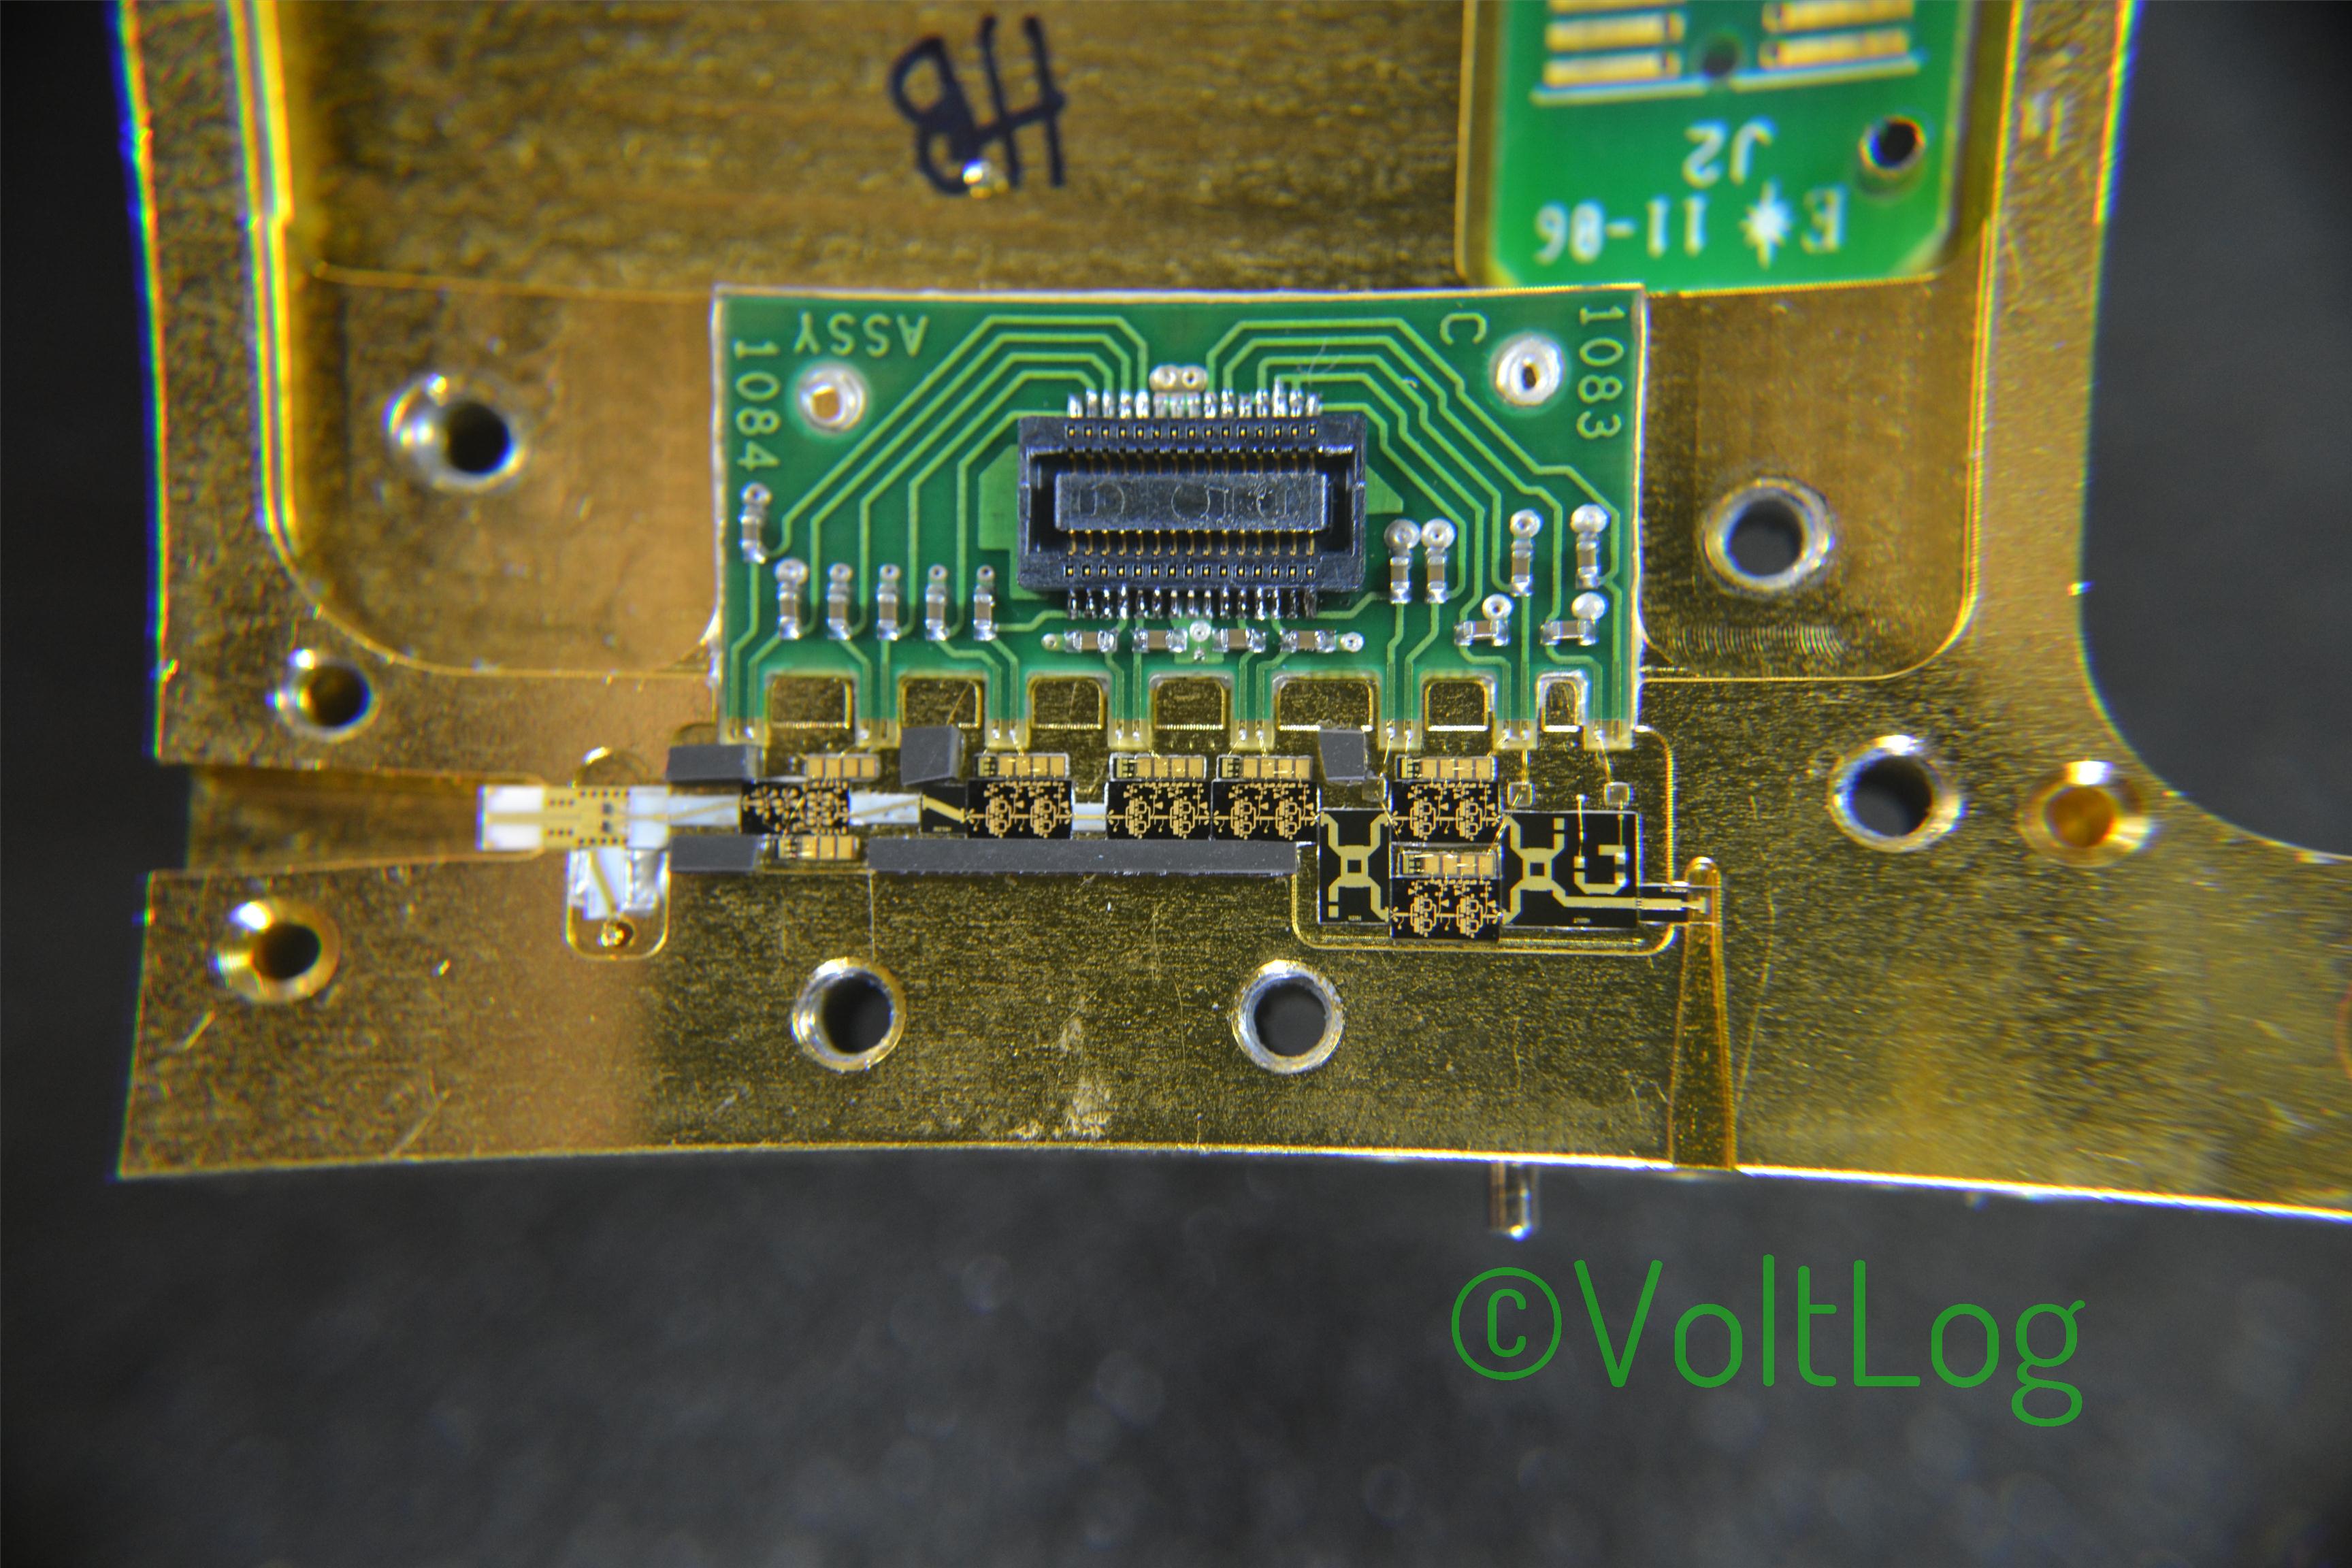
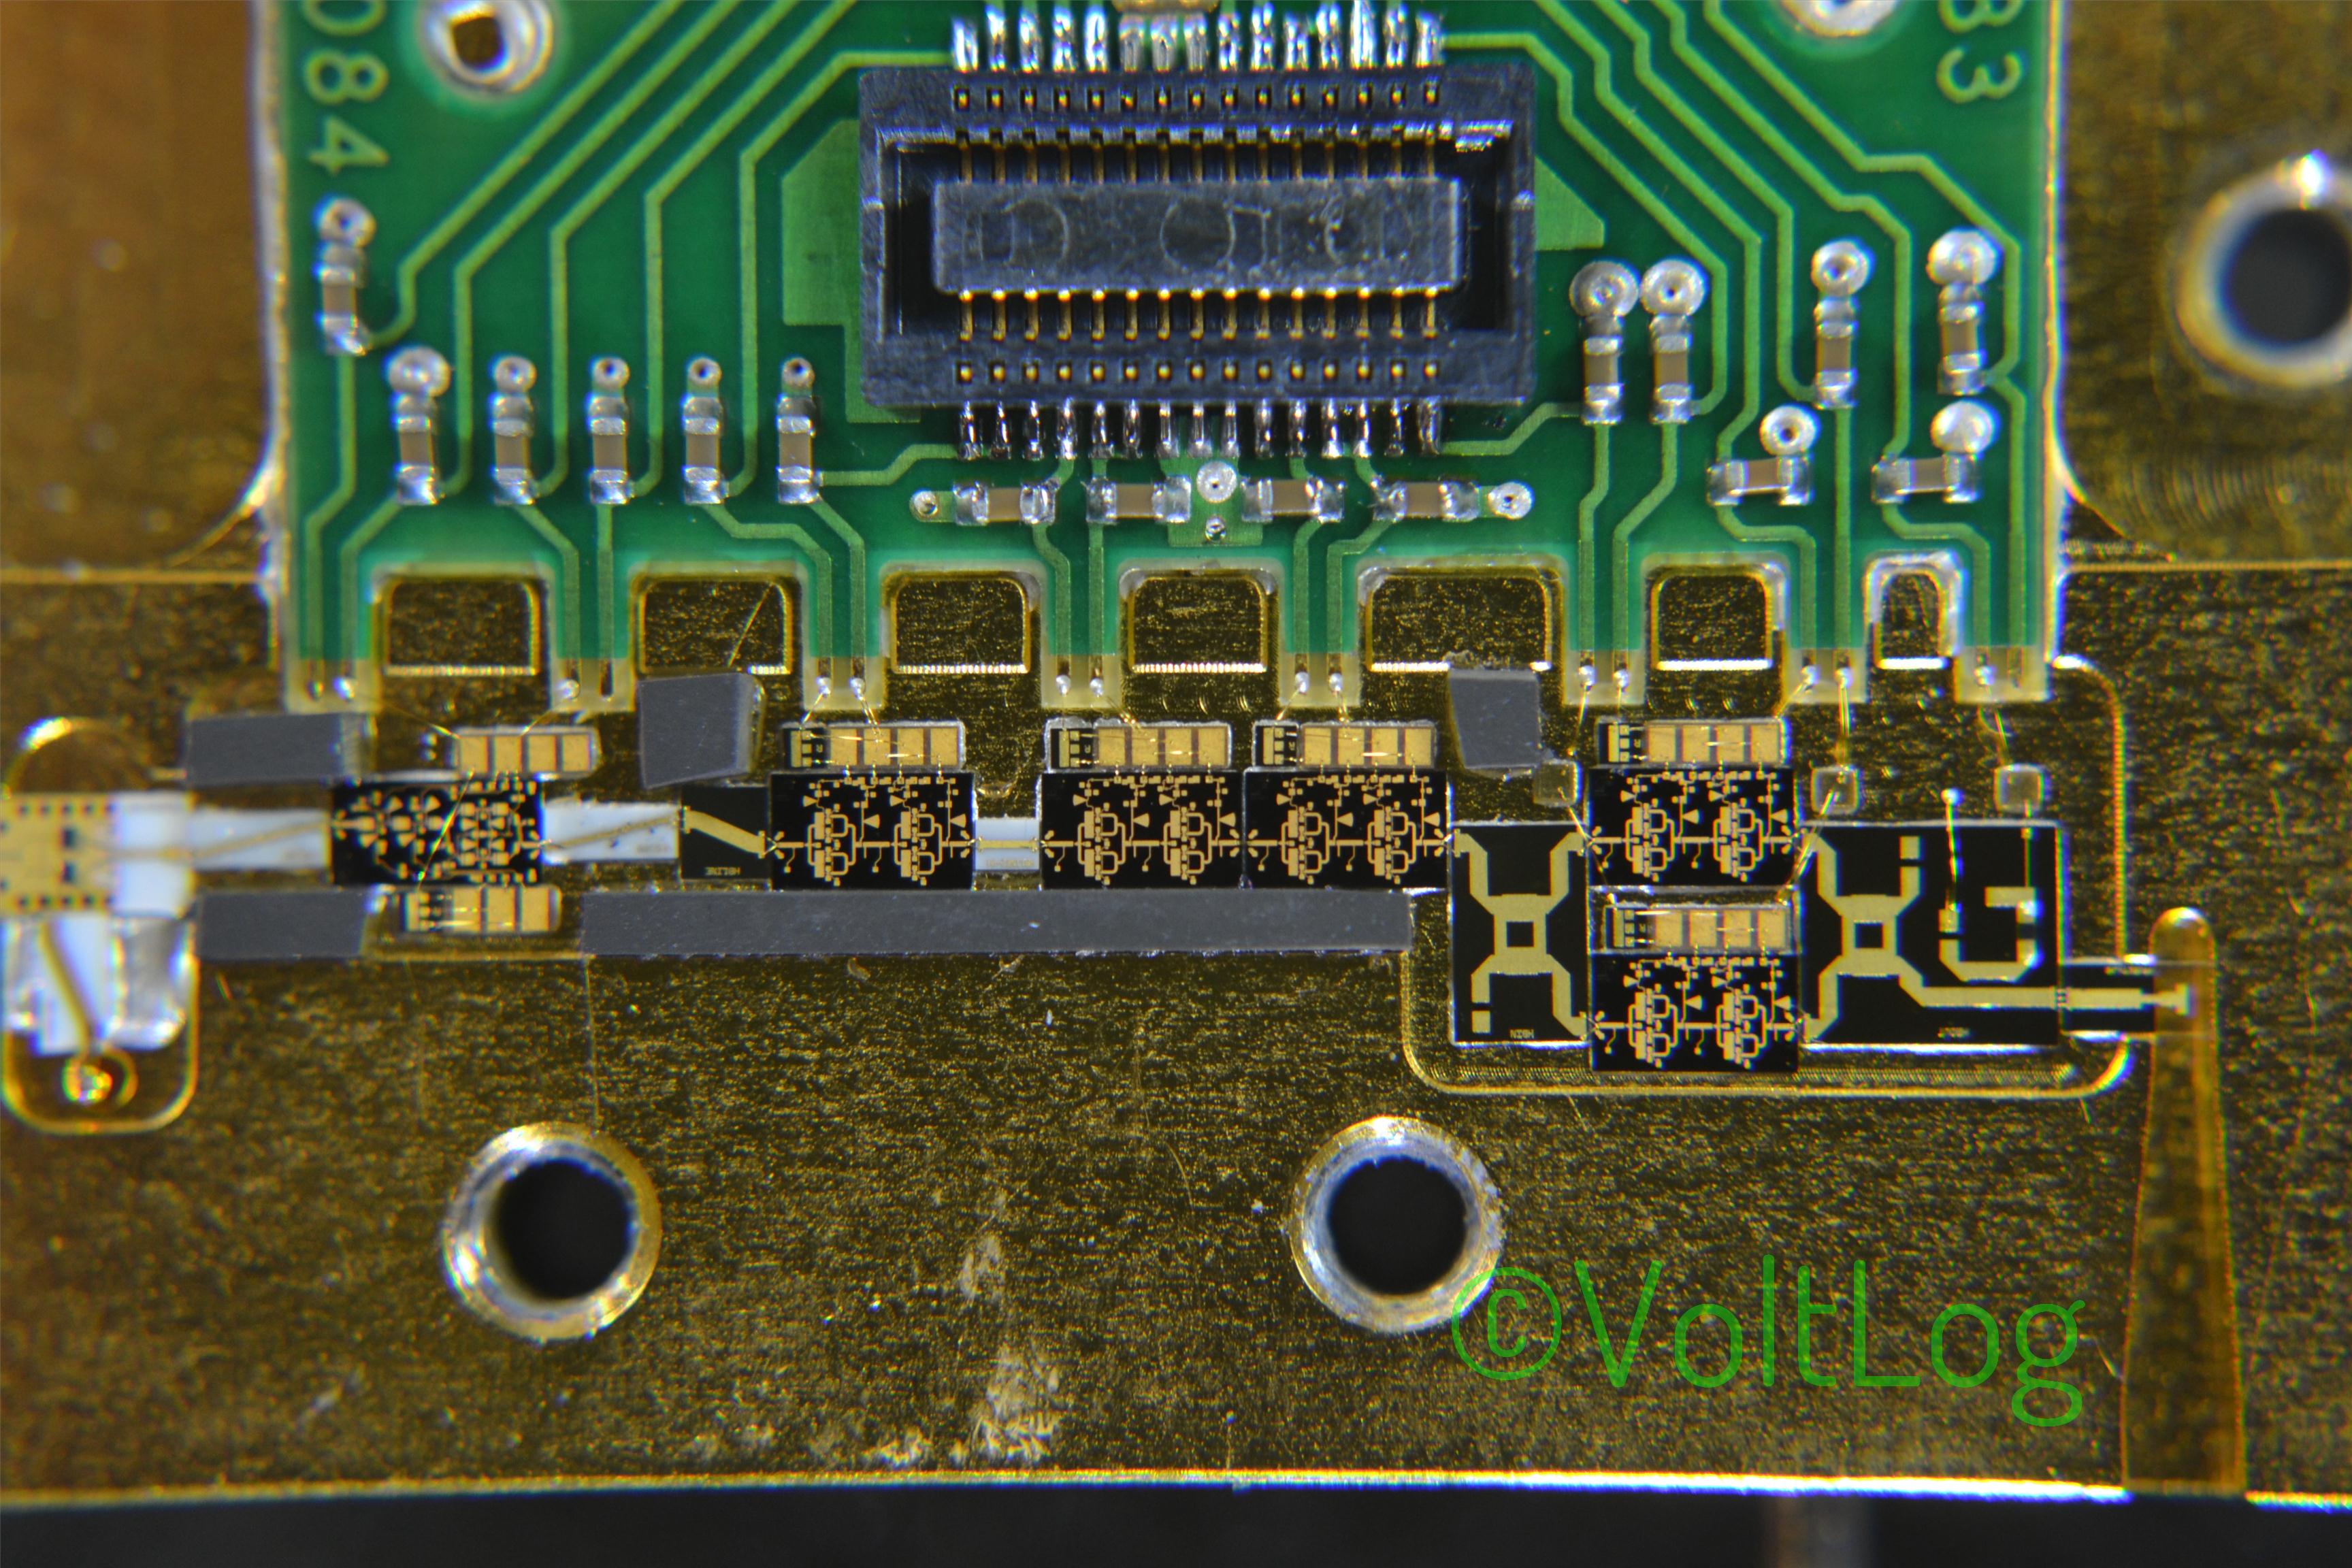
Here is a list of the components I managed to identify inside the unit:
- SMT4004: integrated programmable voltage manager IC which can monitor and control up to 4 independent supplies.
- Texas Instruments OPA725: low noise, high speed, rail-to-rail op-amp.
- Analog Devices AD8604: quad rail-to-rail, input and output, single-supply amplifier.
- Maxim MAX4663: quad, SPST, CMOS analog switch.
- IDT ICS601: Low phase noise 1 to 5 clock multiplier.
- XCF04: Xilinx In-System Programmable 4 Mbit ROMs for Configuration of FPGAs.
- Sipex 3232 RS232 transceiver.
- Semtech LC03-3.3: transient voltage suppressor.
- Intel XT971ALE: Single-Chip 10/100Mbps Ethernet PHY Transceiver.
- Pericom PI49FCT3803: 1 to 7 clock buffer targeted at networking applications.
- Maxim DS1339C: Real Time Clock.
- TLK1201: gigabit ethernet transceivers.
- Xilinx XC3S1500: Spartan 3 FPGA with aproximately 30K logic cells inside.
- MPC8270: PowerQUICC II Processor with embedded communications processor module targeted for telecom applications.
- Analog Devices ADF4154: frequency synthesizer.
- Hittite HMC368LP4: frequency doubler with both an input and output amplifier.
- Hittite HMC441: GaAs PHEMT MMIC medium power amplifier.
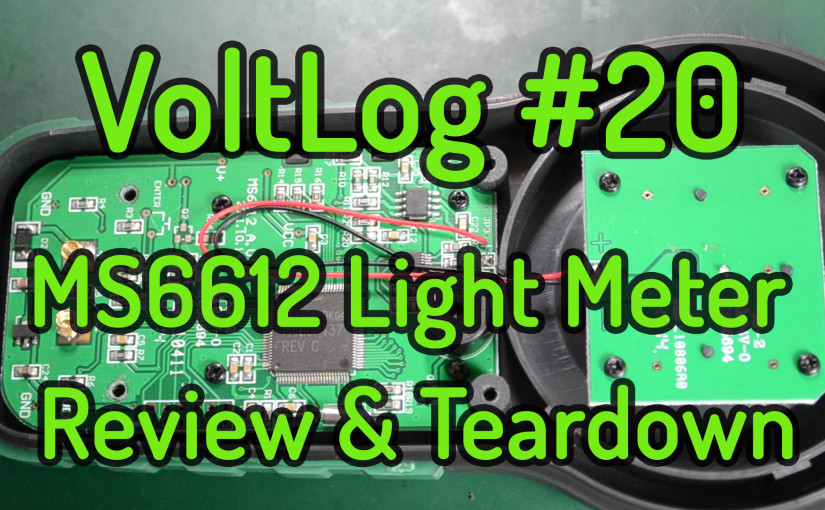
VoltLog #20 – Mastech MS6612 Light Meter Review & Teardown
In this video I’m doing a product review and teardown of the Mastech MS6612 Digital Light Meter. I am also taking a look at a typical 9V battery datasheet and make an estimate on the usage hours that I’m going to get for this meter.
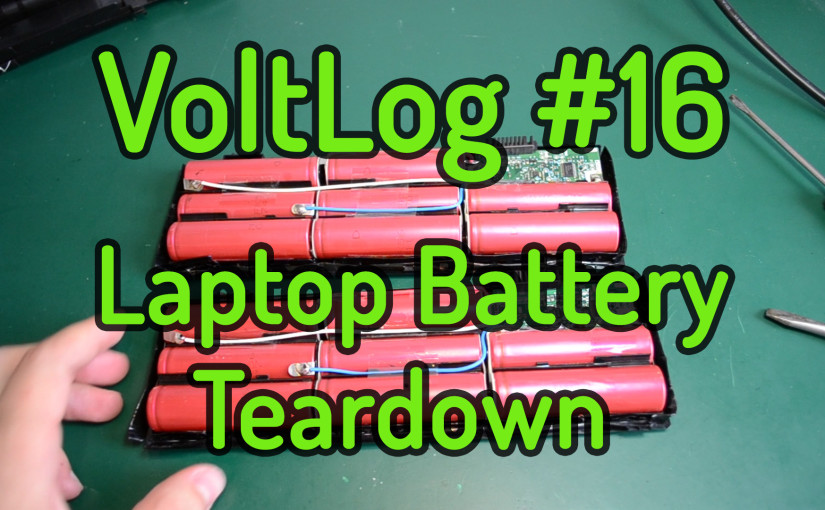
VoltLog #16 – Laptop battery teardown and lithium cell recovery
Today we’re going to be looking at some laptop batteries, we’re going to take them apart and attempt to salvage some lithium cells to use in other projects.
I have these two identical batteries coming from a Fujitsu Siemens laptop and they’re both dead. These batteries usually fail in one of two modes, they either have a failed electronics board and in this case they don’t communicate with the laptop motherboard anymore for correct management or they have one or more lithium cells failed and they don’t reach their nominal voltage anymore.I believe these two are in the second category where one or more cells have failed and they don’t reach their nominal voltage anymore.