Welcome to a new Voltlog, in this video we are taking a look at the TPS62840 ultra low power step down converter from Texas Instruments. It’s basically a buck converter with an input voltage of 1.8-6.5V, 750mA output current, with a quiescent current of just 60nA and active current of just 120nA. It also features very good efficiency at light loads of just 1uA it can offer 80 percent efficiency.
Other features include 16 selectable output voltages through an external resistor and a stop pin which when activated will completely stop any switching to eliminate any switching noise for a short moment, allowing you to take for example an ultra low noise measurement during that time. During that take power will be sourced from the output capacitors. So it looks like this is a pretty interesting dc-dc converter, with really nice features and it’s optimized for ultra low power devices.
In this video we’ll take a look at the CJ720 car relay gps tracker, I’ll show you how to setup the tracker and how to get position information. I will show you what kind of commands this tracker accepts and I will also do a teardown towards the end.
For information on how to setup your own GPS Tracking server, running on a raspberry pi, using open source software, checkout Voltlog #274.
Welcome to a new Voltlog, it’s product review time again, this time we’re taking a closer look at a 10 inch monitor with hdmi input. This is the box it comes in, the monitor has a resolution of 2560×1600, that’s about 2K resolution in the scheme of things, 300 pixels per inch density, 16:10 aspect ratio which I’m a fan of. My desktop monitor is also 16:10 and it works so much better for everyday activities but especially if you are doing any CAD design work. It’s an IPS panel so we should have good brightness, contrast and colors, it’s rated at 400 candela per sq meter. We also get built-in speakers and the HDMI supports video & audio so you should be able to get video and sound through the HDMI cable and that’s useful because we have built-in speakers on the monitor itself.
Welcome to a new Voltlog, today we’re going to take a closer look at an ultrasonic cleaner. This is the 1.3 litre, model number I believe is Y-009, the ultrasonic power is 60W while the heating power is rated for 100W. Usable area I’ve measured to be 125x115x40mm depth which is not a lot but I’ve thought about it and this is pretty much all I need. 99% of the PCBs I design fit within these dimensions so it’s not worth getting a bigger ultrasonic cleaner because it will take up more space and it will use up more cleaning liquid, it would be a waste of resources.
Welcome to a new Voltlog, here is my raspberry pi 4 which I got a few months ago when they released it and if you have one you might have noticed it gets quite hot especially when it has to do some processing. This newer processor, will get hot quick and the board alone cannot cope with all of this heat so what does it do? Well when the CPU temperature reaches 80 degrees Celsius it will start throttling down the CPU as a way of protecting itself from overheating and this will result in a loss of performance.
The Raspberry Pi 4 has a 1.5GHz quad-core 64-bit Arm Cortex-A72 CPU, that’s roughly three times the performance of the raspberry pi 3 cpu. That inevitably generates more heat. In the original plastic case just sitting idle, connected to a network, doing pretty much nothing, the raspberry pi4 when compared to a raspberry pi3 runs about 12 degrees hotter.
To be honest I didn’t think we were going to have services like these available so cheap so fast. I mean yes I know pcb prices have been so low in the past couple of years that it no longer makes sense to etch your own PCBs, unless you are in a big hurry. But having smt assembly service so cheap? Soon enough it would not make sense to hand assemble these boards because it would be equally cheap to have them assembled at JLCPCB
Inside the box of the BST-863 we have the station, a really nice and heavy stand for the tool piece, a total of 3 nozzles, a grounding strap and a power cord. The first thing I notice is the hose which pretty thick, certainly thicker than what I had on my old Gordak station but seems to be softer material. The way it’s designed with the tool standing vertically in the stand makes the air hose forms this loop which depending on your bench setup might or might not bother you but it’s something to consider. But I like the quality of the stand, it’s heavy and feels very sturdy, you get this accessory here which allows you to remove the nozzles while hot and the station has a sensor to detect when the handle is in the stand.
Adjustment of temperature and air level is made through this touch screen control. I’m a bit anti touch screen control on test gear so I would’ve preferred some switches on the front panel but don’t get me wrong, the touch screen works well on this unit, it has nice big touch keys and after setting up your presets you are likely not going to need to adjust the temperature you will just be using the presets like leaded, lead free and another one for heatshrink maybe.
Is this cheaper station a good alternative to the Quick 861DW? This video review should provide you with enough info to decide which one to buy.
Here are some high resolution images from the teardown:
Welcome to a new Voltlog, those who have been with me since the beginning of this channel, may know the first video I ever released, Voltlog #1 was a review of a switch mode bench power supply from Gopher Technology. It was the CPS-3205C and it was a great little unit, it has served me well over the years and I still have it.
At that time I complained about the fact that the unit has the output jacks on the back which is not really convenient for bench use. There were also other issues mentioned while measuring the performance of the power supply, I will link that video on screen if you want to watch it but the video, audio and editing quality are lower than what you’re seeing today.
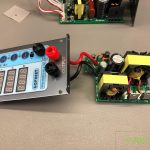
Gophert made some improvements to the original design and have now released a newer version of that power supply, it has a new model number it’s NPS-1601 but it’s the same range of 0-32V and 0-5A. There are other models with different ranges but this is what would correspond to the CPS3205 I reviewed years ago.
They have made a bunch of changes on the front panel, the most important one is they moved the output jacks to the front panel so now it’s easier to connect the output of this power supply but they are still not standard spacing so you can’t connect one of these adapters with banana jacks. They have also redesigned the front panel completely, they are still using 7 segment displays but now they also have a wattage display which can be switched on temporarily in place of the amps display, you press the watts button and it will show watts measurement for about 3 seconds before reverting to amps display.
The switch for A/V adjustment is now tactile instead of a sliding switch but the rest has stayed the same. I like this redesigned front panel I just wished they used a lighter color for the text, because for example there are some markings which are barely visible next to the LEDs.
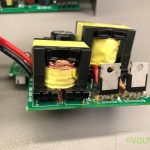
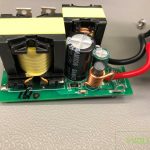
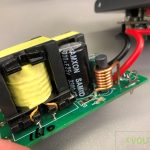
Here is a set of pictures I captured during the teardown:
Welcome to a new Voltlog, today it’s a multimeter review because we haven’t done one in a while and here I have the Smart Digital Multimeter which sounds like a generic name, no obvious branding on the box but granted it is featuring the multimeter on the box, it’s a color image which is not often seen on these cheap meters. On the back, the meter is shown in full black holster and we get a model number sticker, AN-V01 so this probably indicates the Aneng brand.
We’ve looked at Aneng multimeters in the past in Voltlog #114 and others and I’m gonna say this again, Aneng does not make multimeters, Aneng is just a company that rebrands existing multimeters made by other companies.
So this load is built with 3 active pcb’s as well as a fourth passive one as a front panel. They are joined with these brass standoffs and I think the standoffs act as circuit paths as well because I see no wires between the different levels. In order to get the alignment right during assembly the designer of these pcbs, made these corners rounded while these ones are diagonally cut and you can see these features along an entire side. This is a neat solution overall because it saves cost and as long as the screws are tight these should provide adequate connection.