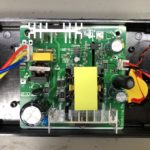
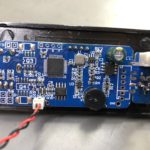
The only thing that seemed interesting when I first saw this was the price which was $0.90 delivered. I could not believe that you can get a wrist watch for 90 cents delivered from China and yet it’s true and there are still models that sell for under $1 dollar.
Author: voltlog
Voltlog #240 – ESP32 PIR Motion Sensor With Deep Sleep & MQTT
Welcome to a new Voltlog, in this video I’m gonna show you how I designed and built this board which functions as an esp32 based, battery powered PIR motion sensor. So I started by designing the circuit, I used some common building blocks, I added the ESP32 with it’s bypass caps, some test points and the programming circuit with auto-reset, I then added some connection points for the PIR sensor, an RGB LED because why not have a nice way to signal this is one of those very small digital RGB leds, it’s just 20x20mm, it’s connected to 3.3V even though it’s only rated for 5V so I’m hoping this is going to work even on 3.3, it’s also worth having a temperature/humidity sensor to also sense that in whichever room the node will be placed and finally the power supply circuit which is a simple low dropout regulator with an 18650 battery as the input.
I did not include a battery charger circuit on this module, because I wanted to keep things simple, I’ll have a battery socket so I can just remove the 18650 cell and charge it separately plus the whole circuit should run in sleep for extended periods of time giving me a long operating time so i wouldn’t have to charge the battery too often.
Once the schematic was finished I did the board layout in a hurry so it’s not exactly pretty or optimized
but I tried to move the esp32 antenna to the side, to place the PIR sensor in the top side as the module will probably sit vertically, I tried to place the temperature sensor in the bottom side to keep it away from any components that might get hot and also placed some isolation slots for the same reason.
You should check-out revB of this board, I made some improvements present in the video below.
Voltlog #239 – Upgrading The CR10 3D Printer With New Print Surface And Bed Insulation
Welcome to a new voltlog, it’s time for another upgrade on my Creality CR10 3D printer, and this time it’s about the print surface. By default this printer comes with a glass print surface which sits on top of the aluminium bed and that has worked fine for most prints and settings I’ve tried but occasionally I would get some adhesion problems and with glass you need to wait until the part has cooled down in order to remove it. Not such a big deal but there is this newer magnetic print surface, which has two parts, you get the bottom part with adhesive that you stick to the aluminium build plate of the printer and you get the top part which sticks magnetically to the other part.
This way, with the top surface I should get better adhesion and when the print is finished I can just remove the print surface from the printer to have it cool down faster or maybe for easier removal because I could just bend the surface to cause the part to unstick.
I’m also going to upgrade the bottom heater of the bed by installing one of these insulation sheets, this should help it reach working temperature faster and maybe it will use less power to keep it at working temperature.
Voltlog #238 – Finally Printing Shrink Tube Labels With A Brother Printer
As shown in the previous video I had to trick the printer to accept this type of cartridge by masking some of the micro switches it uses to detect the type of cartridge but that solved one problem and created another one. The text was now mirrored because that works out for regular label tape which gets printed on the inside of a transparent film. However for heatshrink where the label gets printed directly on the tube, it will end up reversed.
I’ve only tried one combination with the 3 micro-switches but some people suggested in the comments that I should try other switch combination and boy were they right because I did find another switch combination which causes the printer to accept the cartridge and mirror the text as well. So this is the right combination to use with my type of printer and this type of cartridge. The two bottom holes need to be opened, and only the single top hole needs to be covered. You can use a small piece of kapton tape like I did here.
Voltlog #237 – Can You Print Shrink Tube Labels With A Cheap Brother Printer?
Welcome to a new Voltlog, today we’ll have just a short video talking about label printers, I’m gonna show you this heat shrink type of label that you can get and it’s pretty useful to label wiring and how the manufacturers of these prevent you from using certain types of label cassettes in lower end printers.
In my case I am using a Brother PT-H107, this is a bottom of the range label printer, it was practically the cheapest I could find around here.
Voltlog #236 – InTheMail
Welcome to a new InTheMail, the series that will touch both your passion for electronics and your bank account at the same time.
Voltlog #235 – I Made A PCB Business Card
Welcome to a new Voltlog, today we’re going to be talking about the possibility of designing a pcb business card. So if you’re an electronics engineer who offers consulting services or even just an enthusiast and you would like to create a nice original and suggestive business card, stick around.
The idea of making a pcb business card is not new and there are many previous examples of pcb business cards, some people build them passive, others like to integrate a small battery some LEDs, maybe a microcontroller with NFC or a USB interface and generate some interaction with the user.
Maybe 7-8 years ago I first wanted to try this idea but back then, it was quite expensive to get PCBs professionally manufactured in China, first they were charging a setup fee which was usually $150 and then you would have the cost of the PCB which for 10 pcs 10 by 10cm was usually about 2-3$ per piece and then you would have the shipping cost which starting from something like $50 for the first kg via DHL. And all of this was for the standard 1.6mm FR4 with green solder mask and tin finish. If you wanted matte black soldermask and gold finish, there was an additional cost.
Voltlog #234 – The Problems I Found With The KSGER T12 Soldering Station
In a previous Voltlog I reviewed this KSGER T12 soldering station, it was the first station I got my hands on from this manufacturer, it’s version 2.1S and I was pleasantly surprised by the features it has. If you haven’t seen that video I will link it on screen right now. Since then I’ve been using it as my main soldering station and I’ve been pretty happy with how it works but some of my viewers who have been using these for longer have pointed out a few things I missed in the video so this will be a quick update video to show the things I’ve missed previously.
Voltlog #233 – InTheMail
Welcome to a new InTheMail, the series that will touch both your passion for electronics and your bank account at the same time. We’re gonna start with this double insulated silicone wire. I’m not even sure if it’s the right name to use but both the outer black insulation and the inner insulation are silicone they can take the soldering iron at 300 degrees Celsius without any issues, no melting. The one I got is 26AWG and it has 7 strands inside each wire. It seems to be tin plated copper because I did the flame test and the individual wires just glowed red. I also measured the resistance and it is 0.132 ohm/meter. I would recommend getting the 24AWG for a bit more strands inside each wire.
Voltlog #232 – My New Prefered T12 Soldering Station KSGER V2.1S
Out of the three T12 stations that I have, this is now my favorite and will be the one I use daily. I’m not sure if the performance is higher or similar to the other I have, I’ll probably do a separate video to compare them but it’s just the user interface, the menu options, the nice handle that make me wanna use this instead of the others. Yes it has a few disadvantages regarding this handle, it does get warm and it doesn’t really fit that well with a regular stand but I can go past those disadvantages for how nice this station is. If you’re looking for a T12 station this is definitely the one to get.
I also did a second video where I showed the problems I found with this soldering station and if they can be fixed by the user or not.


