ScopeShunt Visualising The Current Waveform With Your Oscilloscope | Voltlog #310

We usually use an oscilloscope for visualizing a voltage over time but sometimes it’s also useful to visualize the current waveform over time. The right way to do it is to get a current probe which can sense the current and convert that to a voltage that the oscilloscope can display however such devices are pretty expensive, they can be around $1000 even for an entry level one like the Rigol RP1001C which is only rated up to 300KHz bandwidth.

But we can improvise something for a much lower cost and it should allow us to visualize the current waveform on the oscilloscope. You’ve probably seen me use a shunt resistor when testing power supply to take a look at the current waveform. Because as you know passing a current through a resistor will generate a voltage drop.

That voltage drop is directly proportional with the passing current and with a round value resistor we can have an easy to use transformation ratio between voltage and current. All we have to do is o introduce this resistor inline between our power supply and the device under test

For example if I have a 1ohm resistor, we have a 1:1 ration, for each mA passed through that resistor we will have  1mV of voltage drop that our oscilloscope can display. Such a circuit will of course have it’s limitations, for example it won’t work very well when testing low voltage low power devices because our resistor will introduce a burden voltage, which will drop our supply voltage to the device under test. This is also not an isolated measurement so it might not be safe when connected with higher voltage circuits.

But there are still a lot of scenarios where you could use this successfully on the electronics workbench so it might be worth building something like this. I want to make this nicer by building it inside an enclosure with the required bnc connector for connecting to the oscilloscope and 4mm banana plugs for passing the current through. I picked this small aluminium enclosure which would be enough to house the resistor, actually the resistors, because there are several advantages to using multiple resistors in parallel.

Alternative to this simple shunt resistor measuring method include the Joulescope which is a fully featured dc energy measurement test instrument with incredibly wide dynamic range that allows you to capture the smallest currents next to a jump to a higher current. I reviewed the Joulescope in Voltlog #211.
InTheMail (Survival Gear) | Voltlog #309

Welcome to a new InTheMail, my usual introductory line would say this is the series that will touch both your passion for electronics and your bank account at the same time but in this episode it’s not about electronics, it’s mostly some outdoor / camping / surviving gear that I got for my adventures and I think some of you may find this interesting, especially as our social behavior is changing now and during this summer we might spend more time in the nature.

I’m gonna start with this paracord rope, it’s 4mm wide, 30 meters long or 100ft with 7 inner strands. It’s rated for 550 pounds or 250Kg minimum breaking strength so this would work for anything when you go outdoors, tying stuff around your camp, tying stuff for transport, but obviously not recommended for anything where your life might depend on it. I try to keep this stuff in my backpack whenever I go camping because it’s pretty light and compact and you never know when you need to improvise and tie something down. The particular seller where I got this offers it in 250 different colors and styles so there is plenty to choose from.

Dual Gear Extruder Grinding Itself Problem | Voltlog #308

Welcome to another video about my 3d printing adventures, as you may have seen in a previous mailbag I got myself one of these dual gear extruders to upgrade the standard one that my CR10 came with. The original plastic extruder was working fine initially, but as time passed, the wear increased and it started slipping, the spring was not providing enough tension anymore so it was time for an upgrade.

The dual gear extruder was the obvious choice because it’s affordable and it’s dual gear system should ensure better grip on the filament. I’m not 100% sure but I believe the original design was done by Bondtech and I most certainly got a cheap clone of that from aliexpress. You would think that for such a simple mechanical device it shouldn’t matter if it’s a clone or not but as we’ll see in a moment it does matter as subtle changes can make it better or worse.

I installed my new dual gear extruder, I didn’t make any video about it, didn’t think it was interesting enough and I needed to install it without further delay because I was doing this while I was printing face shields and I needed to have the printer up and running ASAP. It was working great, I printed a bunch of face shields, it had a good grip on the filament but a few days later I accidentally noticed there is a bunch of residue gathered up on the mechanism.

8W Rechargeable e-Cig Soldering Iron Review & Teardown | Voltlog #307

These days there is a wide choice of portable soldering iron and I think very few people still consider gas powered soldering irons who were quite popular 10-15 years ago because of their portability. 

Now you can get USB powered soldering irons like this one for about $6, it’s rated for 8W, takes a 5V USB input and you can plug this into any power bank and fix a solder joint remotely. I’ve used this a couple of times while doing some electrical work on a car and it was very convenient.

You can also get more powerful, more polished soldering iron like the TS100 which normally takes a DC input from a laptop power brick in the 20V range but since USB Type-C with Power Delivery is a popular thing these days, you can also power it from a power bank capable of at least 12V. But this will be in the $50-60 range and you need to purchase a special power delivery trigger cable separately.

However today’s video is not about these two options, I’m gonna show you something that fits in between these two. It’s delivered rather impressively in a cheap plastic bag but let’s see what we get in here. Looks like they included a small amount of solder wire, that’s nice, every soldering iron should come with a small amount of solder. We get one of these small foldable sheet stands so you won’t burn something when setting the iron on a surface. This looks like our soldering iron tip and inside here we must have the soldering iron body itself and a charging cable

Wiistar 1080p 60fps HDMI USB Capture Card Review & Teardown | Voltlog #306

Ever since I got the new microscope and HDMI camera setup I was thinking of ways to capture video on my computer from the microscope camera. This particular camera is the Hayear 34MP model which I reviewed in Voltlog #292, it outputs 1080P at 60fps over HDMI and it does have on-board micro-sd card recording, so I could record images or videos to an sd-card but if you want to live-stream the camera feed, a capture card is needed on your computer. There are countless options in terms of capture cards but as usual I tried to find the cheapest solution that does the job well enough.

This particular unit came up in my searches, it’s relatively inexpensive when compared to other options that advertise similar specs 1080p at 60fps, it has two hdmi ports, one is an input for capture the other one should be a pass-through so you can connect a monitor at the same time of capturing video but we’ll see if that function works as advertised in a few minutes.

We have a USB Type-C connector for the computer side and an audio output 3.5mm jack. It is mentioned in the product page that it’s supposed to have a delay between audio and video so I’m guessing it’s related to this audio output port. The enclosure is aluminium which should help with heat dissipation and this particular unit is branded Wiistar but I believe you will find this under other names as well. Inside the box you get a USB A to Type-C cable about 1m long, a small usb A to type C adapter, a disk and a user manual.

Reverse Engineering Gopher NPS-1601 Front Panel Circuit | Voltlog #305

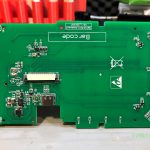
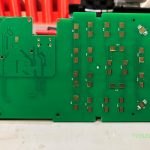
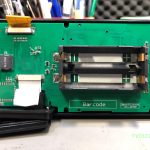
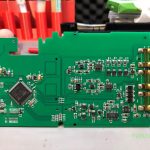
In this video I’m gonna show you how I reverse engineered the front panel of the Gopher NPS1601. First I’ll show the method I used for reverse engineering and then I’ll show the results I got This is in my opinion the best power supply you can get in the $50 range and if you would like to know more about this, I did a review in Voltlog #255.

Why did I decide to reverse engineer the front panel of this power supply you might ask? Well it was a topic I had on my todo list ever since I got this unit because I feel like the user interface on this is not as nice as it could be if it had a color TFT display to show more info than what you get on those small 7 segment displays. And I’m not just talking about improving visibility cause you could do that just by using brighter 7-segment displays, I’m talking about showing more data like: calculated wattage or capacity, showing set current and voltage at the same time with actual current and voltage you know the kind of info you get on the more expensive Riden power supply but hopefully in a better color scheme.

InTheMail | Voltlog #304

Welcome to a new InTheMail, the series that will touch both your passion for electronics and your bank account at the same time. We have a selection of different items in this mailbag video and before we get started I would like to mention that during the past 3-4 weeks packages have almost stopped arriving here in Romania. I’ve been getting maybe 1 or 2 delivered per week. Even packages from Germany have been sitting for weeks before moving between warehouses so I was wondering how things are going where you guys are living? Let me know in the comments below. Hopefully things will get better as many countries are trying to restart the economy in May.

The first item is one you’ve seen before on this channel, it’s a 7 inch magic arm clone from China. The original magic arm from manfrotto is about 100 EUR and there is no doubts it’s better built, but I need a few of these to hold various stuff around the workbench, LED lights, to hold the phone in front of various instrument panels and it would add up quickly if I were to get the original.

These replicas from China are good enough for what I’m doing, they’re inexpensive and if you are curious how these work, Bigclive did a video recently, he showed how one of these works inside so check out his video if you are curious about that. The nice thing is that you have a single knob that you need to turn to lock or release the whole system and you can find these in a variety of sizes.

Hantek TO11 1832C LCR Meter Review & Teardown | Voltlog #303

I never really had any professional LCR meter in my lab so far, I’ve only done measurements using this transistor tester which also features a rudimentary LCR function but that’s about to change because today we’ll be taking a close look at the Hantek TO11 handheld LCR meter.

There are two models for this LCR meter TO11 and TO22 and as far as I can tell the only advantages the more expensive TO22 model has are the extended test frequency range up to 100KHz and a second option for test voltage at 0.3V.

Next let’s mention the naming confusion, there is something going on with the naming of this instrument and I can’t quite figure it out. On hantek’s website you can find this LCR meter listed as model number 1832C and 1833C while I suspect all newer units are marked TO11 and TO22 respectively. I’ve emailed Hantek and asked them to clarify this and confirm whether or not there are any differences and why the two names and they replied saying the two are basically the same, the TO11 being an ODM version.

Here are some images captured during the teardown, click on the thumbnails to get a high resolution image of the LCR Meter internal PCBs.

Kunkin KP184 Electronic Load Issues Fixed | Voltlog #302

In this video I’m going to address the issues I found with the Kunkin KP184 electronic load during the review and teardown of the unit but also some issues people mentioned in the comments. There are 7 things I would like to address in total:

  1. Binding post internal diameter issue.
  2. Grounding issue with blue metal enclosure.
  3. Bad solder joints on thick wires coming to mainboard.
  4. IRFP250M mosfet safe operating area, fake or genuine?
  5. Supposed bug in tripping over-power protection.
  6. Supposed noise in constant current mode loop.
  7. Calibration procedure.

Nothing changes in terms of this being the best electronic load you can buy in this price range, II like it and I highly recommend it if you need to test power supplies or batteries, I think you will be pleased with this unit. If you would like to see the review or the teardown video I will link those on screen right now so you just have to click somewhere in this area. As always thank you for watching and don’t forget you can support this channel on Patreon.


InTheMail | Voltlog #301

Welcome to a new InTheMail, the series that will touch both your passion for electronics and your bank account at the same time. Today’s video will be an automotive special, meaning, the items shown today are most likely intended to be used for your car. I ordered a bunch of this stuff and I thought it would be nice if I kept it all together into one video.

So let’s start with this reversing camera kit, inside we have the camera module and some long wires so you can run them up to your display or head unit. I went for this 45 degree style of camera and with white enclosure because I plan to install this on my wife’s car which is painted white and I figured going for this style of enclosure and mounting would integrate it better with the paint of the car and it would be less obvious, like you would barely notice there is something changed in the back of the car.

But this does come with some limitations, you would have to install this on a flat, horizontal surface, parallel to the road, because the camera is angled for that mounting position and you will likely end up seeing too much of the road or too much of the sky if you install it otherwise. In terms of image sensor, when you order one of these, if you go for the cheapest you will get a crappy sensor with poor low light capability so I spent a little extra and picked a SONY CCD.